One skein projects and misjudgments

I have this chronic problem where I see a skein of yarn I like, and I buy it. But I just buy one. And then I’m stuck wondering what the heck to do with it. I live in the snowy north, so winter gear is always a good option, but I’ve drastically misjudged how far my yarn would go on my last two projects.

For the first one, I had leftover yarn from this giant stripey cowl I made for my old neighbor.

IMG_0018

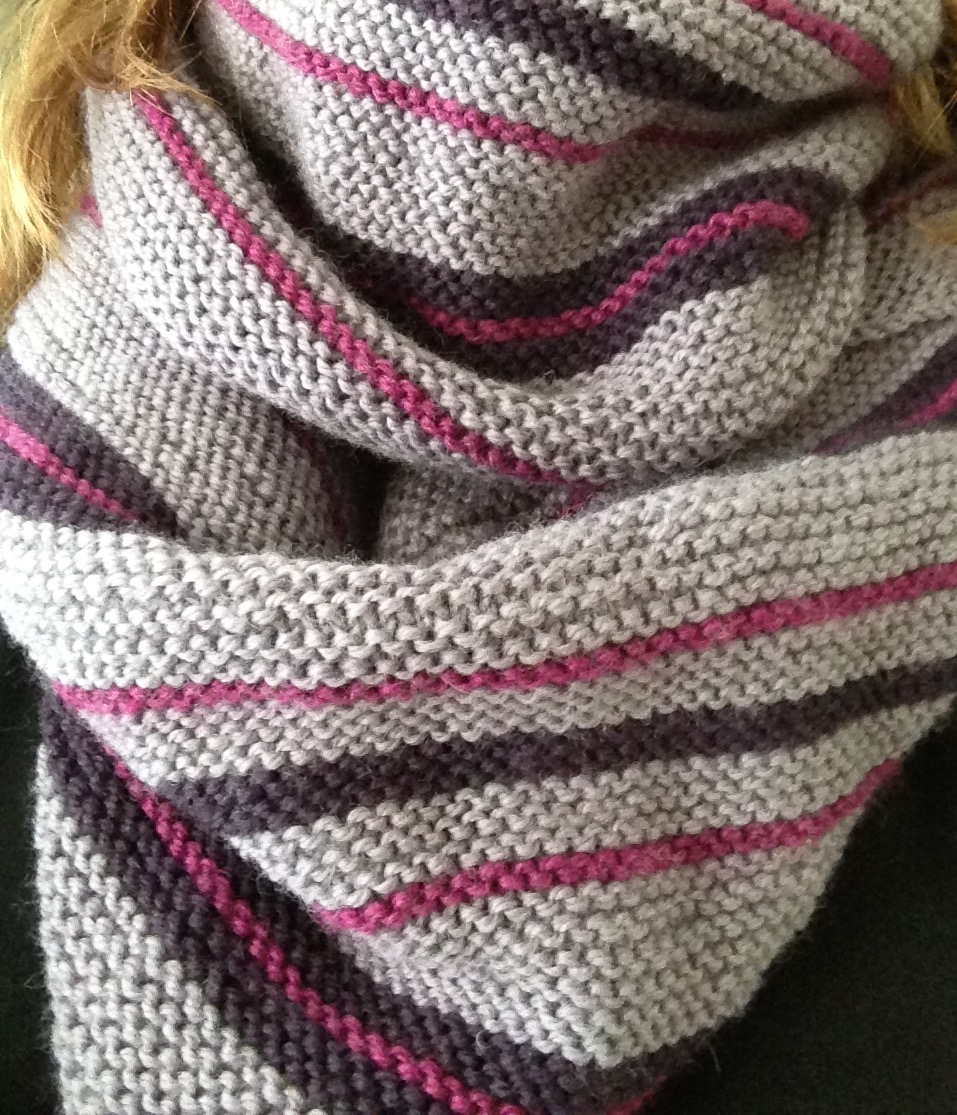
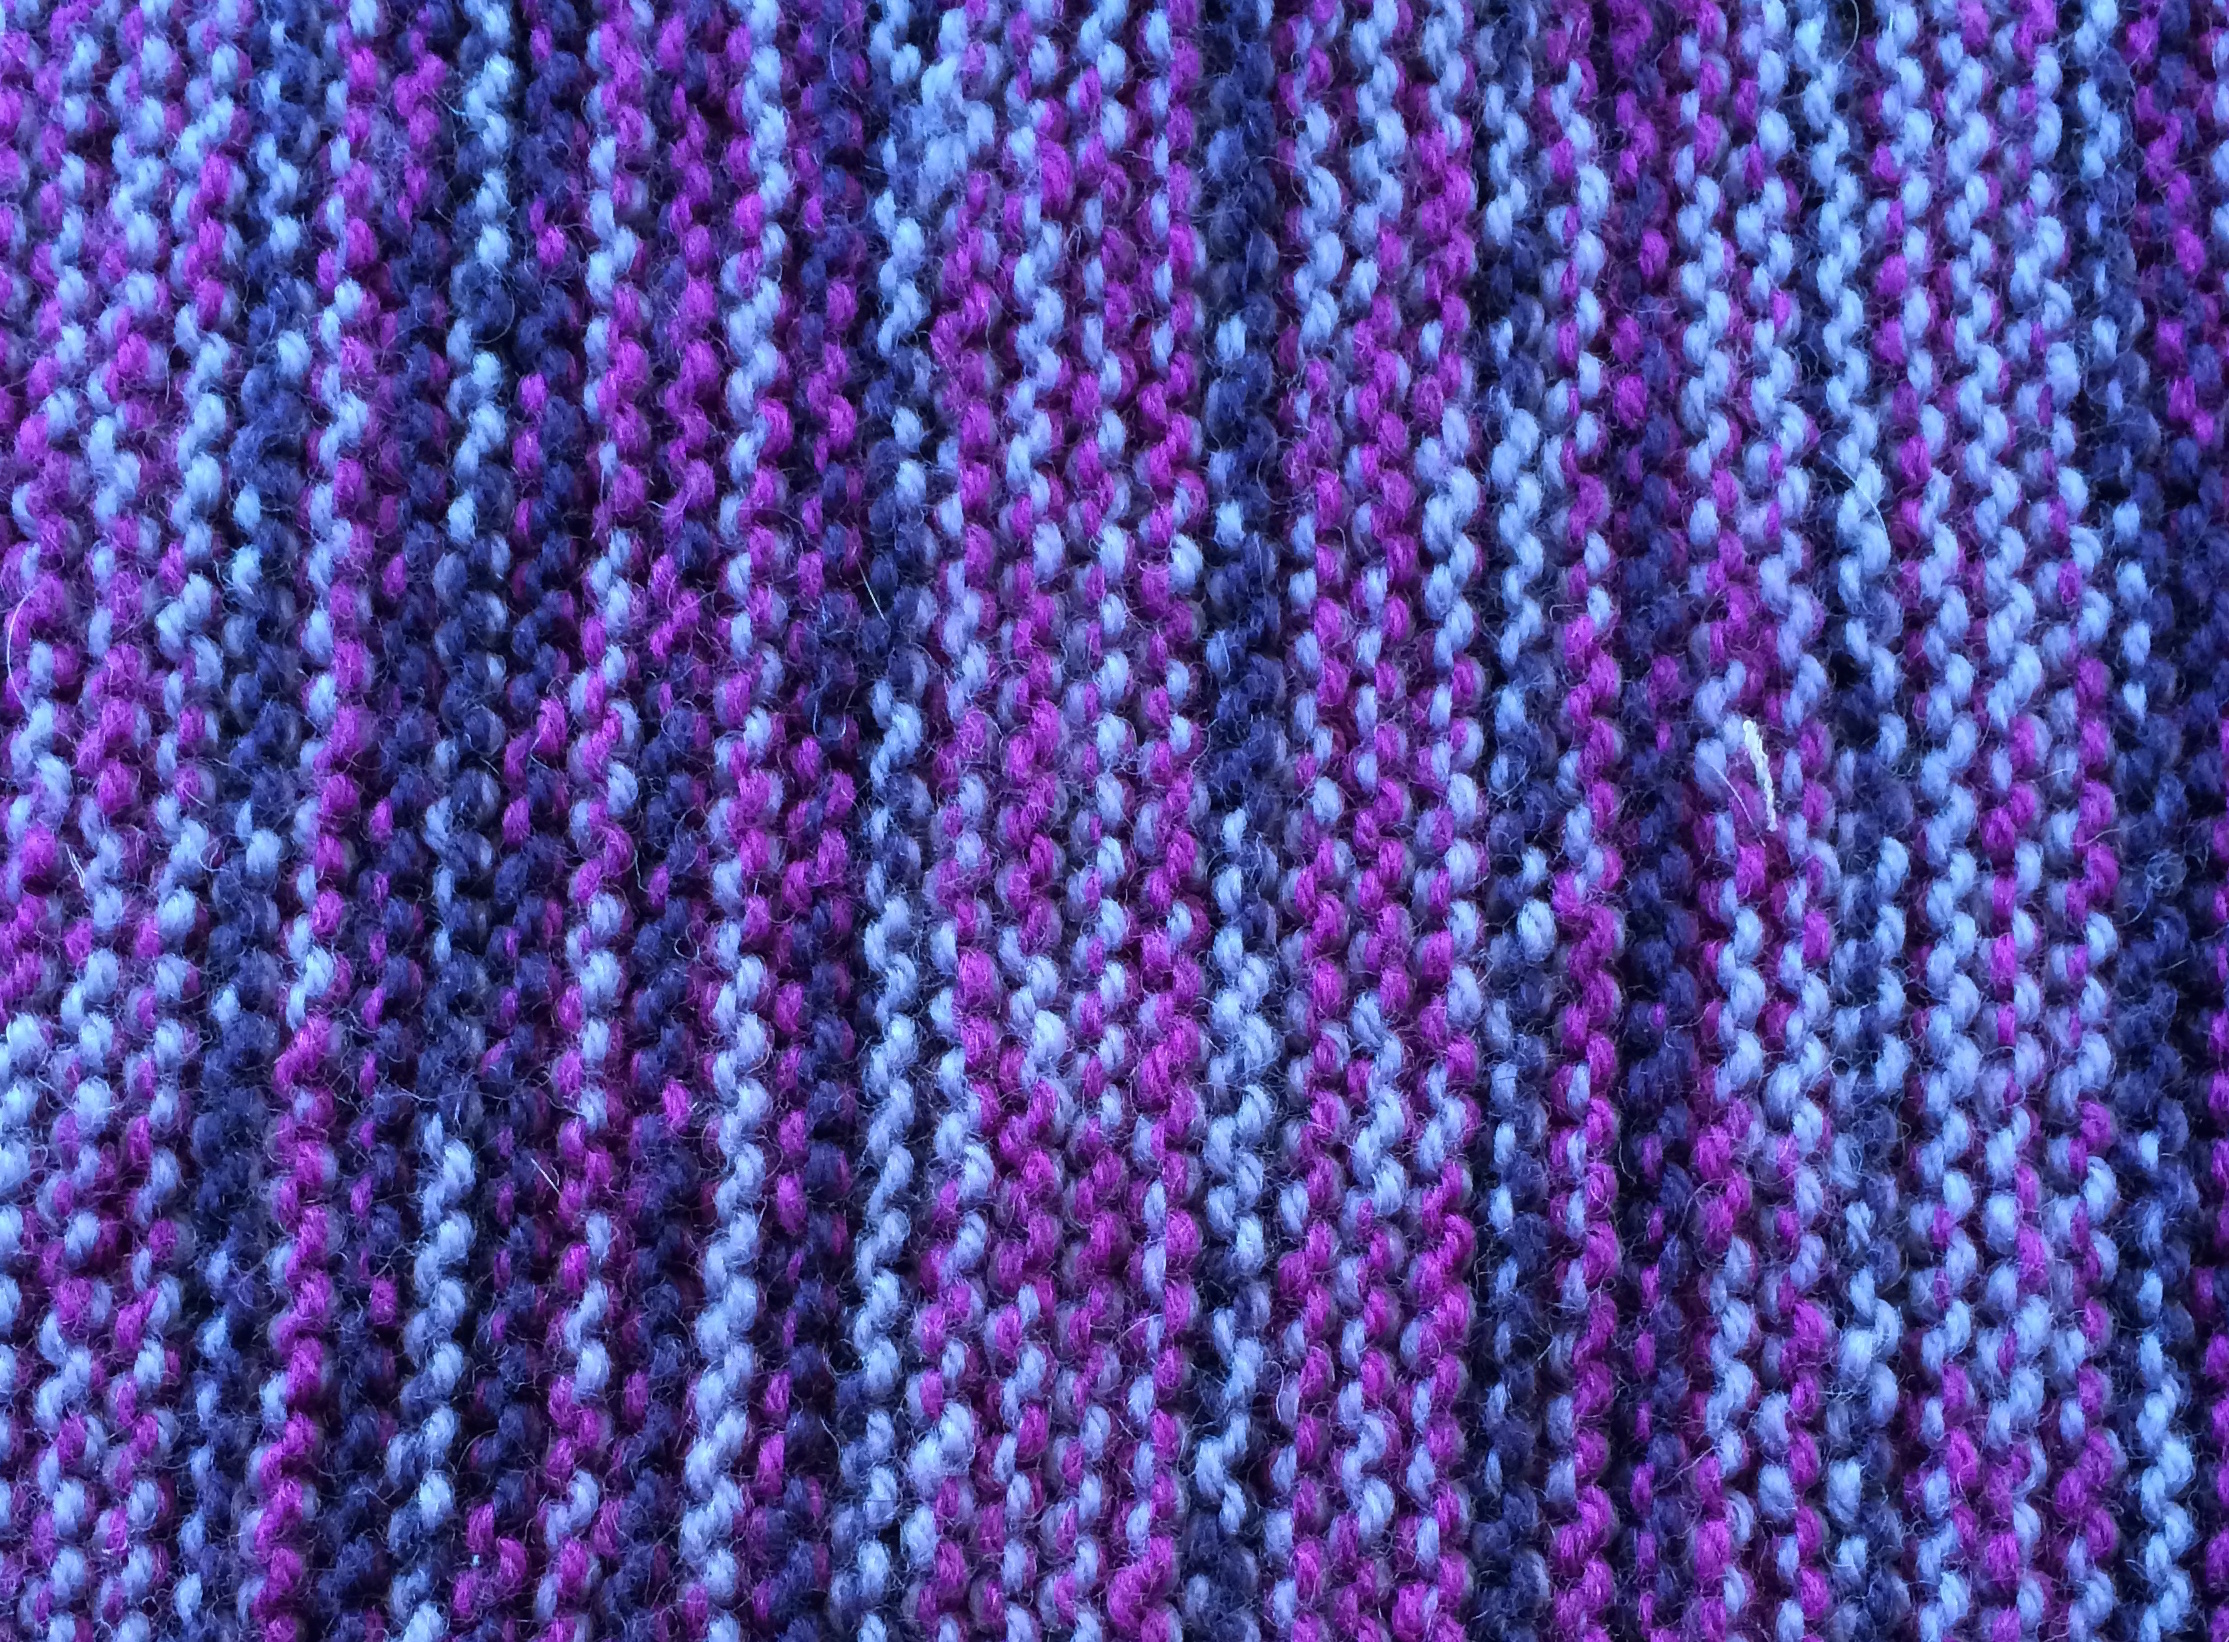
I loved the cosiness of the stockinette stitch for that piece, and set out to make an even thicker scarf from the leftovers (I had about a skein and a half of the lavender, and half a skein each plum and eggplant). I knit the entire piece with two strands together, randomly switching between which two colors were together every few rows. With the thickness of two strands, plus the naturally cushy nature of stockinette, I wound up with a fantastically thick, warm scarf. (Not sure what’s up with the colors in the next two photos — in real life the photo above is the closest to reality.)

flat scarf

Except I ran out of yarn and it was way, way too short. I’d done very steeply angled ends, so I turned it into a small, sturdy cowl with an “intentional” diagonal seam as a feature.

purple cozy cowl

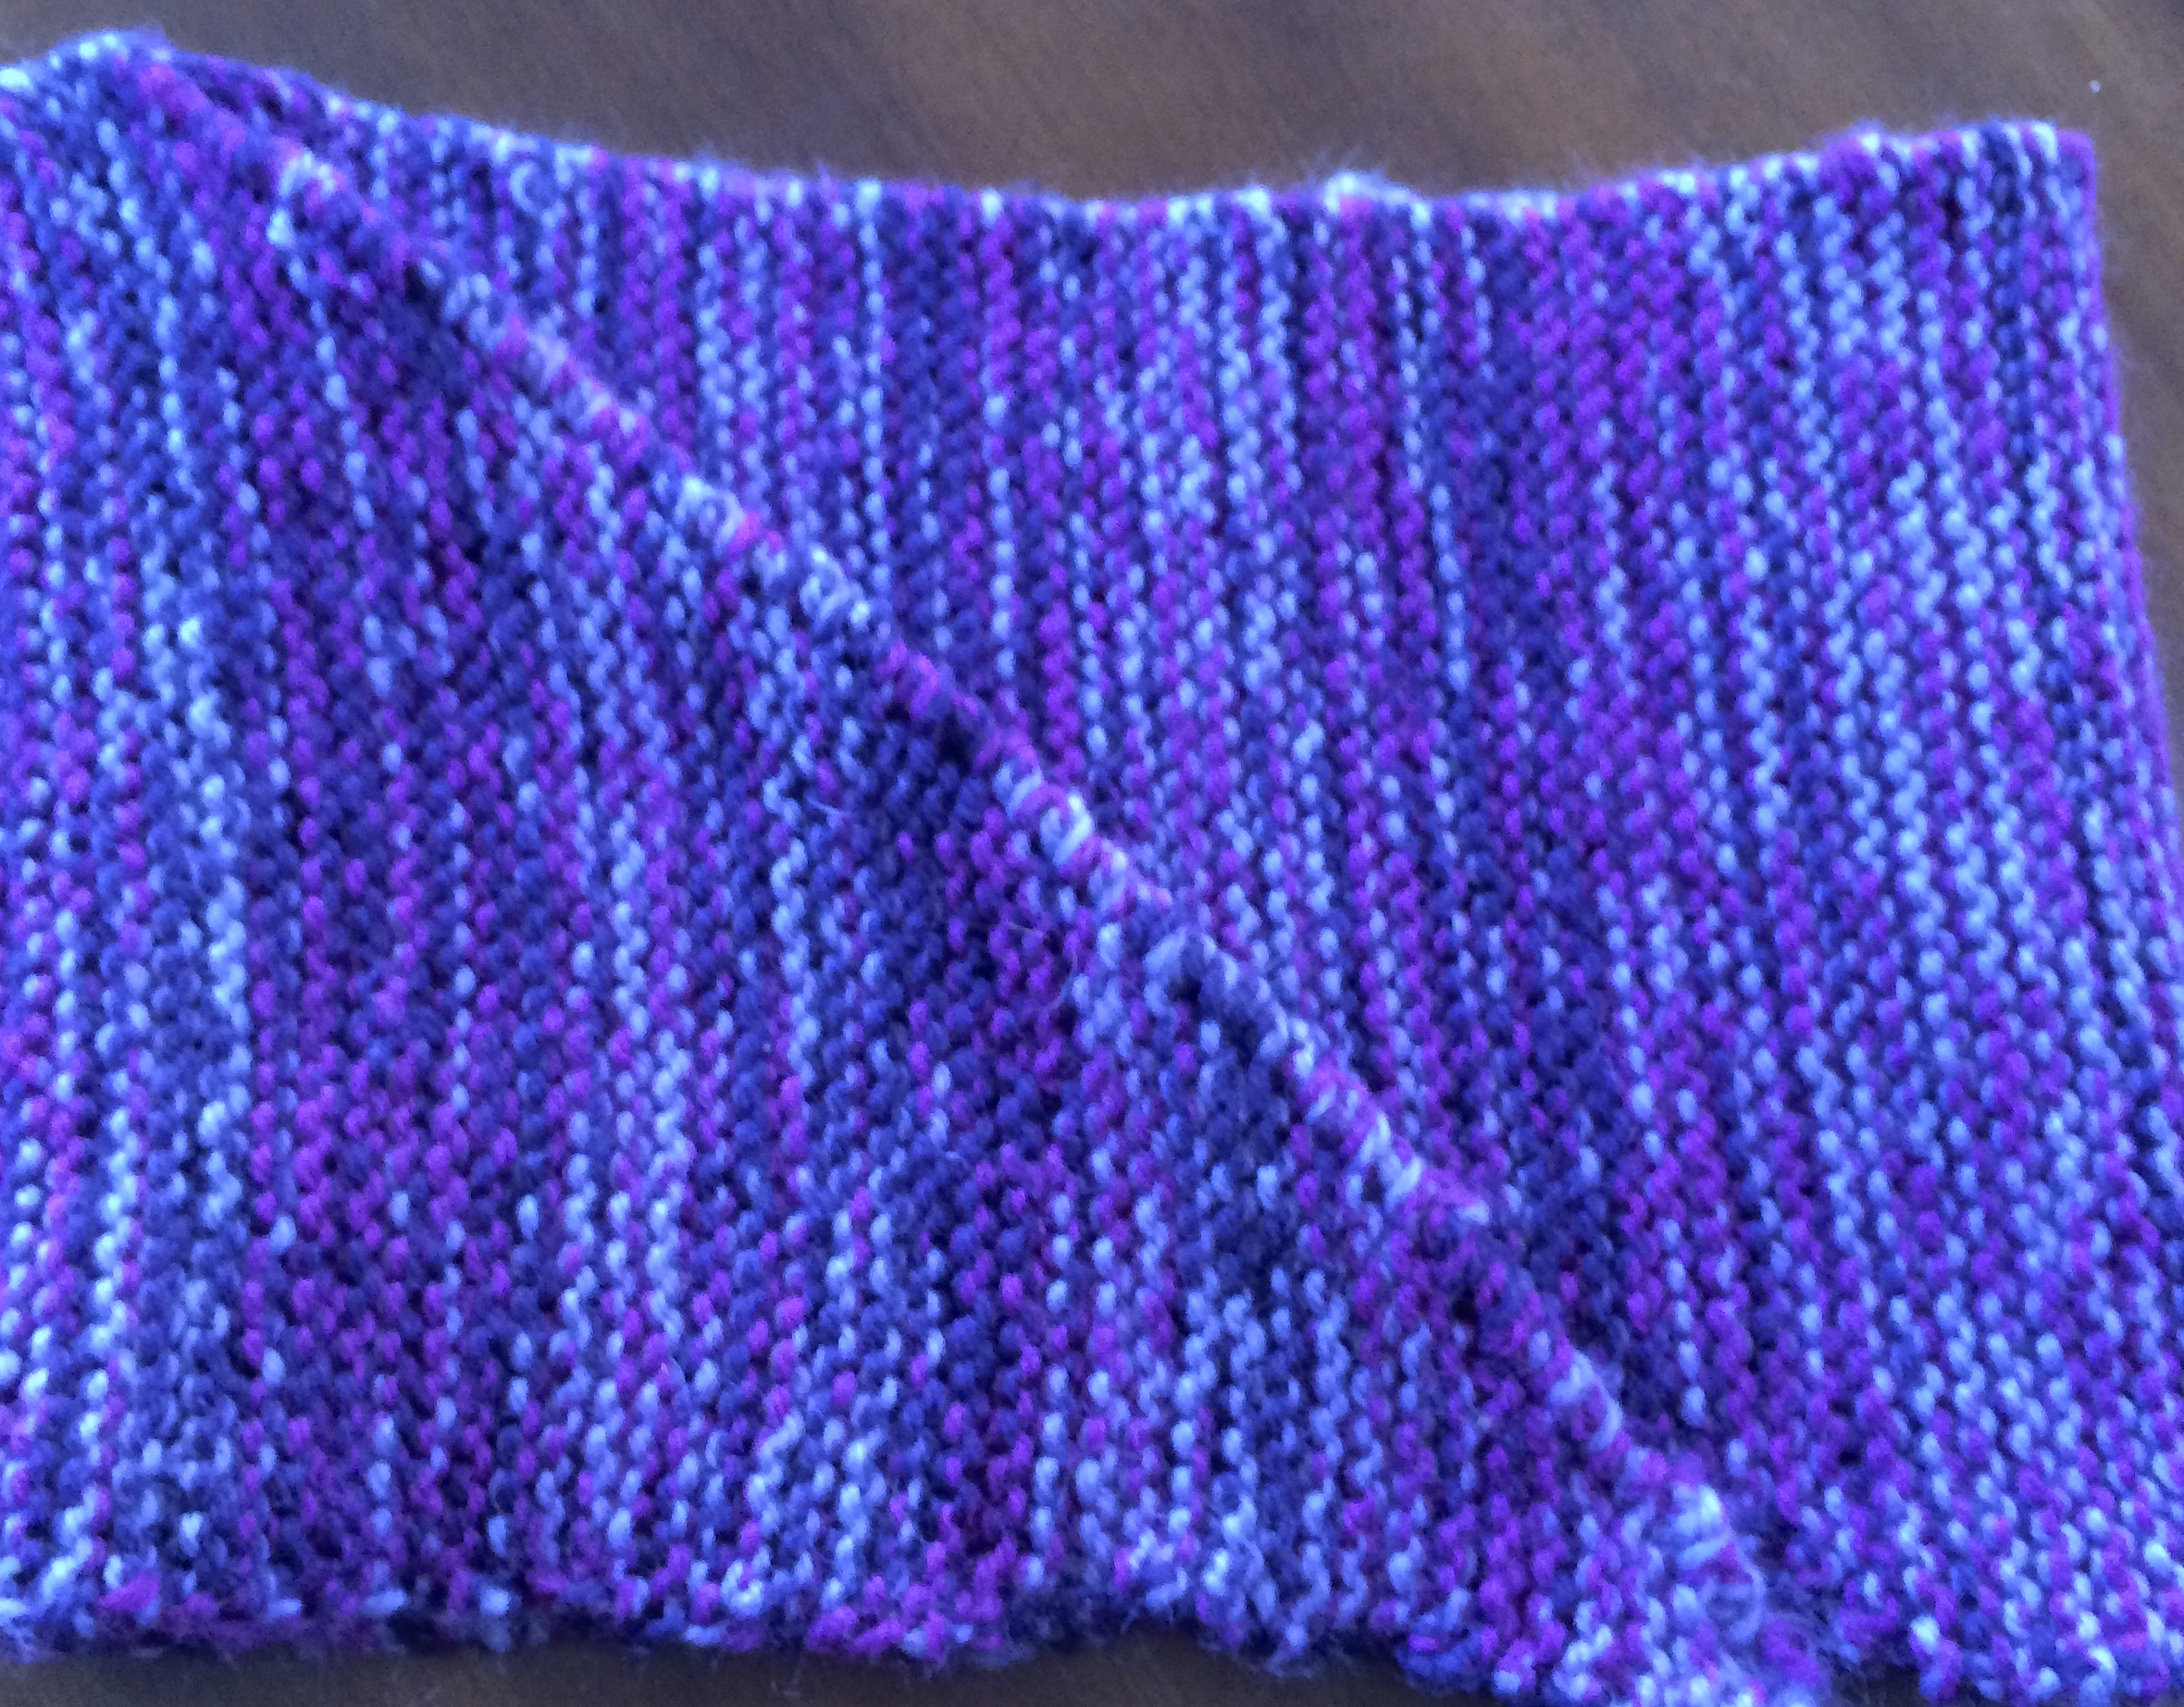
Not quite what I had initially envisioned, but it’s cute sticking up from a coat, and it’s definitely warm!

With my current project, I started with small skein of jeweled tone fingerling weight boucle yarn that I bought at a show years and years ago. It was really difficult to knit as a single strand, as the yarn would catch on itself, so I combined it with a second yarn in a neutral color.

wavy scarf

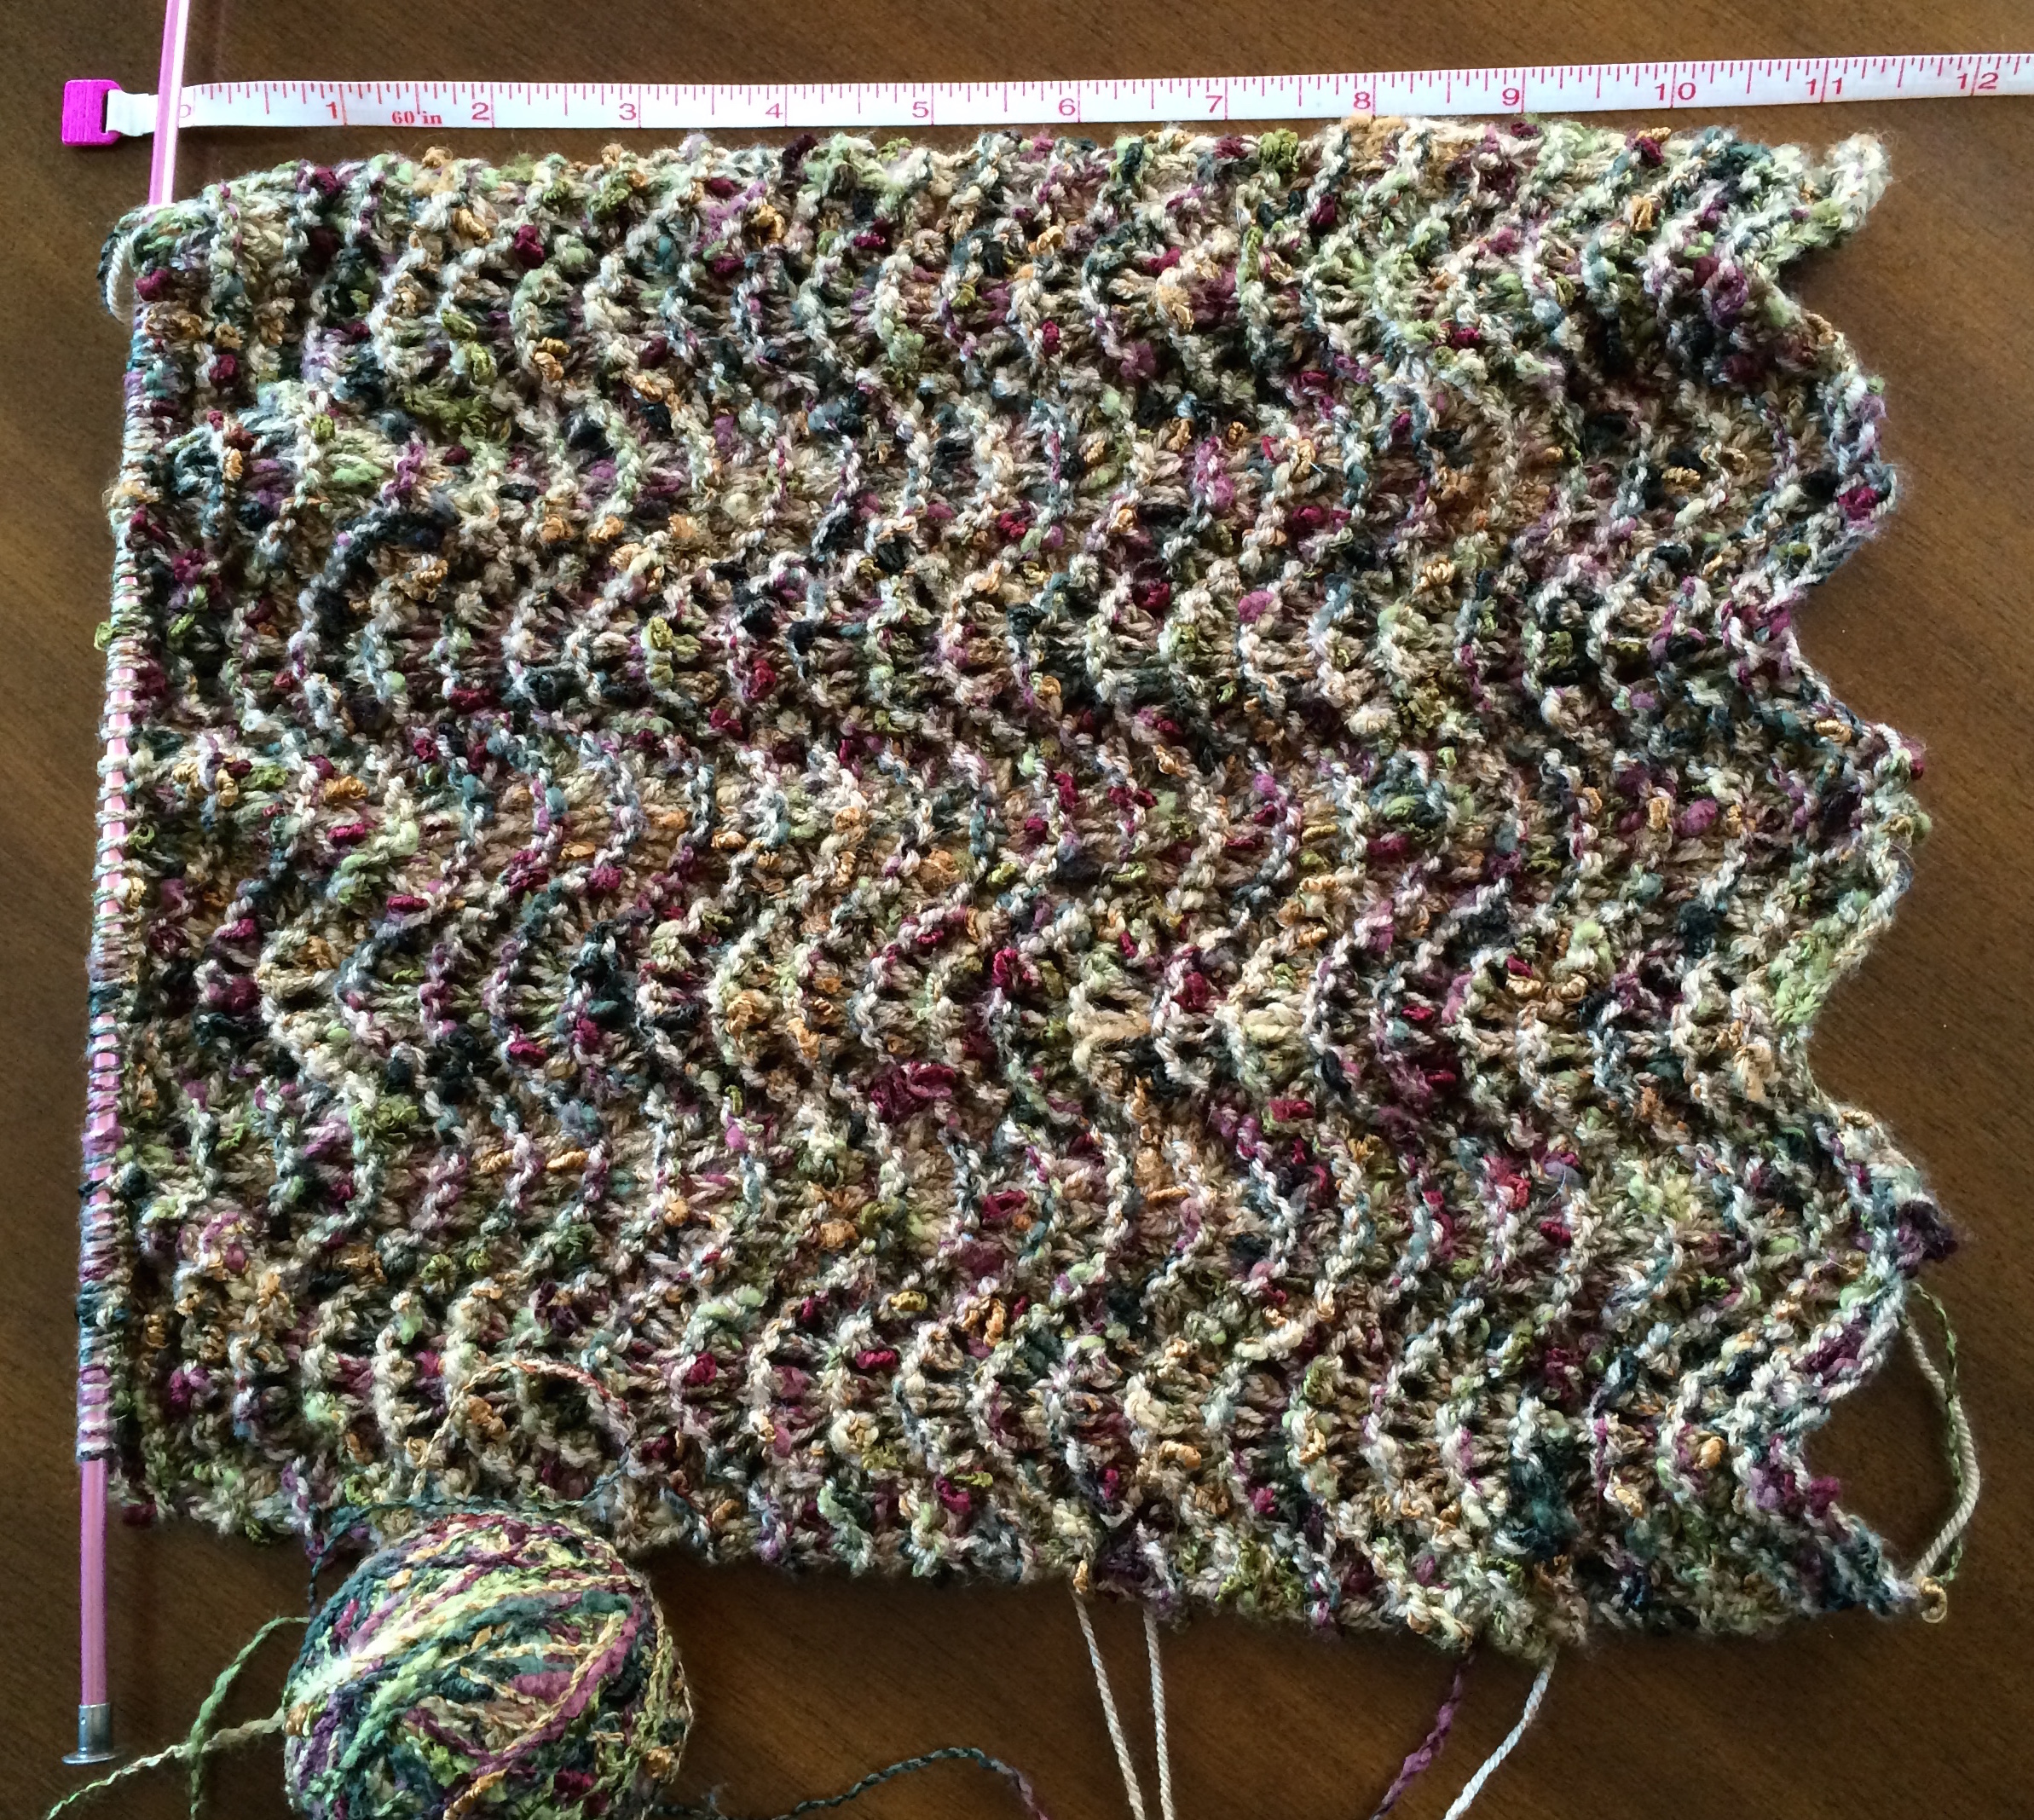
I love the combination, love the wavy pattern, but I’m more than half way through the skein and I’m not going to have the length to do a scarf. So I’m going to have to do is rip it all out (sad!) and either knit again with one less repeat across the pattern, or switch it up and knit in the round, making a cowl with the wavy running horizontally. I’m leaning toward the latter, since it seems a safer way to ensure I get the maximum size. I just need to figure out how the pattern would work in the round.

If you’re a knitter, how do you estimate what you can do with a skein? I have a large skein of a glorious green yarn that I’m scared to start with because I just don’t know how far it will stretch. (I know I could look for a one-skein pattern, but I haven’t found one I like yet!)

Getting back to jewelry

Its been a long time since I posted about jewelry making. It’s not that I haven’t been making anything…I haven’t done much this year, but I’ve done a few things, and a lot of thinking.

Over the next few months, I want to take some time to talk about jewelry design. We’ll do some how-to and tips and general knowledge sharing too, but I think one thing that a lot of jewelry makers struggle with is transitioning from learning how to make jewelry to how to design jewelry.

Frankly, a lot of brilliant jewelry designs are based on serendipity—a designer just playing around with combinations and stitches arrangements until everything falls into place. And I think that a lot of jewelry makers, especially when they are first getting started, are so proud of finishing something that was their own idea that they stop there and don’t think about what next steps could be. That was one part of working for a jewelry making magazine that I really liked: We were always tasked with finding the best way to do something or explain it. The first try is rarely right, but once you know the principles and basics those pieces click into place much more quickly.

Quick painterly art from photos

This time change has really thrown me out of sorts. It’s never happened before but I am SO TIRED this week. You’d never guess that I just came back from a refreshing vacation.

The beautiful beach at Luquillo

The beautiful beach at Luquillo

But I do have a very quick update for you, because I found a fun new app that is letting me turn my somewhat mediocre vacation pics into pretty little watercolor prints! It’s called Waterlogue and it’s very fun.

I have no connection with Waterlogue at all — they don’t know I exist. But they helped me find a cute way to do something fun with two of my Paris photos that I’m really excited about, so I wanted to share.

beachwatermark

The app works a lot like Instagram — you can select photos from your existing files in addition to taking new ones. And you have a couple different painterly effects you can apply. One thing I really like is that you can save the pictures without sharing — sometimes I want to add an Instagram filter to a pic without actually sending it out into the world, and I haven’t found a way to do that yet. With Waterlogue, you can! And you can save your pictures to various sizes/image qualities, which is useful if you actually want to print them.

I have two photos that I took in Paris of storefronts, and I was really hoping they would be high enough quality to print, frame and hang. While the photos are nice and sharp they either felt a little emotionally flat or had some details that distracted from the overall feeling. Changing them to “watercolors” really helped.

Here’s the first one, a charming little cheese shop around the corner from my hotel.

DSC00425

It’s okay. Not a great photo — just a snapshot of a storefront. But in watercolor:

watermarkedFromagerie

The colors pop. Different lines have a little more weight, which I think might improve the composition a little. There’s just a little more romance.

Here’s another one, the flower shop across the street:

DSC00424

Again, it’s okay. It doesn’t really capture how charming the shop was in person. But after a little alteration:

floralieswatermarked

A little more charm!

I had a lot of fun playing around with vacation photos in this app, and I was excited that it helped transform a few shots that I felt didn’t capture the feeling of the scene into something that was much closer. Something I’d actually consider throwing in a frame and putting up on the wall. (And if you’ve been reading, you know how picky I am about what goes on the wall!)

Thanks and Cards

Oh, hi. Still there? Sorry…

Turns out planning a wedding is complicated stuff, along with wrapping up the school year and spending a week in Guatemala. Oh, and my birthday was in there too.

I thought it would be tough to top last year’s Forced-Gifting Party, but this year was pretty awesome too.

DR Birthday Art

…even if all I have to show for it is a rock.

It’s a lava rock, and I got it from the volcano I climbed on my birthday (I know, right?). We climbed Volcan Pacaya in Guatemala and then we roasted marshmallows* in the hot spots and our group sang me Happy Birthday and gave me M & Ms and then we went back to town. Where we wandered around and saw an amazing convent and then went to dinner at a fancy hotel where a mariachi band sang to me too. And then I got a cupcake. Oh yeah, and I should clearly start a travel blog, right? (Maybe not so much).

Back to the point.

My birthday was Saturday and now I need to send some Thank You cards!

Thank You blue flower

So I whipped these up super fast–Just some colored paper, a single pack of embellishments and colored pens.

Thank You pink flower

I used the same basic idea on all of them, with a strip of paper going all the way across and then a little notched pennant, offset (or not) and layered (or not) with an embellishment anchoring it. Quick, easy and cute.

Thank You Green Flower

Do you make your own cards? What’s your favorite one?

*Technically we…warmed them? They got puffy but they didn’t change colors. And marshmallows in Guatemala are oddly technicolor, so that was strange too. But still mostly delicious.

Pinterest Challenge: Herringbone Art

banner

It’s Pinterest Challenge time*! This great opportunity to stop pinning and start doing is hosted by Sherry and Katie and is always a ton of fun.

Apparently DIY art is my favorite thing, and I needed something big to fill the wall in my dining room…here’s what I came up with:

DR Birthday Art

There’s a very popular pin of a painting all over Pinterest….I thought it was ok, but the colors aren’t really my first choice. Herringbone Art

The first DIY spin on this I saw  was Amanda’s using art by her kids:

I just had to do one of my own. I’ve been looking for something to replace my large/boring/generic/beige hand-me-down art from my dad in the dining room and this seemed like the perfect choice. Plus, she did it with her kids—so cute.

Then I remembered I don’t have kids. First I thought about getting some of my students to make me art, but I didn’t get around to it. Then I realized it could be my activity at my birthday party! (You know how when you’re a kid you have an activity at your party? And then you grow up and you mostly just drink? I missed that memo. I don’t drink, but I have to have an activity.)

  1. As soon as people finish their ice cream, tell them, “Now you have to make my birthday present!”
  2. Give them watercolors that your mom brought and some paper. Show them the picture above. Tell them you are going to cut it up and that you’d like them to use colors that match your curtains (only three people will actually listen, but its still worth a try).
  3. Have them paint.

4.   Let paintings dry. Ideally for a month. You want to make sure they are really, really dry. (You may also just be disorganized.)

5.   Figure out what size you want your pieces to be. Especially if people drew actual pictures, smaller is probably better.

3 sizes I considered. A 1:3 ratio looked best to me.

6.   Once you decide on your pieces (I did 1×3), measure out on the backs where to cut. Set aside any that you will not want uniform pieces of—basically anything that was a thing (like a tree) and not abstract.

7.   SPECIAL CUTTING TIP: I measured out one inch increments on one side and three inch on the other. If you have extra on one side, which you likely will, make your marks there and DON’T cut all the way through. You’ll end up with strips attached across the top. Then you can line it up and cut once to get several pieces, which saves a ton of time.

Measure the dimensions along two edges. If you use a paper cutter, you won’t need to extend the lines. Cut MOST (but not all) of the way across, so you have a fringe.

When you slice across the mostly-cut strips, you’ll get your pieces. Much faster than cutting strips into individual pieces.

8. Cut, cut, cut.

9.  Start playing. Lesley did this while I was still cutting and measuring.

10. Get ready to do this for real. My mat left a space that was 19.25”x27.25”, so I measured out a 20”x28” box on a large piece of white paper. I also sorted the pieces a little bit, mostly by color intensity.

Ruler, pencil, scissors, strips. And, um, toes.

In retrospect, I wish I had set aside a piece or two of everyone’s to make sure they all made it in. Pretty sure I was successful, but not positive.

11. Decision time: Do I want to orient the herringbone vertically or horizontally? (Horizontally. It’s a big wall)

12. What angle looks right? (I’m using math in real life! First I measured everything and now I need to find an angle!!!) [Spoiler: its 45 degrees. Lame. Although sensible.]

13. Play.  Lesley’s playing above helped a lot here. It was also interesting to see how the art changed when I was looking at a photo instead of the real thing.

14. Once I had a layout I liked, I needed to stick it down. It will be behind glass, so I was hoping I could just double sided tape. I used American Crafts tape runners, which I very highly DON’T recommend. Very annoying.

15. Leave it on your floor while you go on vacation.

16. Restick some pieces because you used cheap adhesive (thanks AC), stick it behind glass, and get it on a wall! Everyone loves it and I love that so many people who are important to me are represented in all the pictures.

DR Birthday Art

I’ve seen other cool takes where you use one large piece of art and cut it in that pattern and then restick it, or where you use a pre-existing painting and tape out the herringbones. Just look for herringbone art on pinterest for some other equally-awesome takes.

Check out the other projects linked up by the hosts Emily, Katie, Sherry and Renee:

pinterest-pic

And my other Pinterest Challenge Projects:

Circle Art: Framed

Ring Around the Artwork

Storybook Final

Childhood Favorites Art

Finished Drawer

Map-Lined Drawer

What did you do? Do you share my desire for making tons of homemade art (there is tons more that weren’t Pinterest Challenges…I don’t know what’s wrong with me!)

Just in Case Cards

Sometimes I have a cool embellishment I want to use, or I come across a paper when I’m looking for something else and an idea just comes. Or I just have to try something cool I saw (probably on Pinterest).

If someone gets a new dog?

If someone gets a new dog?

The dots went with the cool paper. I could write anything in there...hi, thanks, birthday

The dots went with the cool paper. I could write anything in there…hi, thanks, birthday

I made this for my dad for Fathers Day. Then I remembered he never wears button downs. Oops. Still a cool card though...

I made this for my dad for Fathers Day. Then I remembered he never wears button downs. Oops. Still a cool card though…

Do you make anything for no good reason than it came to you?

Happy Anniversary, Mother!

Today is the 30th Anniversary of the Day Mother Broke Her Tailbone. Or, I suppose, the day Mother’s tailbone got broken. By sister. Getting born…in a snowstorm, incidentally. Sister hates birthdays, so my mother sent an email asking what we should do for the 30th anniversary of her broken tailbone instead. Sneaky.

Personally, I’m celebrating with a gift. My family isn’t very in to “stuff” and my sister is especially nomadic (likely moving to California this summer), so if I don’t come up with something good, I don’t do it at all.

My sister enjoys photography (I have one of her photos in my dining room, and hope to use more someday), but thats about all she has on her walls. I wanted to come up with some art for her (because apparently that‘s my thing these days) but I don’t like just breaking out a rerun of something I’ve already done.

My favorite piece is my Birthday Art, which my best friend wants me to re-make for him.

DR Birthday Art

And when I wanted to make something cool for Boyfriend, my take on that matched his rug (and used his nephew’s artwork).

Circle Art: Framed

So what now? I only want to use artwork if it’s got some meaning behind it, so that’s out. What else?

MAPS.

I have an obsession with maps. One of my most popular project was my Map-Lined Drawer.

Finished Drawer

Between my Craft Ideas and Things for My Wall Pinterest boards, I have seven different map pins. Things like…

heartmap

Heartmaps

Then I saw this post (before or after I pinned it on Pinterest? Who knows.) So pretty. So easy*. I could use the different places my sister has lived, or places she’s visited. It would look cool and add some meaningful art.

Watercolor maps. From this awesome map to image site.

mapimage(1) copy

mapimage

These are two of the (many) places she’s lived. I popped them in to two Ikea shadowbox frames and we were good to go.

I thought about doing something similar to the inspiration images above, but my sister is very much not a heart person…and making them too small made it tough to see the detail. We went out for dinner over the weekend to celebrate, and my dad was convinced I bought them. Win!

Are you obsessed with maps too? Can you figure out the two locations shown above?

Aw, Thanks (again)

Just dropping in to show a few more card designs. My mantra is generally to keep it pretty simple, and I’m loving trying out new writing styles–a lot of scrapbooking letter stickers are just too big for cards.

Keeping it basic with a contrasting paper offset, rounded corners and handlettered thank you

Keeping it basic with a contrasting paper offset, rounded corners and hand-lettered thank you

Three strips of washi tape from Target and done!

Three strips of washi tape from Target and done!

Martha Stewart candy stickers have a little dimensional but are flat enough to mail. The lettering is on a shape I cut with my Cuttlebug.

Martha Stewart candy stickers have a little dimensional but are flat enough to mail. The lettering is on a shape I cut with my Cuttlebug.

Which is your favorite?

Carnaval 2013: Gold Stars and Blue

I planned a party. It was a little over a week ago, but the pictures just came out.

p1450699132-3

The party was really a benefit, held for the mission organization of my church. That’s their logo, which is not just relevant because the benefit was for them but because the majority of my contribution consisted of bringing that shape into the decorations. Its a ten-pointed spiky-not-chubby star.

chicagolightsstar

That, combined with shades of blue, were our driving force behind the decorations. Every table had a blue tablecloth (in several shades) and a centerpiece with a glass base wrapped in a word representing one of the mission programs, and gold stars in some form.

Short Centerpiece

The short centerpieces, clustered on the first two rows of tables out from the dance floor, had shallow vases filled with gravel (on top of a styrofoam cake form to save on gravel cost/weight) with a 3D papier mache star in gold. They also had small gold stars in two sizes (painstakingly punched by, um, my students) and several candles scattered around.

Medium Centerpiece

The medium centerpiece had three vases, each with a different texture, lit from within with LEDs. Each vase was on a gold star, and the shades of gold were slightly different. I used wrapping paper for the stars, so they were not expensive, and they looked very nice as bases. The tallest vase had cellophane crinkled inside and then was filled with water (I was skeptical, but this actually looks really cool as long as you are careful to fold under the top crinkle so it doesn’t try poking out), the medium had plastic crystals (they look like ice cubes) and the shortest had clear water beads. The different textures lit up looked really neat.

Tall Centerpiece

The tall centerpiece was pretty simple, with these large stars illuminated from within with LED lights on gold-covered pole (wrapping paper on PVC), held up in a dollar store vase with a word representing one of their programs or missions. The base, which you can just barely see, is an 18″ 10 point star. I made a template (math in real life!) for all of the medium and tall stars so they would look like our inspiration star above.

Illuminated Star

The stars looked really neat when the lights went down, and I loved how they looked with the lights in the room.

Wine Auction

The dance floor held the bottles for the Mystery Wine Auction during dinner–you buy a ticket for a bottle of nice wine, and one lucky winner gets three really valuable bottles instead. I used three extra stars and some creative height-makers to give it some dimension and it really popped. Kathryn even ordered the gobo in the shape of the stars to project on the curtain behind the band.

The process was pretty cool–the committee chairs, Kathryn & Brad, both bought various things they thought could work with our very vague theme of “shades of blue,”  “something that goes with the cool lights” and “stars like the logo.” Kathryn found these amazing spiky gold balls that I loved, but they didn’t end up being the best fit for everything else. My main contribution was to say I could figure out how to make all the gold stars for the bases–so basically they asked me to be on the committee because I’m good at scissors.

M&M at Carnaval

Oh, and I was there too. At a table with a tall centerpiece, my friends from the committee and Boyfriend. We had a lovely time. Boyfriend even got us a hotel room since I was on the committee (it was super modern with bright teal carpet)!

My Shoes Match

Also, my shoes matched my dress. I thought you should know.

What’s the biggest event you’ve worked on? Ever decorated for 500 some people?!

Pinterest Challenge: Ring Around the Artwork

winter-challenge

It’s Winter Pinterest Challenge time! Thanks to some motivation from Megan (The Remodeled Life), Katie (Bower Power), Sherry (Young House Love) and Michelle (Decor and the Dog), I pulled together some new artwork (with & for Boyfriend).

Circle Art: Framed

Back in November, I went to visit my sister in Milwaukee. In the course of my (epically bad) train trip, I was left with nothing but a piece of paper and pen (and a phone. No keys. No wallet. No coat. Just a phone.) given to me by strangers (seriously. It was bad.). Mostly out of options, I started on my Christmas list, and a list of things to give others, especially the Boyfriend (he’s pretty tough to shop for).

His walls are either art by Ikea or pictures of his family, so something with more meaning seemed like a good idea, but what? It seemed cute to make something together, but that could be something only girls find cute–what if he thought it was dumb? Or I could combine the two!

I absolutely loved Amanda’s artwork that she made from her children’s artwork:

herringbone-art-round-2-after

So much so that I made my own, but without the “aw, cute” of using my kids artwork. (You have to have actual kids for that sort of thing.) So instead I made my friends make me artwork at my birthday party.

Large Scale Art pieced from paintings by friends

But. Boyfriend has a nephew! I could have his four year old nephew make me some art, and turn that into something cool…

Along the lines of my pieced-together birthday art, but something different. 4 year olds probably won’t produce a ton of useable artwork, so I wanted something that could use his nephew’s picture as a component but probably not the focus. So I decided on circles…

I have a love affair with circles (I have a whole board of cards that involve circles) and on my Things for my Wall board, I pinned this:

Floral Burst box64It’s from Etsy shop box64studios, and although this one is no longer available, they have a similar listing here. I thought it was really cool, and thought something similar would look great as one of my bathroom artwork options.

Plus Boyfriend already has a circle thing going. He just moved, but here’s a picture of his old living room:

Mike Living Room

The rug is from the Home Decorators Collection and I love the circle pattern.

Boyfriend’s nephew painted me a couple of pictures a few weeks before Christmas, and I cut them into circles and put them in a box. I wanted to make sure he liked the idea, so for Christmas I just gave him the box of circles. (It was the one gift he chose to open at breakfast–he was a little bewildered.)

Circle Art: Cut and Ready

I grabbed a sheet of fancy gift wrap from my stash and did a practice run on the cream back.

Circle Art: Test Run

Looking pretty good. Needs way more little circles. (Flashback to my Heart Art, where I had oodles of way-too-big hearts and needed tons more baby hearts). We also didn’t love the way it looked on white–the circles that were only partially painted were blending in a little and we didn’t love the look. [If you do this, I’d recommend using art that is thoroughly painted/colored so you can use a white background. Much simpler.) After a trip to Paper Source, we came home with a sheet of gray handmade paper with some silver texture to it and laid it out again.

Circle Art Take 1: Busy Paper

Yeah. Too busy.

So we tried again, flipping over our piece of fancy paper and laying down the design again.

Circle Art: Loose Overlapping Rings

Much calmer. The paper still has a nice texture and doesn’t look plain but it isn’t fighting with the circles. But Boyfriend didn’t like the circles overlapping (as they are in the top left corner) and overall we thought more definition might look better. So we tightened up the arrangement.

Circle Art: Ready to Glue

Then it was time to glue. I started out with glue dots, which worked fine, but it would have used a lot (and after my Valentines wreath I’m running a little low!) We used a combination of tape runners and double sided tape, but I think most adhesives would work as long as your paper isn’t too delicate (some adhesives discolor paper).

When we finished, we popped it in a large Ikea frame, and hung it on my wall!

Circle Art: Framed

I know it doesn’t fit on the wall–it also doesn’t belong in my house, but Boyfriend is traveling (again) and its as good a place as any for it. It will live in his new living room above the couch.

Want to see my other Pinterest Challenge projects?

Pinterest Challenge: Map-lined drawer

Map-lined drawer

Storybook FinalSentimental Storybook Art

Do you have any homemade art in your home?