Some updates

It’s been a while, hasn’t it? Sorry about that! It turns out that managing three blogs at work means that I’m less inclined to work on my own blog at home (go figure). But that’s going to change in 2014, I swear!

Some exciting changes here. For one, I got a new camera! It’s a Sony Cybershot Mark 100, which is a compact, fixed-lens camera, but with an incredibly powerful lens and sensor. I wanted a small camera for travel, but didn’t want a mediocre point and shoot. So far, I’m really happy with the purchase. I took it with me on my recent vacation (I went to Paris. Everything people say about it is true.) and got some great pictures with it. I do have a few catch-up posts to share, which will still feature less-than-perfect, step-by-step iPhone pictures, but after that you should see a noticeable improvement in photo quality. If anyone is interested in how I went about choosing my camera, leave a comment and I’ll do a post. I did a lot of research ahead of time and went to about 5 stores to look at cameras in person (I research things to death when I make a large purchase). Otherwise, I’ll assume you get your camera advise from a camera expert!

Some other exciting things you missed:

I made this cake for my sister’s birthday. It was ridiculously good and impressed everyone who ate it, even those who ate smooshed leftovers out of a tupperware three days after her birthday.

susan's birthday cake

At one point my vegetable garden was producing crops like this on a daily basis (this is my share, after giving the upstairs neighbors their share):

veggies from garden

I can’t wait to start planning for next year’s garden, and I’m hoping to share some of the stuff I learned having a vegetable garden for the first time.

And at one point, my living room looked like this:

Brown Living room

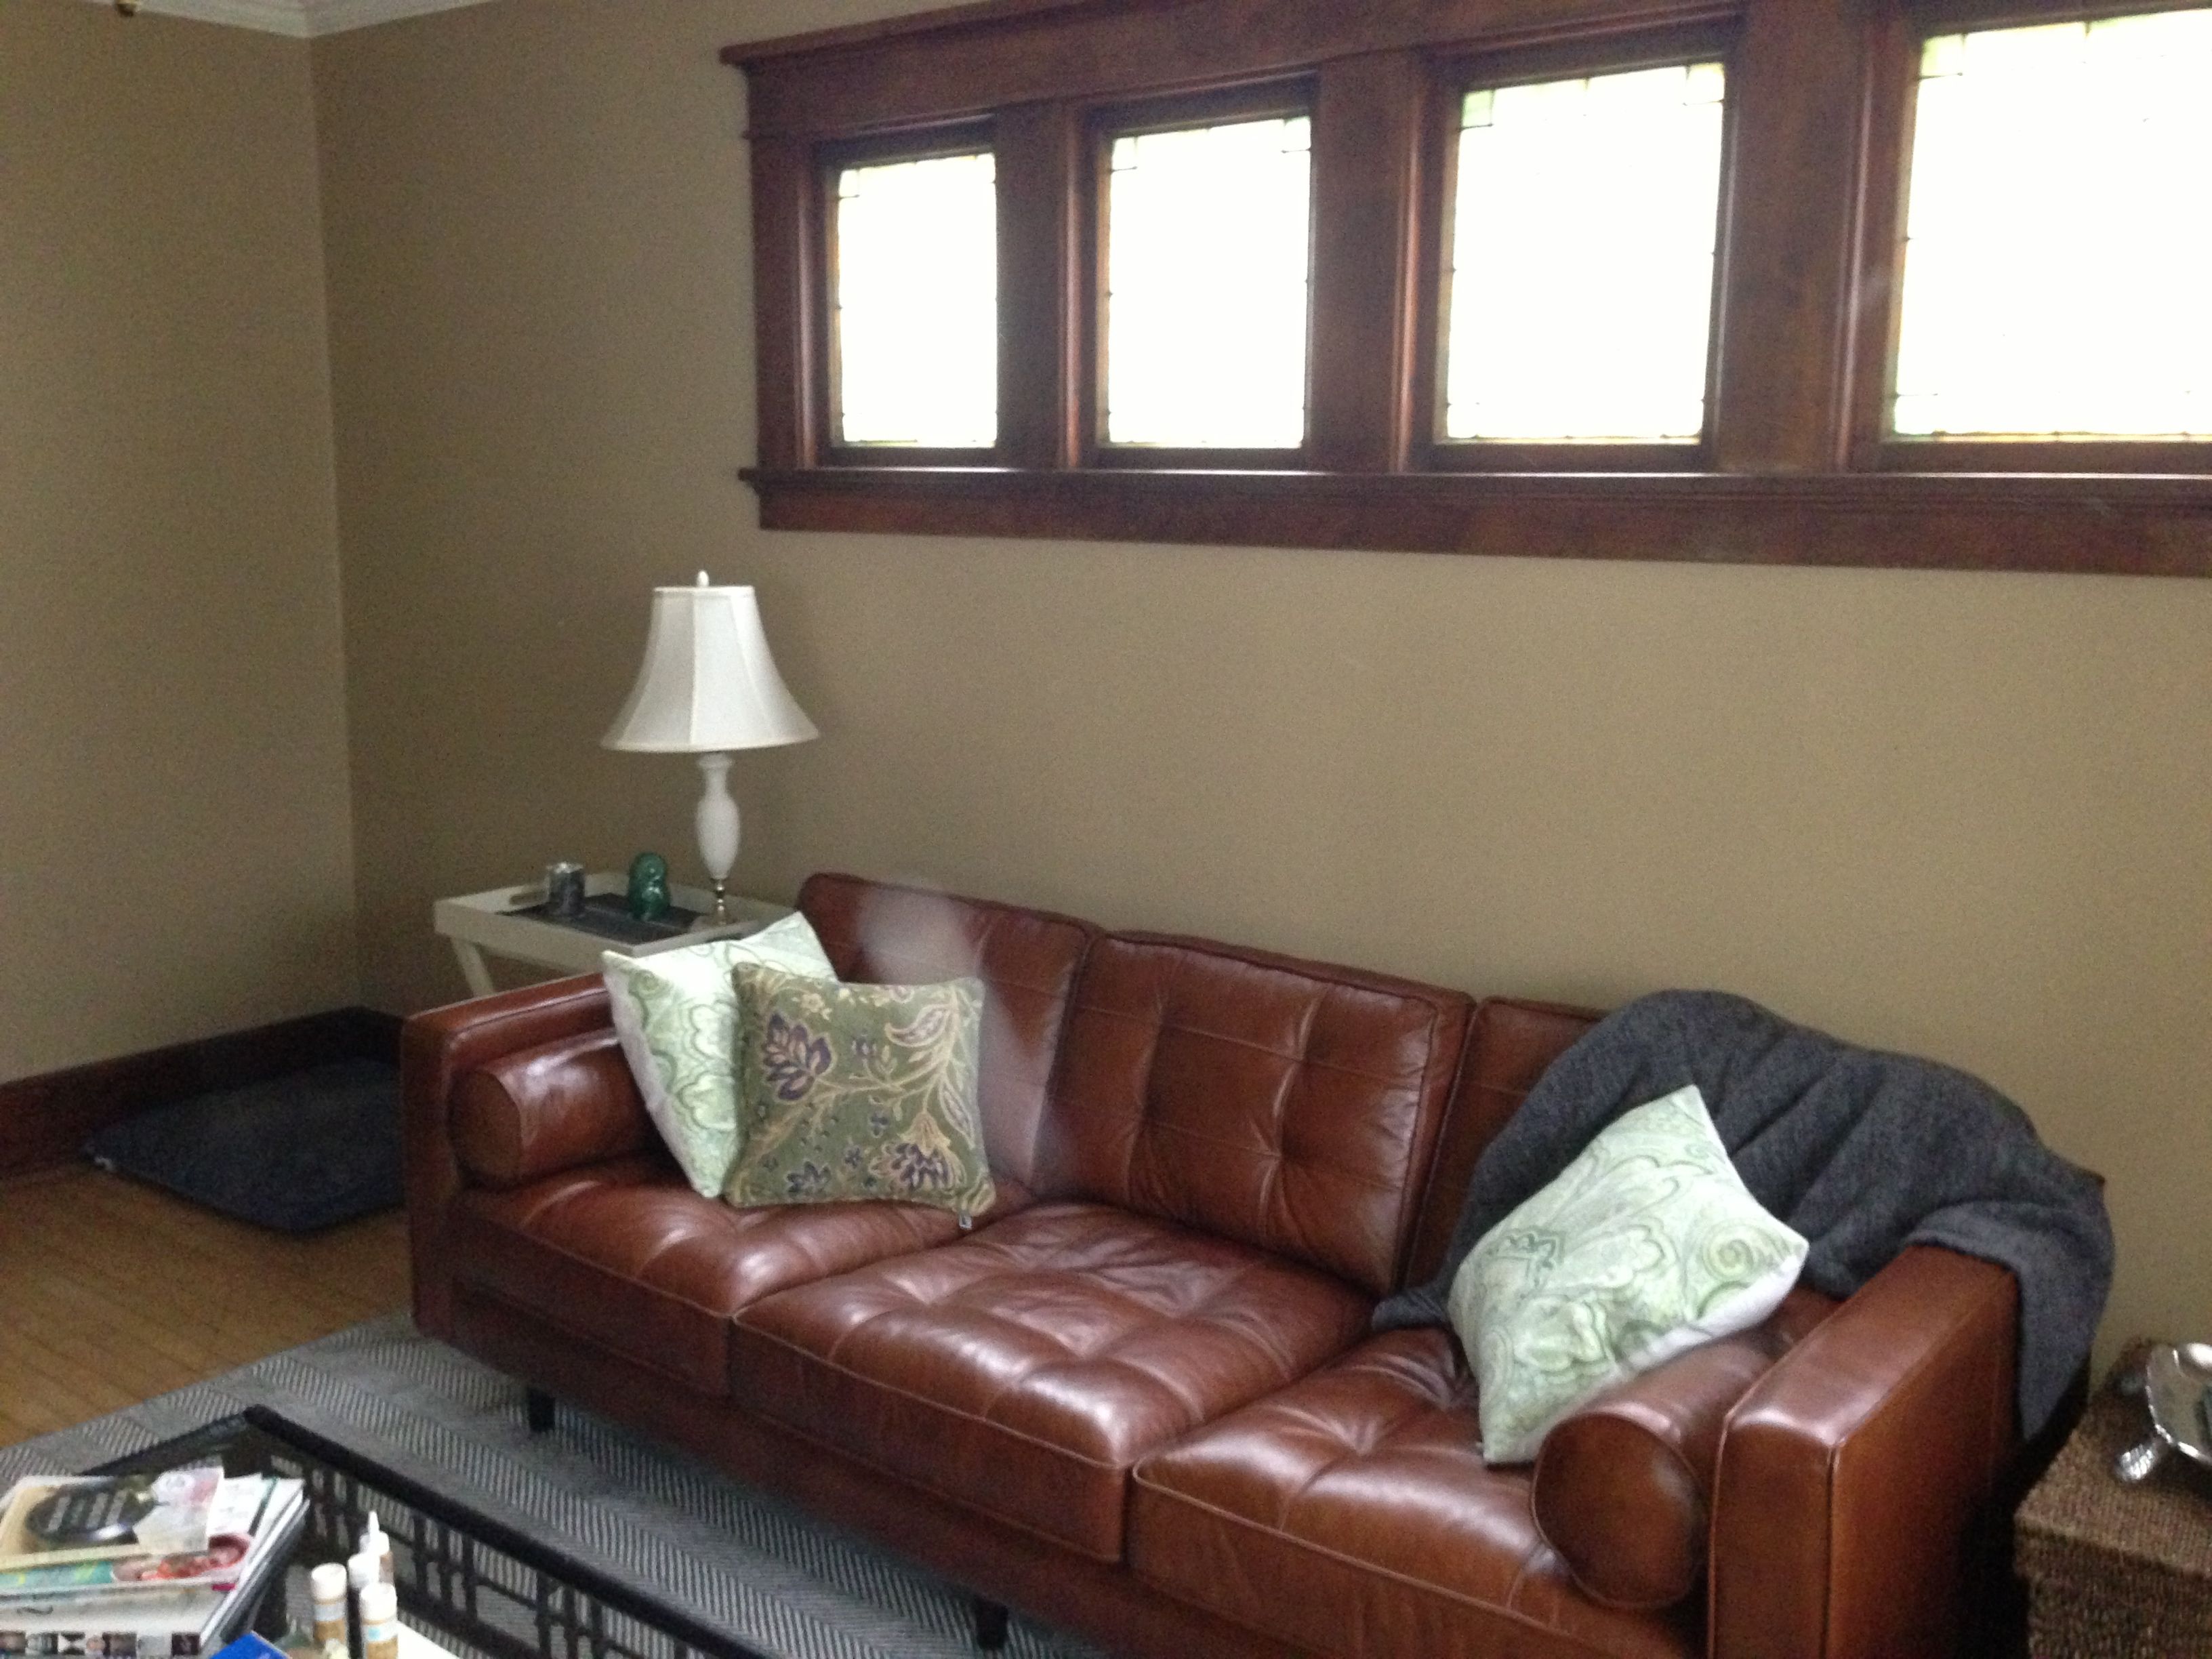
In an attempt to try something new, I painted the living room a nice cozy brown (Basketry, by Behr). I actually still really like this color. It’s a great mid-tone neutral—not too green or too red, in my opinion. But, with the wood trim and floors it was a lot of brown. Then I bought a brown couch (not what I intended at all—I’ll definitely share my couch saga soon!), and a too low coffee table and the room slid into a horrible state of Not Working At All. So, aside from the couch (which I LOVE), it’s completely different!

Oh, and I bought these insanely girly hooks for $2 each at Anthropologie. Everyone who saw them on my counter said they were really flowery and looked like they belonged in a little girl’s room. Everyone who’s seen them on the wall  (they  in my back hallway next to the door) has complimented them. Girly can totally work in a grown up house.

girly hooks

So that’s what’s been happening here. More to come soon!

Advertisement

Baking with Whole Grains

Over the course of the 100 day challenge I did with my cooking group, I did a lot of experimenting with whole grain baking. I’ve finally reached a point where I feel comfortable doing most of my baking with whole grains, but I learned quite a few things along the way, including:

  • Most whole grain recipes call for a mix of whole grain and refined flour, much like many store bought items that say “with whole grains” are a mix of whole grain and refined flours.
  • A straight substitution of whole grain flour results in a very different texture, which can be much denser, with a thicker crumb.
  • Whole grain pastry flour is a great alternative to heavier whole wheat and it’s worth it to learn when you like using each.
  • If you are going gluten free, buckwheat, oats, rice flour, amaranth, almond and more are there to experiment with! Some give a nuttier flavor and denser feel while others are more cake-like.

As for specific recipes, here’s what I’ve found when making substitutions:

  • Muffins and quick breads are extremely compatible with flour substitutions, especially moister breads (like banana or zucchini). For example, in my usual blueberry muffins, I subbed whole wheat pastry flour and used almond flour for the topping with great results. I had a lot of fun experimenting with banana bread, which might be the most forgiving quick bread of all. First, I used my family’s go-to recipe from The Settlement Cookbook and used half whole wheat and half rolled oats instead of regular flour. Then I tried Smitten Kitchen’s crackly banana bread and used a mix of buckwheat, flax meal and whole wheat flour (instead of millet, which I didn’t have on hand, I used a mix of chia hemp and buckwheat seeds (a cereal mix available at Outpost).
  • Regular pancakes retain much of their texture with whole wheat pastry flour, but experimenting with variations like buckwheat crepes (flatter and nuttier) and oatmeal pancakes (much fluffier) is worth a try.
  • It is a lot harder to blend a smooth pie crust with whole wheat pastry flour. It takes longer to get an even consistency and it cracks more easily when you roll it out and transfer it to the dish.
  • Flour substitutions in cakes require more thought than anything else. I haven’t found a good substitute for cake flour. The good news is that there are plenty of excellent cakes that are designed around special flours, such as almond flour or corn meal. And for denser, richer cakes, like chocolate, using whole wheat pastry flour or another heavier flour might actually help the cake achieve the right texture without freezing (yes, some layer cake recipes suggest freezing the layers to achieve the desired texture).

As I mentioned above, I’ll probably continue to nix the refined flour for a lot of my baking — particularly muffins, scones and quick breads, because I prefer the texture with more natural flours. And, in fact, these are also the recipes that I’ve found to work best with natural sweeteners like maple syrup, honey and various raw sugars like date, coconut palm and sugar cane.

The one area where I might be inclined to “cheat” post-challenge would be with chiffon cakes and some sponge cakes. I haven’t been able to find a less-processed flour that achieves the right texture, and texture is important for these particular types of cake. Beaten egg whites just can’t hold up to the weight of some of these flours as well as others.

So that’s it: My findings on baking with whole grains. Of course, it’s very much based on my personal taste. Have you been baking with whole grains? What results have you seen?

Breakfast on the go, time two

Breakfast has, by far, been the easiest meal for following the challenge rules. I’m one of those people that MUST have breakfast. My day doesn’t feel like it’s started without it, and I’m pathetically inclined to get cranky a few hours into the day if I skip it. That said, time is at a premium before I head out the door to work, so anything I can prep in advance and grab on the way out the door is wonderful.

I found two great recipes from The Smitten Kitchen Cookbook, that with very slight tweaks (subbing in a whole grain in place of wheat germ or whole grain flour in place of all-purpose), are perfectly challenge-friendly, very tasty and ready to grab on the way out the door.

First up – Almond Date Breakfast Bars

Ingredients

1 1/4 cup rolled oats

1 cup pitted chopped dates

3 tbl whole wheat flour

1/3 cup milled flax seed

1/2 cup sliced almonds

1/2 tsp salt

1/4 tsp cinnamon

1/4 cup almond butter

1/4 cup olive oil

1/4 cup honey

freshly grated orange zest

1/4 tsp almond extract (optional)

Directions

1. Preheat the oven to 350 and line an 8×8 square pan with parchment paper, taking care the the paper extends up all the sides.

2. Combine the first seven ingredients in a large bowl and mix together.

2. Combine the remaining ingredients in a separate bowl (I just used my liquid measuring cup so I didn’t have to scrape it out repeatedly).

3. Add the liquid ingredients to the dry and mix until coated.

4. Press the mixture into the pan evenly. Bake for 20 – 25 minutes, until lightly golden.

5. Let the bars cool until they feel more solid than crumbly (putting them in the fridge once they’ve cooled to room temperature might help). Remove from pan and cut into nine squares.

Next – Maple Oat Granola

I like to throw this on top of Greek yogurt (sweetened with a little honey on the bottom of the bowl)

Ingredients

3 cups rolled oats

1 cup unsweetened shredded or flaked coconut

1 cup chopped walnuts

1/4 cup flax seed mill

2 tbl olive oil

1/2 tsp coarse salt

1/2 cup or more maple syrup

1/4 tsp cinnamon

1 large egg white

1 1/2 cups dried fruit (cherries or berries seem to work best)

Directions

1. Preheat the oven to 300 F. Line a jelly roll pan or cookie sheet with parchment paper.

2. Mix all the ingredients but the egg white and fruit until well combined.

3. Whisk the egg white until it’s slightly foamy, them add to the mixture, stirring until evenly coated.

4. Spread in an even layer in the pan.

5. Bake for 45-55 minutes. Check 20 minutes in and turn sections of the granola if they appear to be brownings (I’ve never remembered to do this, and they’ve turned out fine.

6. Once light golden brown on top, remove from oven and let cool.

7. Sprinkle with fruit, then remove from pan (breaking it up as much as you want) and transfer to an airtight container for storage.

Even after the challenge is over, I think I’ll be making both of these on a regular basis.

Christmas Cookie Exchange

Last week was a big week for me in the holiday entertaining department.

On Tuesday, I hosted my sorority’s annual holiday cookie exchange. Our best turnout year had over a dozen people, but this year was a paltry four. One girl made Snickerdoodles, another made peanut butter cookies and the third made potato chip cookies. The potato chip cookies were pretty interesting (a hint of saltiness)–I’d heard of those before but never tried them.

It’s a super simple party to throw–evite, get some drinks (I just did hot chocolate, and everyone only wanted water) and remind people to bring copies of their recipe and an empty container for all their cookies!

I made a recipe Lesley pinned from Recipe Girl for Peppermint Sugar Cookies.

Recipe Girl's Peppermint Sugar Cookies

Recipe Girl’s Peppermint Sugar Cookies

They turned out pretty well. I wasn’t totally in love, but I liked them, and they look really pretty. After reading the reviews I subbed granulated sugar for some of the powdered sugar. It worked fairly well (but its not like I know how the recipe would work as written).

I served hot chocolate and we sat around and chatted and snacked on cookies before we exchanged. This was also a great plan for holiday party prep–I scheduled it so that I could use my cookies for dessert at my Christmas party on Saturday.

What’s your favorite kind of cookie?

Cooking from a CSA, Part 7: Moving to a Half-Share

Two weeks ago my CSA’s spring share ended and I moved to a half share for summer. I’m kind of relieved (after all, you know I’ve been having trouble eating everything), but I already miss having a full fridge all the time.

20120623-161232.jpgI’ve made the most of my last two batches including a lemony risotto with sugar snap peas, asparagus, Swiss chard and fennel. While it was a nice blend of vegetables, it definitely wasn’t a recipe worth sharing. Way too lemony with nothing to balance it out. That’s what happens when you make up your own recipes and just throw stuff in a pot to see what happens—sometimes the results aren’t perfect, even if they’re pretty.

A more successful rice dish was thing one:

20120623-161446.jpg

This was another “throw stuff in a pot and see what happens” recipe, but I was delighted by the outcome—and it made great leftovers. I started with a bag of brown and wild rice blend (Lundberg Wild Blend) from the grocery store and cooked it according to the instructions with vegetable broth and a tablespoon of butter. There was still a bit of liquid when the rice was done, which ended up being a good thing because it coated the vegetables like a sauce and helped my leftovers heat up with out over-drying. (Dry crunchy rice leftovers = eew).

Brown and Wild Rice with Garlic Scapes, Fennel and Swiss Chard

  • 1 cup Lundberg’s Wild Blend
  • 2 cups vegetable broth (I used a can + water to make 2 cups)
  • 1 tablespoon butter
  • 1 tablespoon olive oil
  • 3 garlic scapes, finely sliced
  • 1 fennel bulb, ends removed, finely sliced (I also removed the very solid pieces of the core)
  • 1 bunch Swiss Chard, ribs removed, cut in 1-in. ribbons
  • salt
  • pepper
  • thyme
  • cumin

1. Cook the rice according to package instructions (in this case, bring veggie broth, butter, and rice to a boil, cover, and reduce heat to low to simmer for 40-50 minutes).

2. When there’s about 15 minutes left for the rice, begin to warm olive oil in a large sauté pan over medium-low heat. Add the garlic scapes and cook gently until just soft (about 5 minutes).

3. Increase the heat to medium, and add the sliced fennel. Season with salt, pepper, thyme and cumin to taste (I used a dash of the first three and was rather generous with the cumin). Cook until the fennel is tender, but not soft, about 5 minutes.

4. Add the chard ribbons to the saute pan, and cook until barely wilted. Check the rice and see if it’s done (as noted above, I went by texture, not amount of liquid). Add contents of rice pot to saute pan and stir together. Serve warm.

Unfortunately, my CSA suffered a huge strawberry crop failure this year, so I’ve only received two pints of fairly small and very ripe berries. They were perfect for baking and I made a double batch of Smitten Kitchen’s Strawberries and Cream Scones. They were wonderful right out of the oven:

20120623-161408.jpg

And they’ve also worked out well frozen. I simply shaped them, put them on individual pieces of parchment paper…

20120623-161309.jpg

…and thrown them in a freezer bag. Then I bake them according to the recipe instructions. This is a trick that I learned from Deb at Smitten Kitchen (she mentions it right in her recipes if you can make them ahead, which is fantastically helpful). Since scones are best right out of the oven, it’s nice to have a supply in the freezer!

20120623-161338.jpg

Delicious Sweet-or-Savory Scones

My first CSA box had a bag of frozen strawberries that had already thawed by the time I got home. I had to use those strawberries fast. Since thawed strawberries naturally seep out a lot of juice, they were perfect for a sauce, but (for once) I wasn’t in the mood for cake. This last weekend was chilly, dark, and rainy, so I wanted a warm treat for breakfast–and I had a guest to serve. So Mary and I made scones.

I made a rather basic scone recipe from Nigella Lawson. So basic, in fact, that it has no sugar! Fresh out of the oven, the scones were fantastic—light, airy and delicious. Crumbly, like a good scone should be. We halved them and spooned some strawberries and juice onto the bottom half. A little whipped cream and it would have been an excellent version of strawberry shortcake—as it was, it was exactly the warm treat I was looking for.

I had leftover scones for the next few days. The problem with scones is that after the first few hours, they become a little soft or soggy feeling. My solution to this was to pop them in the toaster over at 350° for a few minutes. The tops darkened slightly, but they were the perfect texture once again.
I also tried them with a savory topping with a dinner salad. I took the warm-from-the-toaster-oven scone, cut it in half, and added a slice of cheese and some roasted red peppers to the middle. It was just as good as the sweet version—the scone can be a great substitute for biscuits.
Sweet-or-Savory Scones
Adapted from “Lily’s Scones” in Nigella Lawson’s How to Be a Domestic Goddess*
  • 3 1/3 cups flour
  • 1 teaspoon salt
  • 4 1/2 teaspoons cream of tartar
  • 1/4 cup cold butter, cut in small pieces
  • 2 tablespoons shortening, in small lumps
  • 1 1/3 cups milk
  • 1 large egg, beaten
Preheat the oven to 425°F. Shift dry ingredients together. Use a pastry blender to blend in butter and shortening until the mixture is even and crumbly. Add all the milk, and mix until just blended. Lay on floured surface and knead briefly–it will seem like a sticky mess.
The original recipe call for rolling out the dough and using a round cutter. I simply rolled it to a 1 in. thick rectangle and cut it into 12 equally-sized pieces.
Place scones on baking sheet–they can be close together–and bake for 20 minutes, until lightly golden on top. Serve warm or reheated.
* Nigella Lawson’s How to be a Domestic Goddess is one of my all-time favorite cookbooks! So many good recipes, with a focus on baked goods and other comfort foods. And her language is casual and food-passionate. She’s English, so I’ll admit there’s a recipe or two that I haven’t loved, but there’s at least a half dozen recipes in each of her books (and I own several) that’s in permanent rotation in my family.

Gingerbread Waffles

I have to admit, I don’t think I ever would have dreamed up gingerbread waffles on my own. This morning I was looking for something warm and homey for breakfast and I turned to The New Settlement Cookbook* for a basic waffle recipe. As I scanned the basic recipes, I came across “Gingerbread Waffles” and just had to give it a try. Warm, spicy-sweet and perfect for a winter morning. Not only did they taste great (I ate them as the book recommended, with a little bit of butter and sprinkling of powdered sugar), but the texture was perfect—crispy on the outside and fluffy on the inside. These would be excellent with a jam or fresh fruit.

Gingerbread Waffles

Gingerbread Waffles (adapted from The New Settlement Cookbook, 1991 edition)

3 eggs
1/4 cup sugar
1/2 cup molasses
1 cup buttermilk (I used sour milk)
1 1/2 cups flour
1 tsp ground ginger
1/2 tsp ground cinnamon
1/2 tsp ground cloves
1/2 tsp salt
1 tsp baking soda
1 tsp baking powder
1/3 cup butter, melted

1. Using a whisk in a deep bowl, beat the eggs until light and frothy. Add the sugar, molasses and milk, whisking thoroughly after each edition.

2. In a separate bowl, sift together all the remaining dry ingredients (everything except the butter). Whisk the dry ingredients into the wet (a little at a time will help avoid flour clumps), and then add the melted butter and whisk until blended.

3. Warm up your waffle iron for about 5 minutes, then add your batter to the middle of each grid. (These waffles fluffed up quite a bit so I had a lot of batter dripping out of my first batch—start light and add more batter next time if needed). Cook until the surface is slightly darker and a light crust has formed (about 6 minuted on my iron).

4. Serve immediately, with butter and powdered sugar, or the topping of your choice.

Yield: About 16 waffles, depending on the size of your iron.

I could have fed 4-5 hungry people with this batch. I froze my leftovers to toast up later.

* A note about my source: The New Settlement Cookbook is a newer edition of a great traditional cookbook that was born right here in Milwaukee. It’s filled with updates of traditional ethnic recipes and basics. While it doesn’t have the beautiful photos and modern flair of more contemporary cookbooks, I find myself turning to this book again and again for the basics, especially for baked goods. Sadly, it’s out of print, but worth picking up at a second hand bookstore if you ever come across it. (My mother found copies for my sister and I after thwarting our multiple attempts to steal hers.)

Breakfast Berry Crumble

Why aren’t crumbles and crisps served for breakfast more often? They are a great warm way to start off the day.

This morning I was trying to figure out something warm to have for breakfast, since my apartment was freezing. No eggs, no oatmeal, but I did have berries, plums and yogurt.

This simple crumble was very easy to make with just a few things I had on hand, and was the perfect size for popping in the toaster oven. Served with a dollop of vanilla greek yogurt on top, it was an excellent start to my morning.

Blueberries, plums and a simple struesel topping make an easy warm breakfast.

Breakfast Berry Crumble

  • 1 cup blueberries
  • 1 plum, diced
  • 1 tablespoon honey
  • 1 tablespoon sugar
  • 2 tablespoons flour (I used whole wheat)
  • 1 tablespoon butter
  • 1/2 teaspoon cinnamon
  • vanilla greek yogurt, for serving
Mix the blueberries, plum pieces and honey together in an ovenproof ramekin. Drizzle with honey and mix. In a small bowl, use a fork to combine the remaining ingredients until the mixture is fairly uniform and resembles a coarse meal. sprinkle on top of the berr-plum mixture. Bake at  375° for about 15 minutes (until the mixture is bubbling and the topping is slightly golden and collapsed. Serve with vanilla yogurt on top.

Blueberry-lemon muffins with ginger streusel topping

The morning Mom and I went to the estate sale at the Shorecrest we stopped for coffee and breakfast and I had a fabulous blueberry muffin. It was just about perfect—not too dense, not too cake-like—and it had a very subtle flavor beyond the blueberry. I thought it was ginger, but Mom thought it was lemon. Well, of course, I had to try to recreate it on my own.

I’ll admit, this has actually taken a few tries. The first batch was much too lemony, and I used fresh ginger instead of ground. They were too moist, and the flavor was just…off. Not bad (they were edible), but nothing I’d like to share.

The new batch, however, with the streusel topping, is good. Possibly the best muffins I’ve ever made. And I have made a lot of muffins.

The base for this recipe comes from one of my standby cookbooks, The Good Housekeeping Illustrated Cookbook. My mom got one for her wedding shower…I had to hunt for mine at Goodwill. I’ve changed the proportions slightly, added lemon and spices and the streusel topping, and substituted a little whole wheat flour for the white (whole wheat flour keeps the muffins from getting too light and cupcake-like, in my opinion).  You could use all-purpose flour only and eliminate the spices and lemon and you’d still have a pretty good blueberry muffin.

Blueberry-lemon muffins with ginger streusel topping

Makes 12 muffins

Ingredients
  • 1 3/4 cups all-purpose flour
  • 1/2 cup whole wheat flour
  • 6+ tablespoons sugar
  • 1 heaping tablespoon baking powder
  • 1/2 teaspoon salt
  • 1/2 teaspoon nutmeg
  • 1/2 teaspoon cardamom
  • 1 teaspoon ginger
  • 3 tablespoons lemon juice, or zest and juice of one small lemon
  • 1 scant cup fresh or frozen blueberries
  • 1 egg
  • 1 cup milk
  • 1/4 cup canola or vegetable oil
  • 2+ tablespoons butter

Directions

1. Prepare your muffin cups (I prefer individual silicon cups for muffins) by lining or buttering as necessary, and preheat the oven to 400° F.

2. In a small bowel, gently mix the whole wheat flour and blueberries until the blueberries are coated. (Supposedly this prevents the berries from sinking.)

3. In a large bowel, mix 1 1/2 cups all purpose flour; 4 tablespoons sugar; 1/2 teaspoon each of salt, nutmeg, cardamom, and ginger; and1 heaping tablespoon of baking powder. (Note: The remaining flour, sugar, and ginger is for the topping.)

4. In a separate bowl, beat the egg and mix with 1 cup milk and 1/4 cup oil.

5. Add the liquid to the flour mixture, and stir until barely mixed. Add the blueberry mixture and the lemon juice (and zest, if using). Stir just until the flour is mixed in—the batter should still be slightly lumpy (Overmixing muffins toughens them).

6. Spoon the batter into the muffin cups. For regular muffins they’ll be a bit over 3/4 full.

7. In a small bowel, mix a scant 1/4 cup flour, 2 tablespoons butter, 2 tablespoons sugar, and 1/4 teaspoon ginger with a fork until you have uniformly crumbly mixture. If necessary, add a little more butter or sugar to get the right texture. (This does make a little more topping then necessary.)

8. Sprinkle the topping evenly over all the muffins. I like to use the fork to lightly tap the topping into the batter (it keeps it from rolling right off when you eat the muffin).

9. Bake at 400 for about 20 minutes, or until lightly golden and a toothpick test comes out clean. Let cool on a wire rack.

Enjoy!