Thanks and Cards

Oh, hi. Still there? Sorry…

Turns out planning a wedding is complicated stuff, along with wrapping up the school year and spending a week in Guatemala. Oh, and my birthday was in there too.

I thought it would be tough to top last year’s Forced-Gifting Party, but this year was pretty awesome too.

DR Birthday Art

…even if all I have to show for it is a rock.

It’s a lava rock, and I got it from the volcano I climbed on my birthday (I know, right?). We climbed Volcan Pacaya in Guatemala and then we roasted marshmallows* in the hot spots and our group sang me Happy Birthday and gave me M & Ms and then we went back to town. Where we wandered around and saw an amazing convent and then went to dinner at a fancy hotel where a mariachi band sang to me too. And then I got a cupcake. Oh yeah, and I should clearly start a travel blog, right? (Maybe not so much).

Back to the point.

My birthday was Saturday and now I need to send some Thank You cards!

Thank You blue flower

So I whipped these up super fast–Just some colored paper, a single pack of embellishments and colored pens.

Thank You pink flower

I used the same basic idea on all of them, with a strip of paper going all the way across and then a little notched pennant, offset (or not) and layered (or not) with an embellishment anchoring it. Quick, easy and cute.

Thank You Green Flower

Do you make your own cards? What’s your favorite one?

*Technically we…warmed them? They got puffy but they didn’t change colors. And marshmallows in Guatemala are oddly technicolor, so that was strange too. But still mostly delicious.

Advertisement

Mary’s Getting Married!

…but I already told you that.

In a terribly surprising turn of events, I’m blogging about it. Visit me at MaryMarryMike.wordpress.com if you want to check it out. I will probably cross post a few things over here, but I’m guessing you don’t want to hear about 7000 different places in Chicago to get married (and how we apparently don’t love ANY of them). Oh, and if you do, you can just come visit me over there.

I’ve got lots to blog about at home too, we’ve just been busy getting all our moved-in-together stuff sorted out.

Any big changes for you? Any advice on how to choose a venue for our reception? This is seriously impossible stuff!

Packing it all in

So, I’m getting married.

That’s exciting.

Also, I have to live with a boy. That’s….different. I love my fiance and I can’t wait to start a life together. But I own my place (and love it) so we’ll be starting life here. In a one bedroom condo. With two people.

And 2.5 closets.

And two adults worth of stuff.

The biggest win we were going to get was squeaking out some more storage from the hall closet…which is the only real closet, other than the bedroom.*

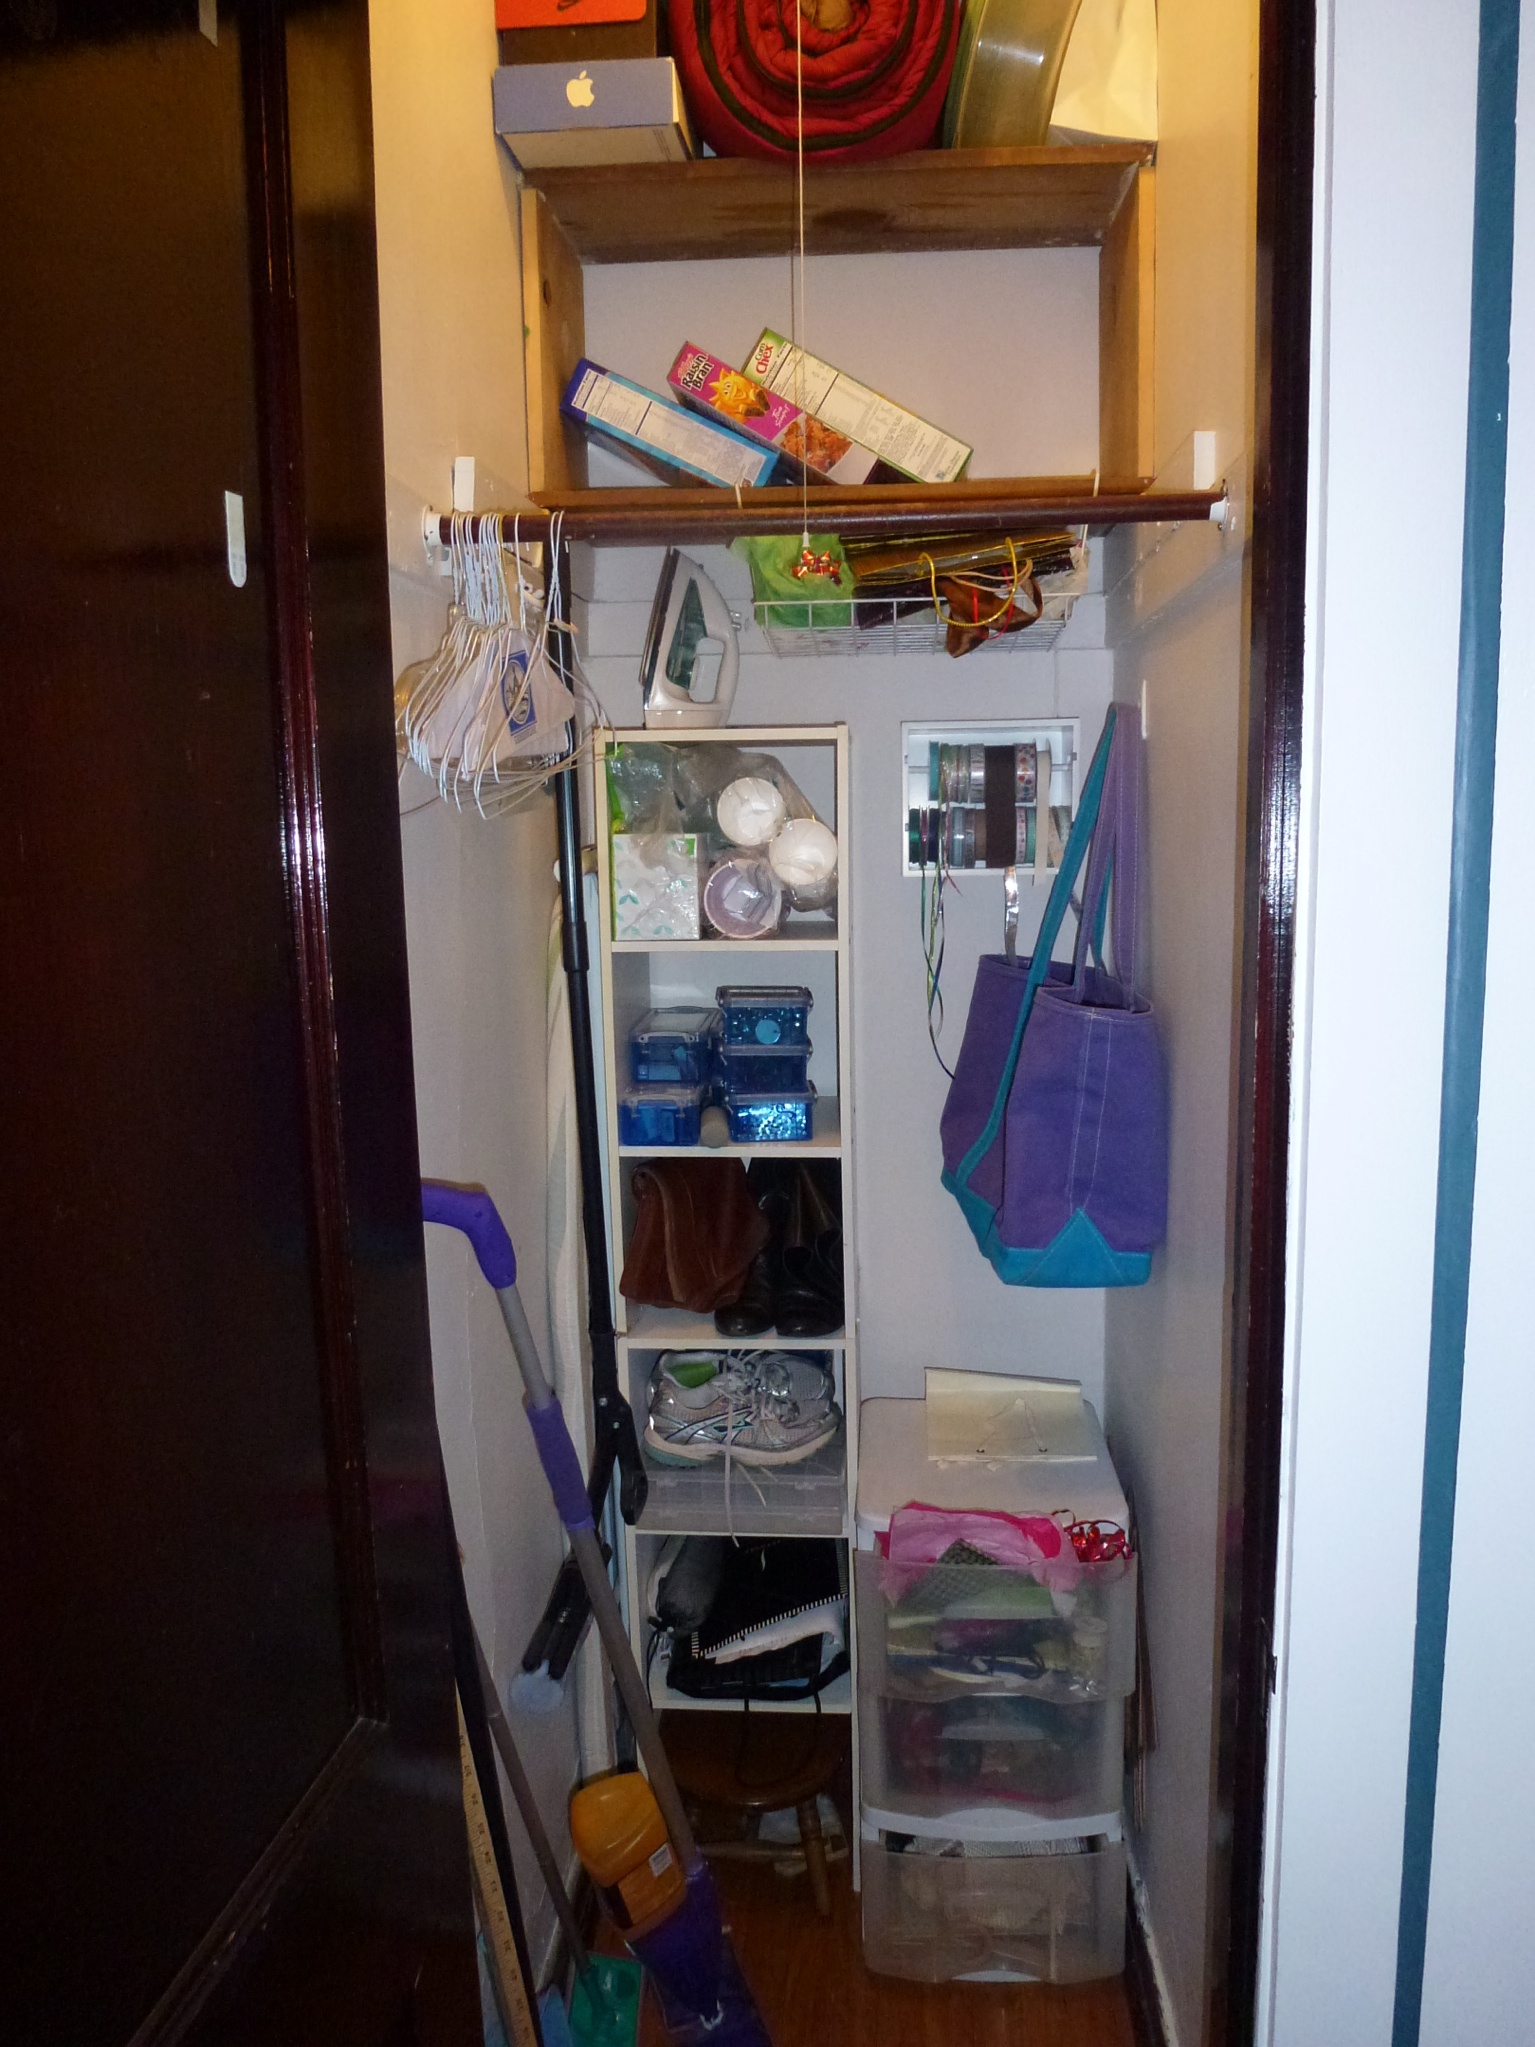
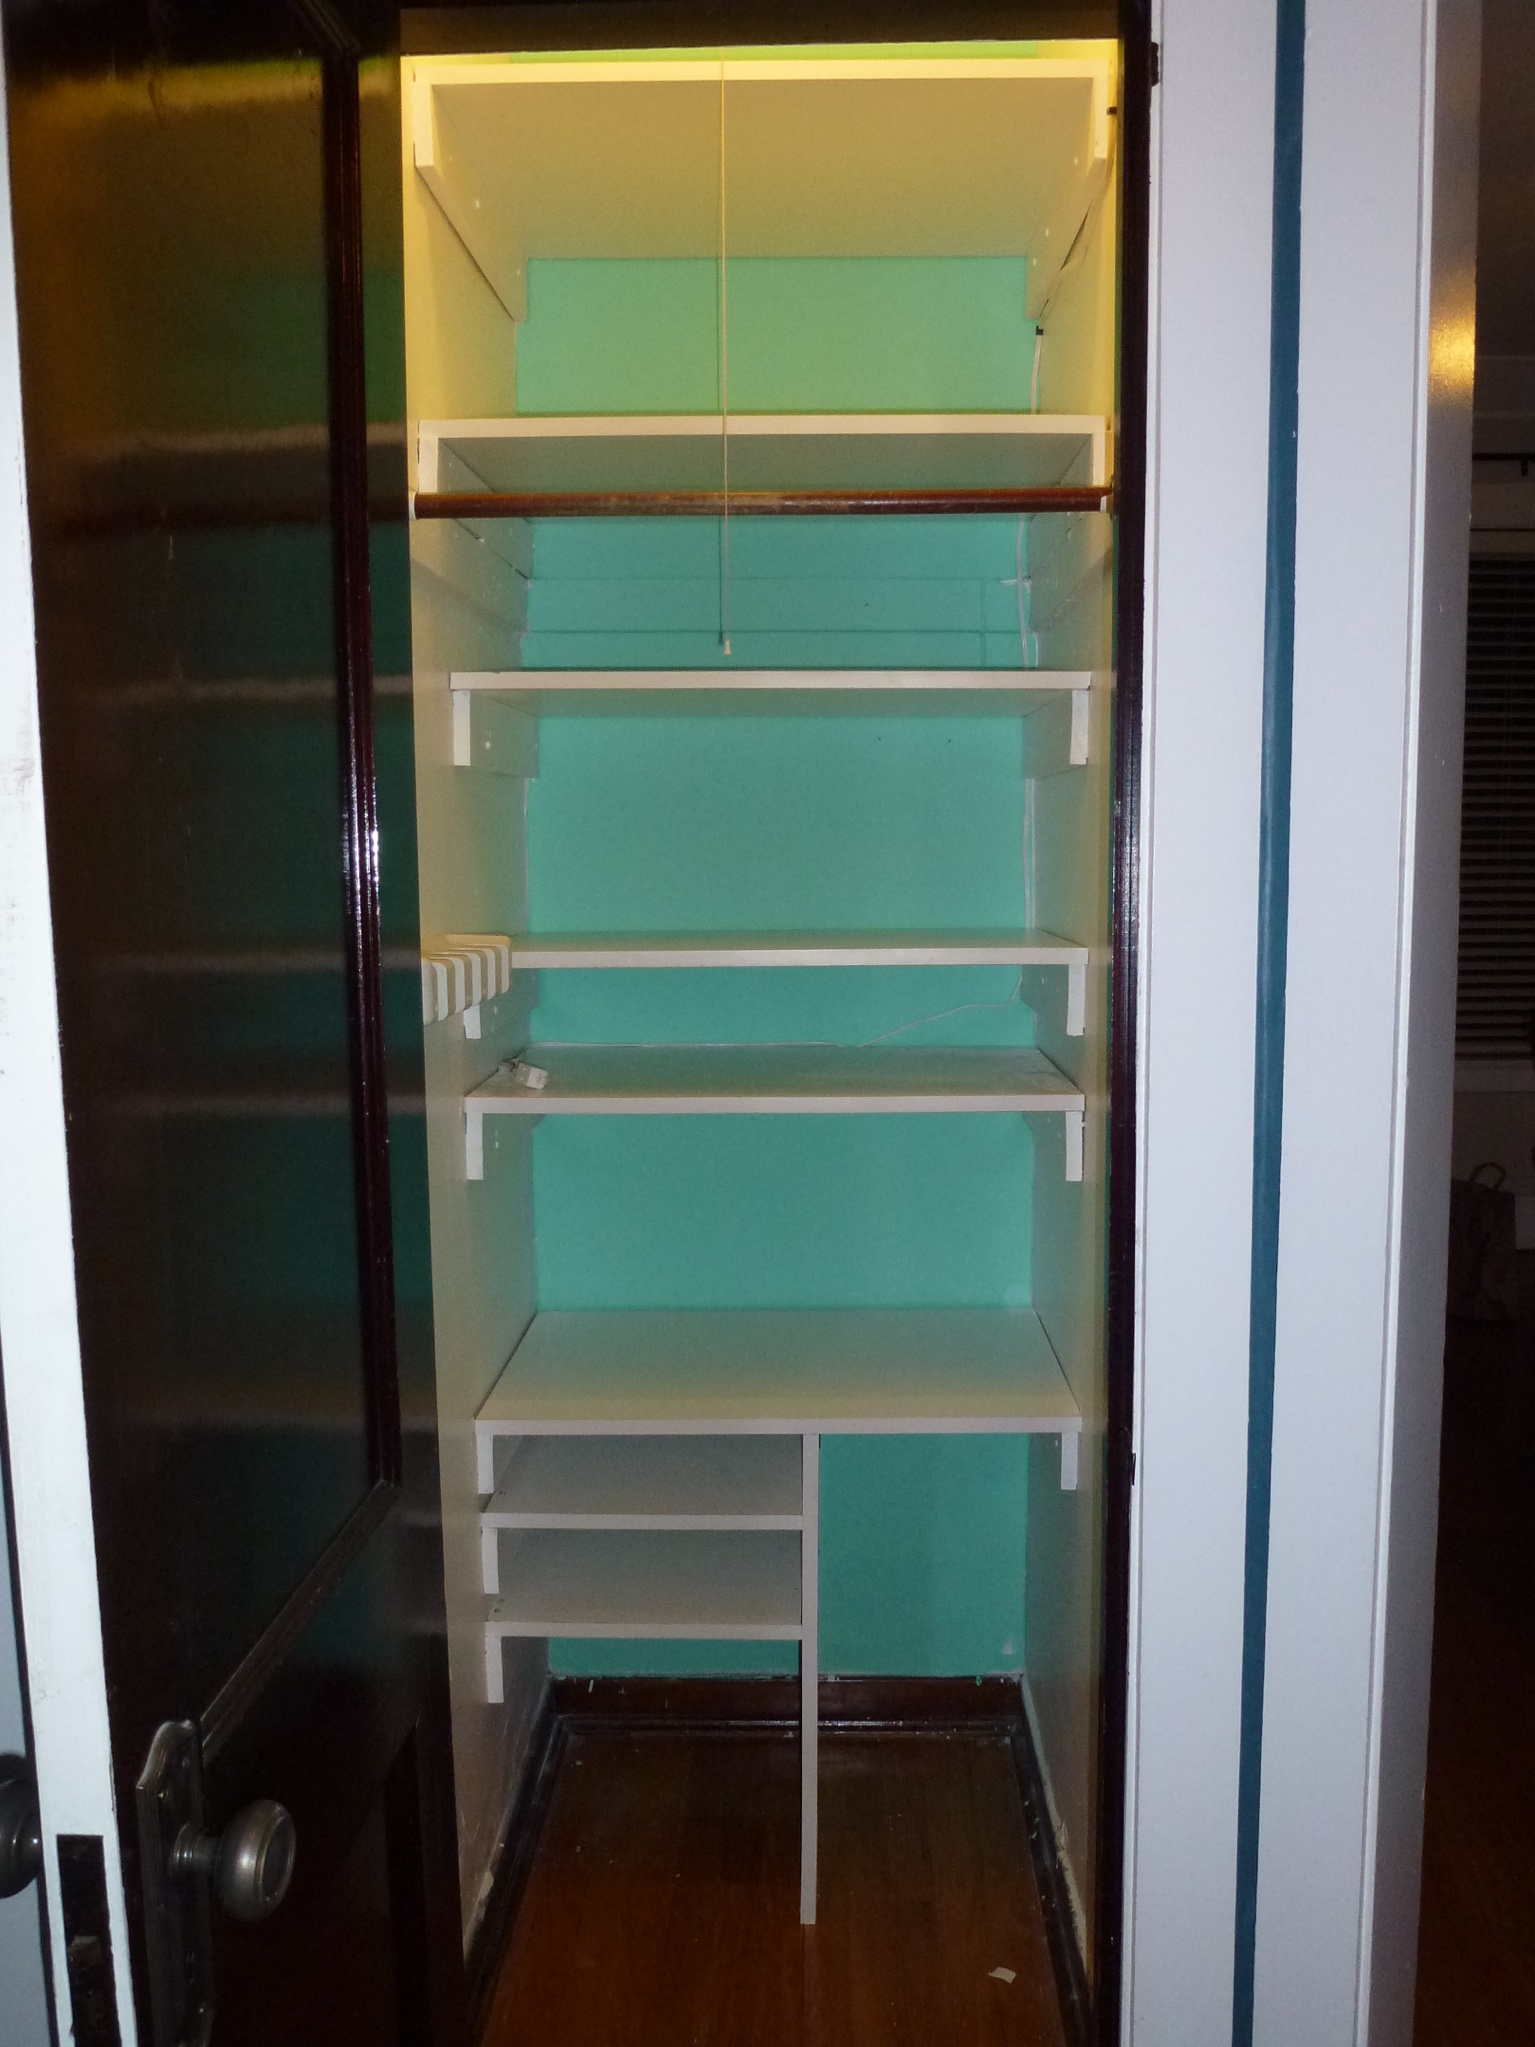
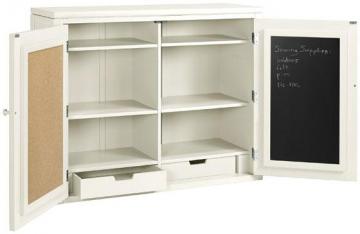
Its in the middle of the house, in the teal hallway between the bathroom and dining room doors. It used to hold all my sheets and towels, before this happened. Plus all my coats, and extra craft supplies, and cereal when I buy too much. Winter boots. My sleeping bag. Randomness. But all of it–there’s nowhere else to go. And it was in pretty rough shape:

Hall Closet old

(That was embarassing). After I found new homes for the linens, I never really figured out a good or efficient use of the shelves. Everything in there was just the leftover random stuff from when my sister and I both moved (I got all of both of our stuff). So it wasn’t being used very efficiently. And now that there are two of us, we have more storage needs:

  • my crafting supplies
  • his suitcase (he travels several times a month, this has to be very easily accessible–not the basement or a top shelf)
  • his tools (he’s got way more than I do)
  • cleaning supplies (realistically, these are his. I’m a terrible housekeeper)
  • extra shoes (realistically mine. I think he has like four pairs. I have…more than that.)
  • all the random stuff listed above, like pantry supplies, extra paper towels when we buy in bulk, sleeping bags

And of course, this is still both the coat closet and the broom closet so we need to keep that space too.

No biggie right?

The junk in there wasn’t going to cut it; we needed real shelves. Sturdy ones. And a spot for the suitcase. Oh, and this closet is only 29.5 inches wide. We didn’t want to waste an inch, so our solution wasn’t going to come off the shelf. So we decided to build it out ourselves (Boyfriend finished his whole basement in his old house, so he was ready to go for this project).

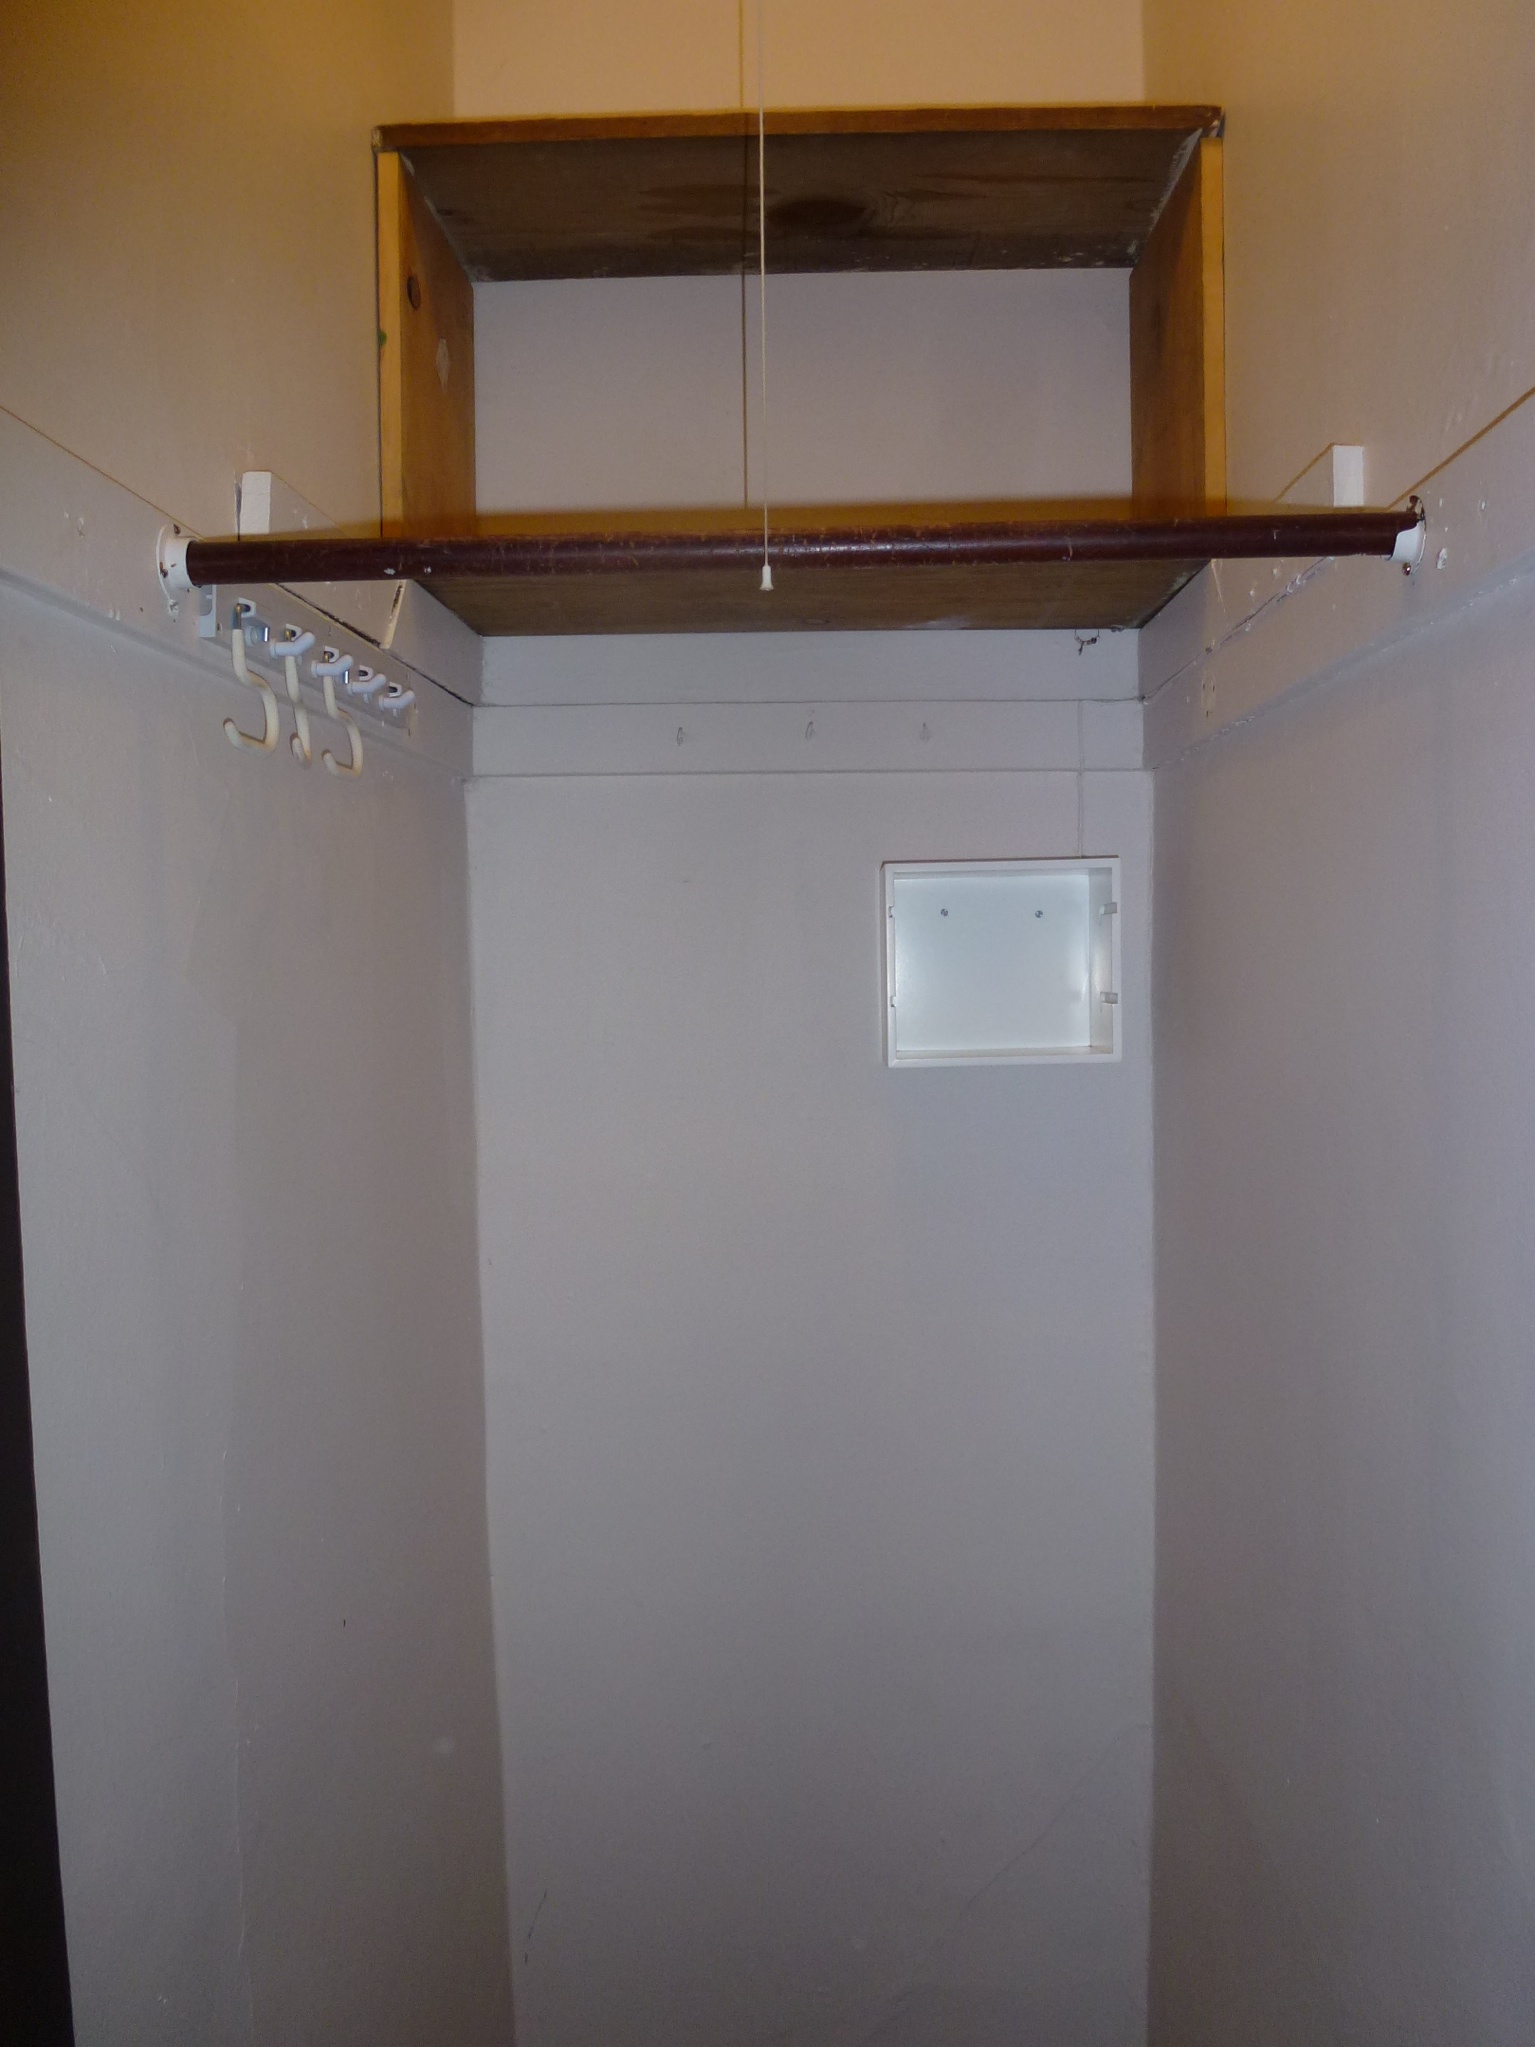
We talked and I made lists, we talked some more and I made sketches. We measured, and measured again, and made more sketches. We pulled everything out, til we were left with this:

Hall closet old empty

Two shelves, a broom organizer, a rod, and a ribbon hanger. (Believe it or not, this closet was even worse when I moved in. There was a single 24 inch deep shelf and a hanging rod in the back.)

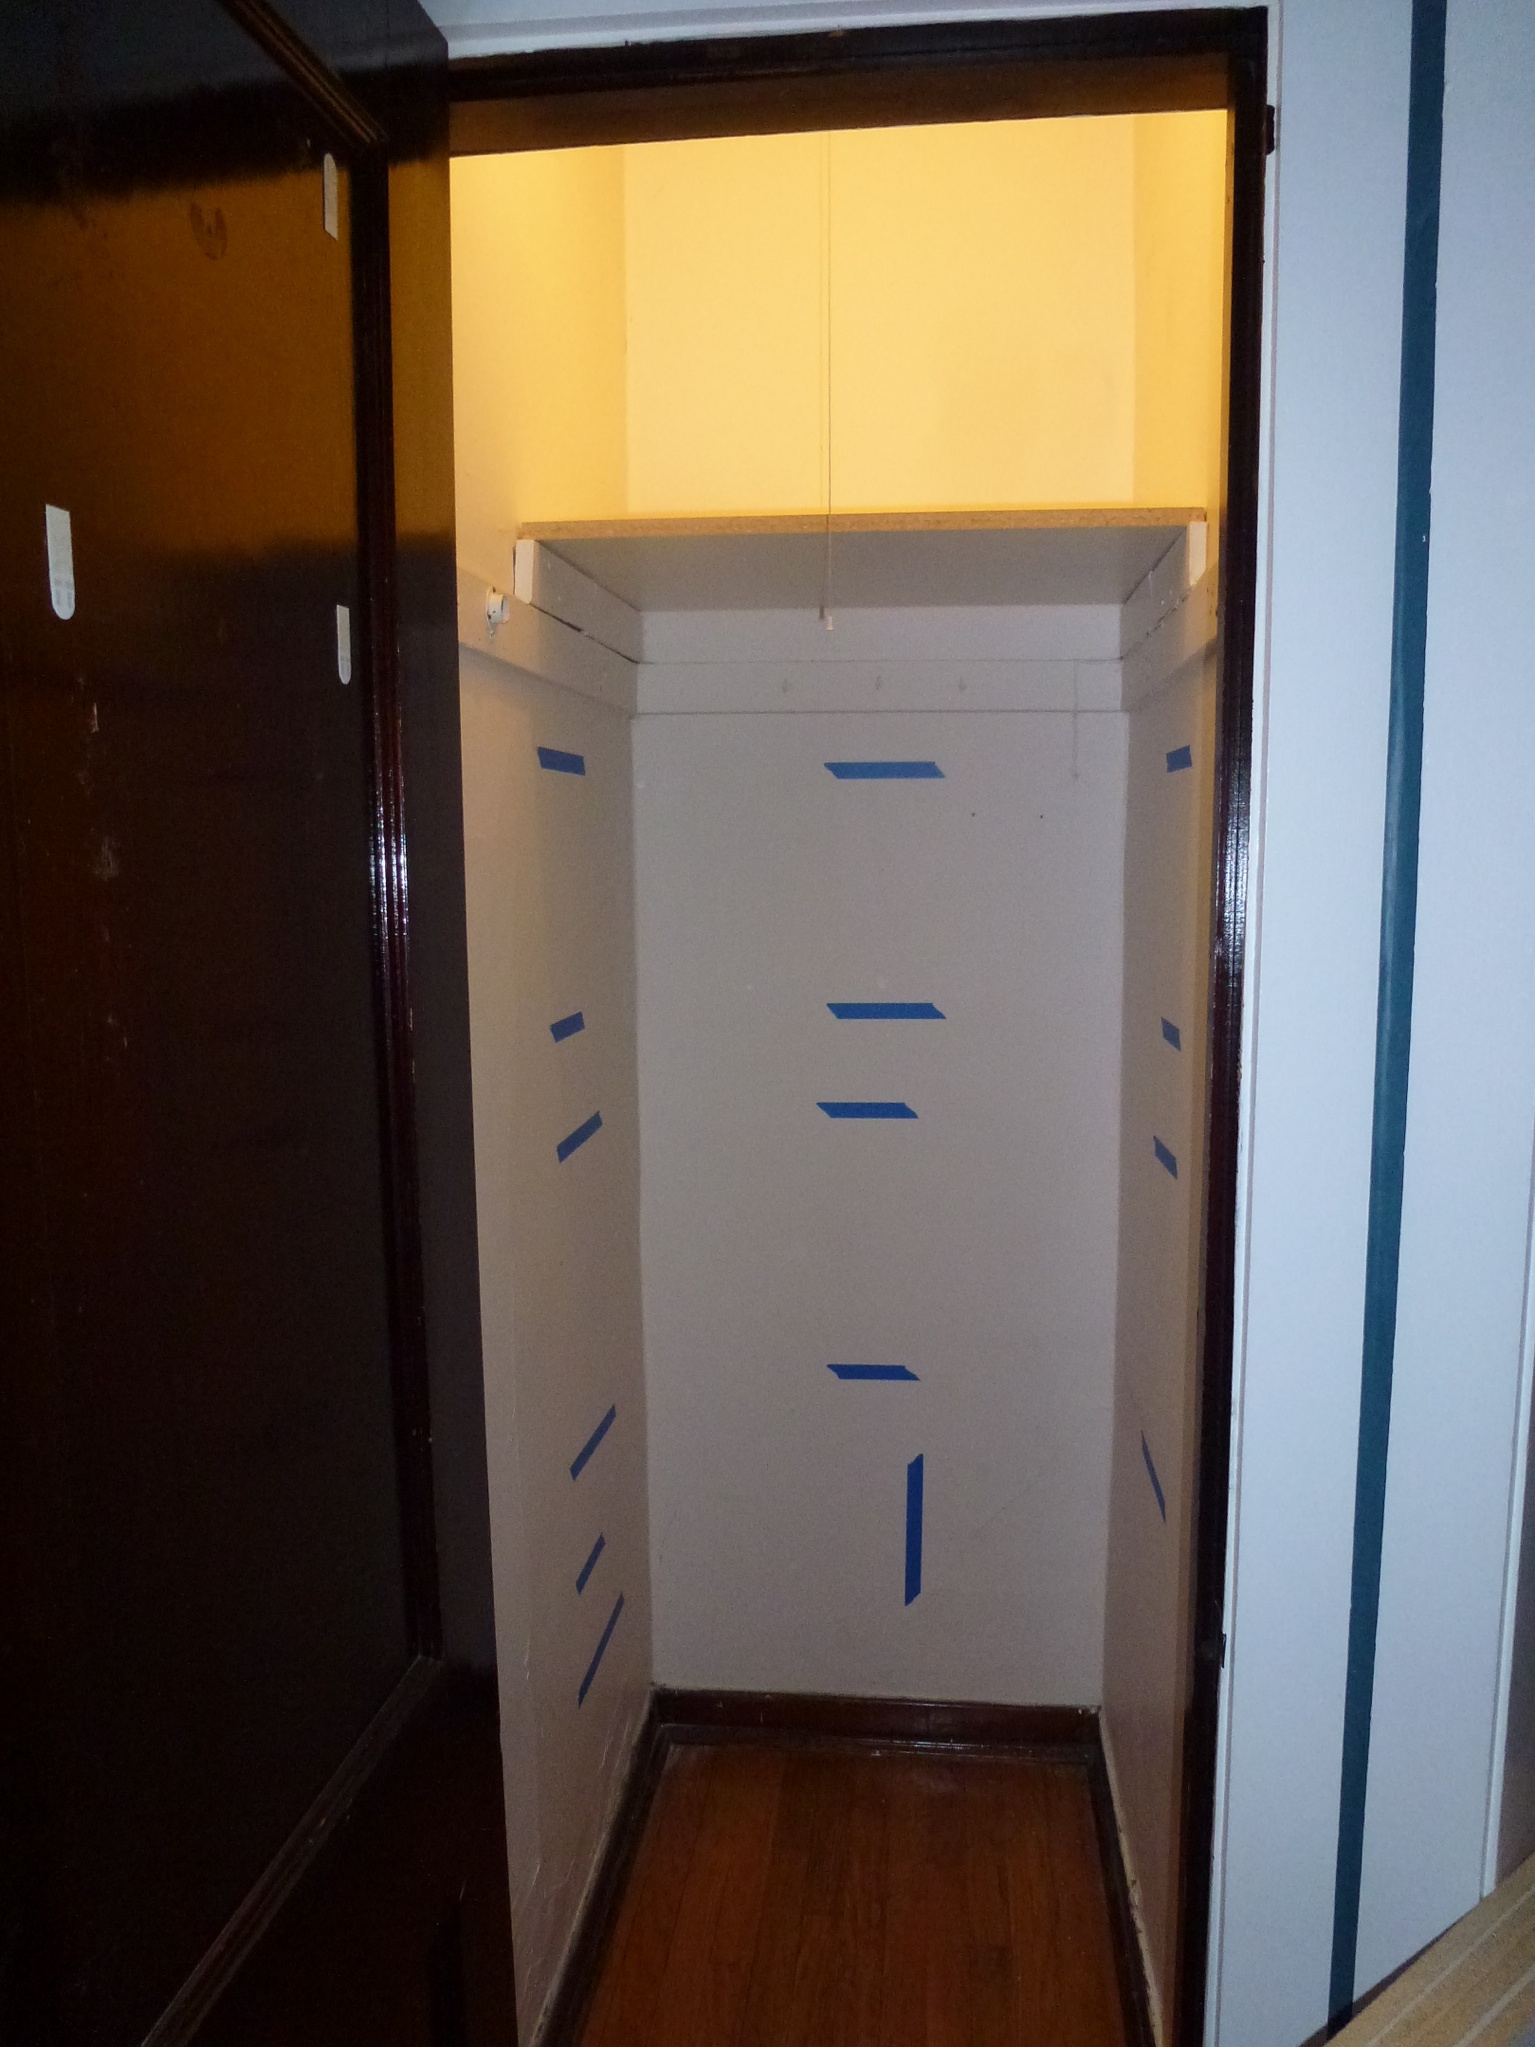
The good news is, this closet is DEEP, so there is enough room for some pretty substantial shelves, even with coats hanging in the front part of the closet. After all our sketches, and lots of math on my part, we felt pretty good about our plans. So we finished ripping everything out of the closet, and then I got to work with a tape measure.

We scoped out Home Depot and found 2 x 4 sheets of laminate (we went to the city Home Depot, which has a smaller selection, because they also have a Home Decorators Collection). And then we finalized our plan, and headed for the bigger Home Depot–our design would require SEVEN sheets of laminate, with more than a third as scrap because of our 29.5 width. Luckily, they sold 4×8 sheets, meaning we would need only one, plus a smaller sheet to make all six shelves, plus two half shelves and the center support.

Since we were using irregular measurements (to accommodate all the things listed above) and wanted to permanently install the shelves (no adjusting), I wanted to be sure they matched what we wanted. In addition to remeasuring a whole lot of cereal boxes and various tools, I did this:

Hall Closet Taped Shelves

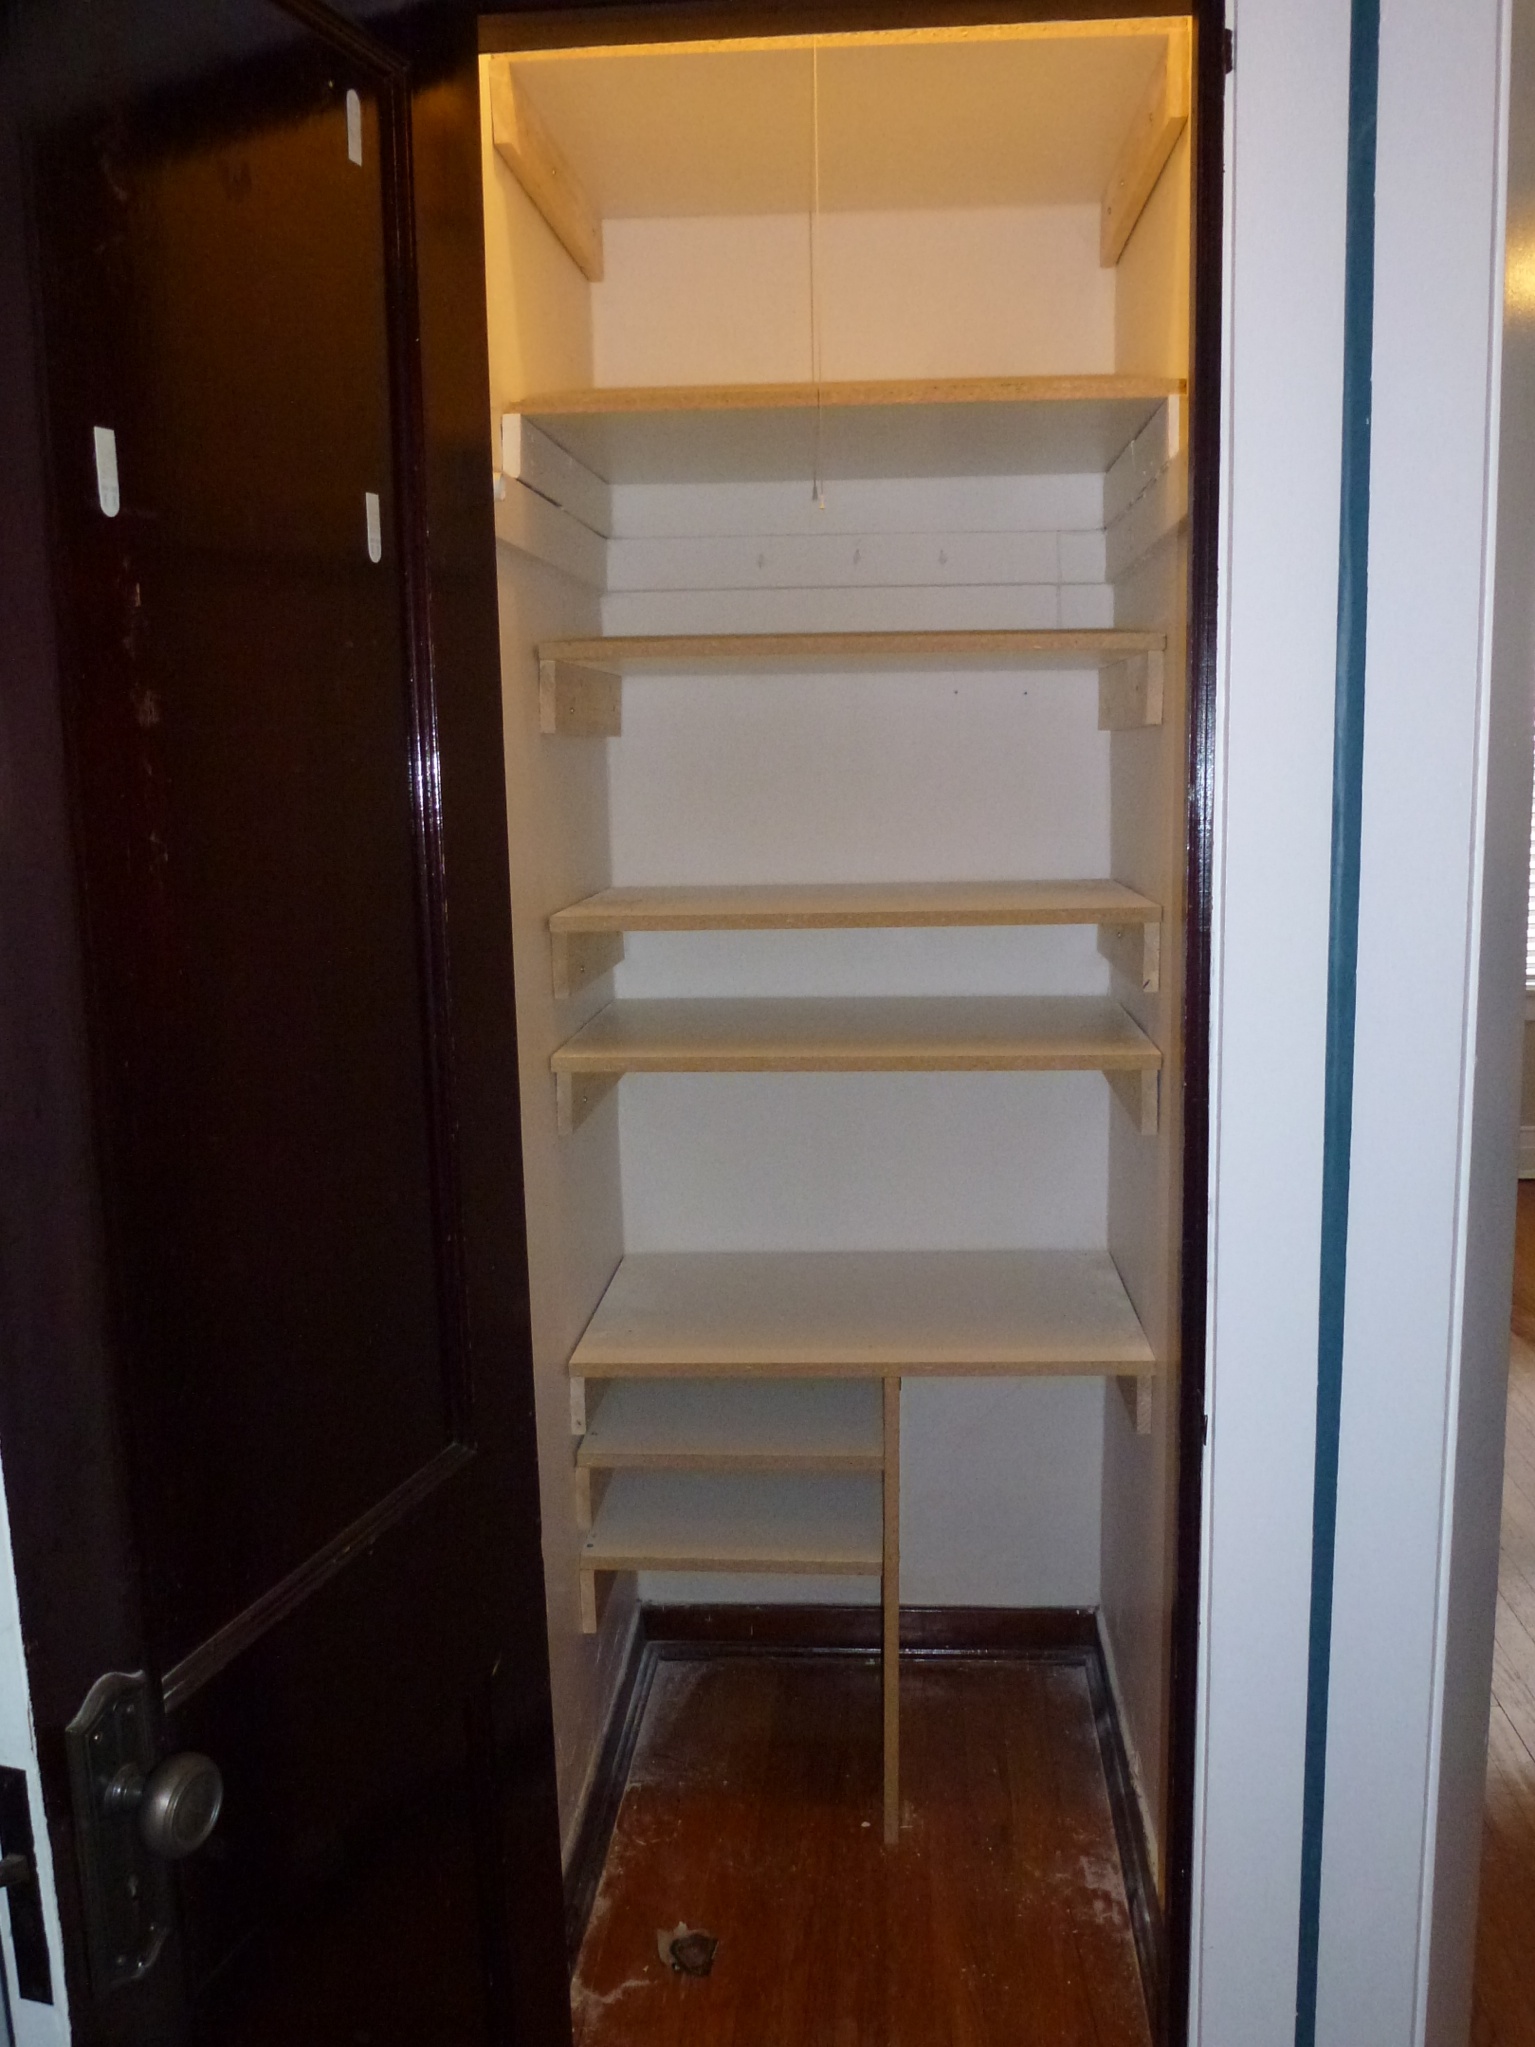
The shelf at the top was placed on the only existing supports we were keeping so we wanted to make sure there was enough space at that top shelf. The tall shelf near the bottom is the sturdiest one since it goes above the half shelf at the bottom (making room for the suitcase) and is for tools. The other tall shelf is for cereal and other pantry goods.

Those were my key contributions to the closet. I started unpacking some of the boxes (the movers don’t come until next week but we’d been bringing over boxes of stuff weekly to start moving him in) and organizing the kitchen–its a one person closet, and this was Mike’s deal now.

He got it to here:

Hall Closet Shelves

And then it was time to paint. It was dingy and ugly, and also kind of cream, which looked even worse with white melamine shelves. So we primed it (with, um, oil based primer because I can’t read and then we didn’t have mineral spirits so we had to go to the store with me covered in paint because I had no way to get it off BUT) and then talked paint. Since we had to go to the hardware store, I really wanted to paint the back of the closet a fun color. I thought it would be cool. And its a small wall, so a test pot would get us there. Except not at the true value, where they sell only itty-bitty testers and in tiny little pots. I was thinking of buying a quart, but really, so not worth it. Its for a closet. And then the salesman was all, can I help you, we have oops paint. So we got a $5 oops GALLON of this:

Hall Closet Painted

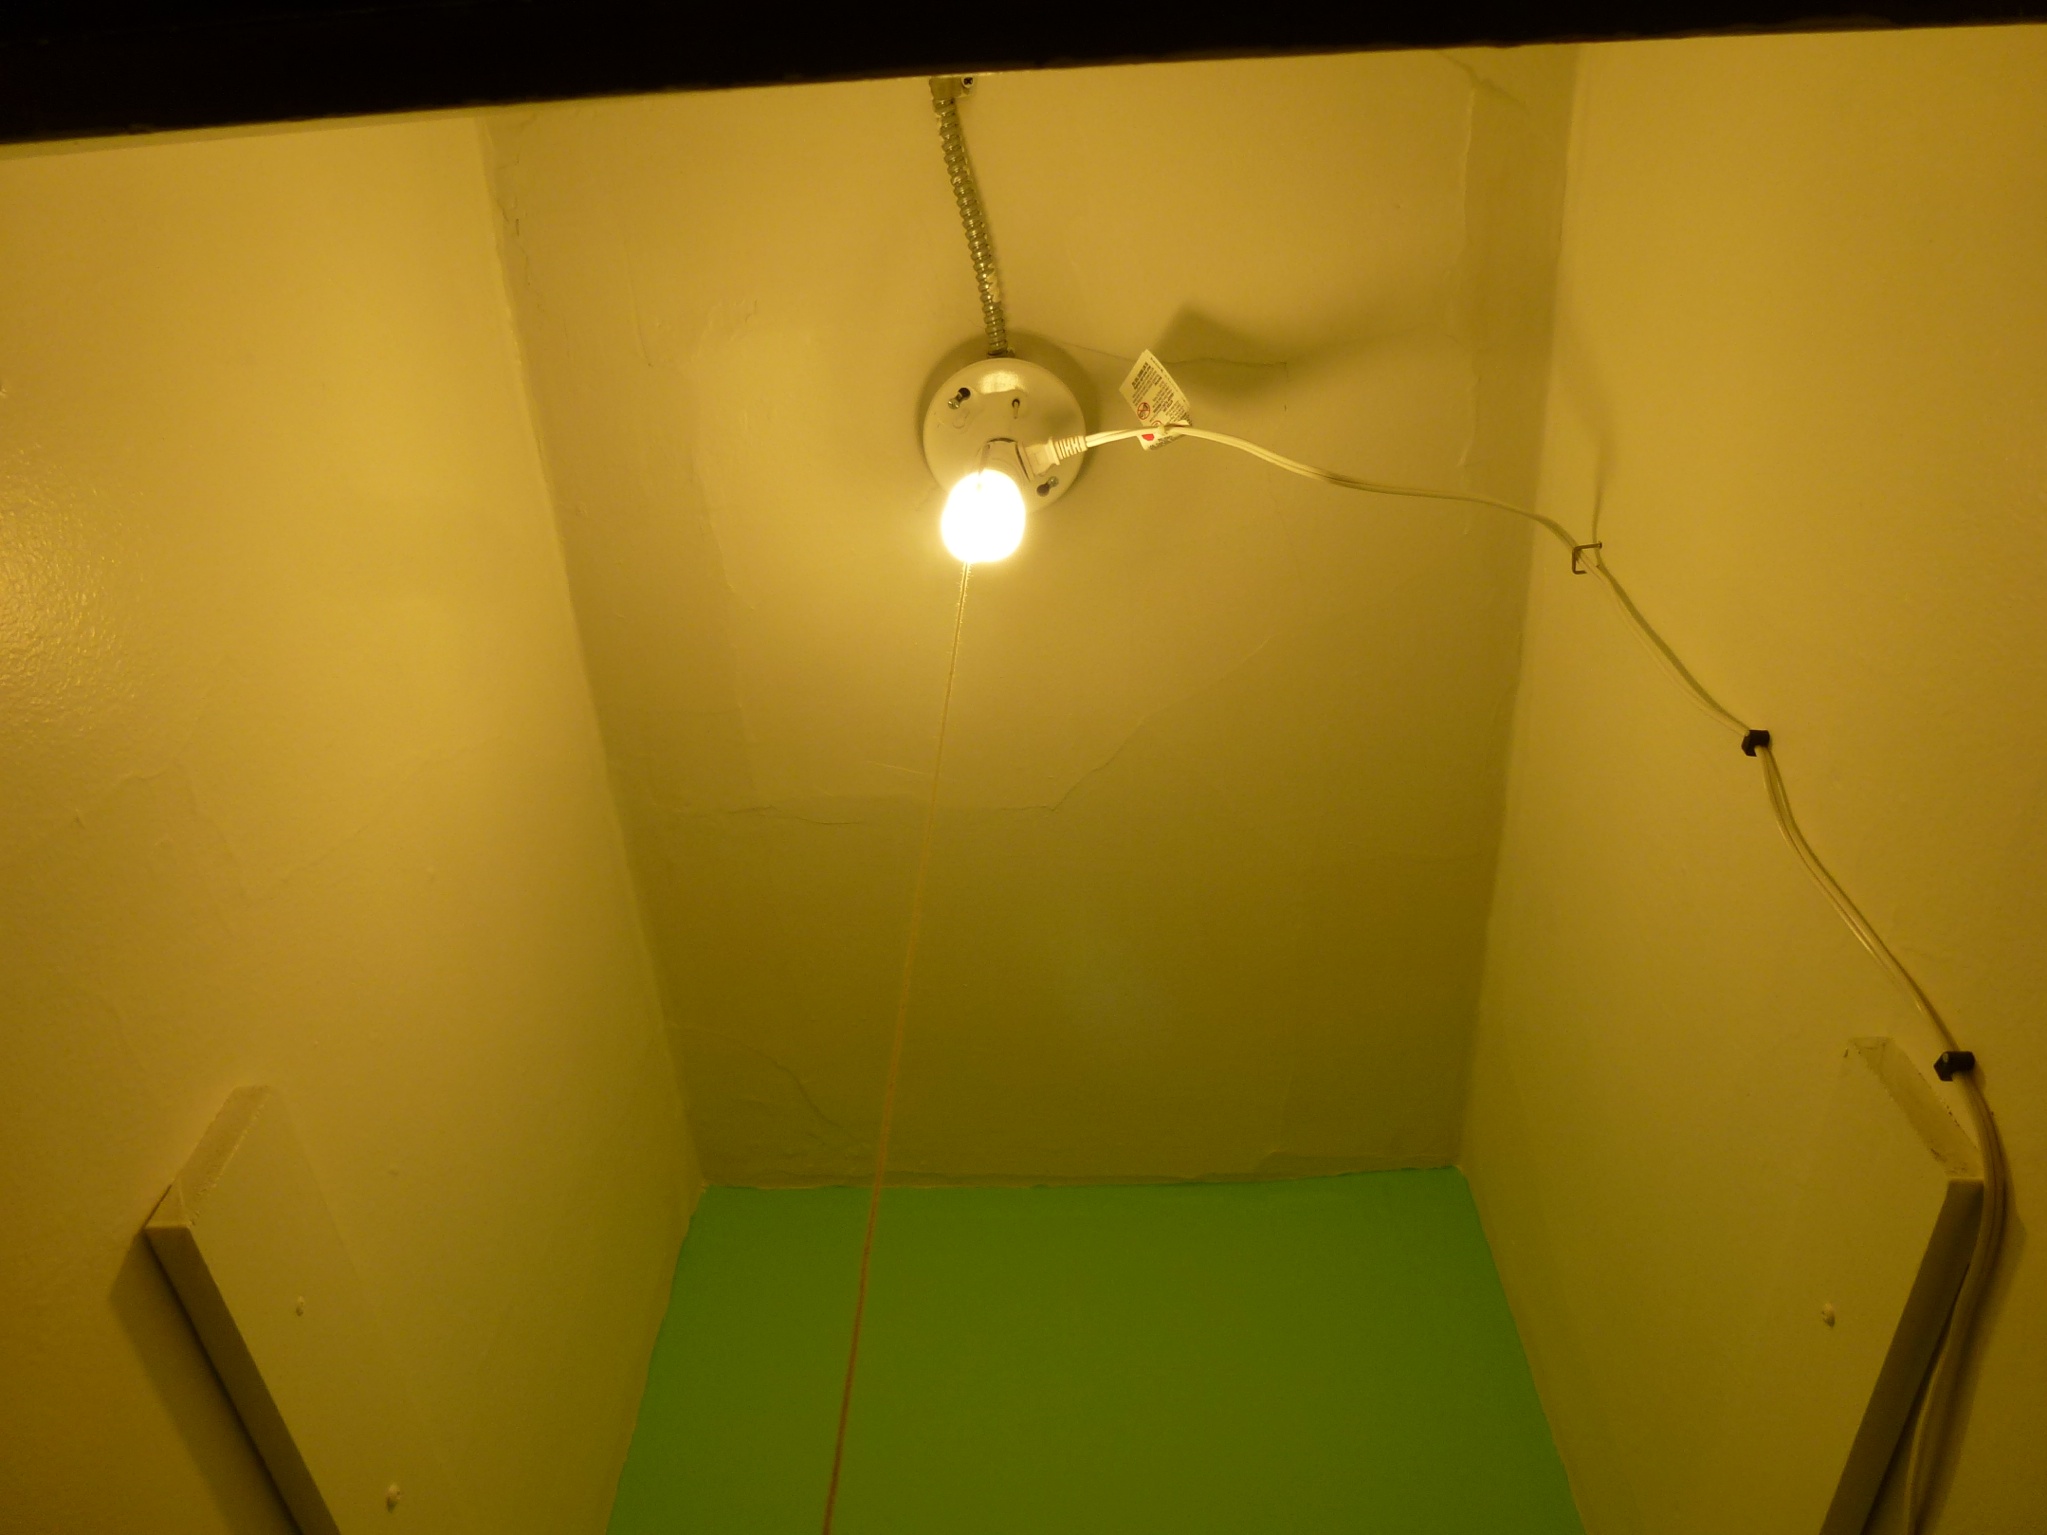
He was against it, then offered to paint the whole thing that color (yikes!), and now thinks its fun too. Win! We also got iron-on edging for the laminate so it looks more finished, and he wanted electricity (to charge all his tools) so he did this:

Hall Closet Light

Its an adapter for the light that includes outlets, so you leave the fixture always on, and then put the bulb below with a second string so the light isn’t always on. Then he tacked an extension cord into place. It isn’t in the back because we’re too short to reach the back corner (ever. You should have seen us trying to paint).

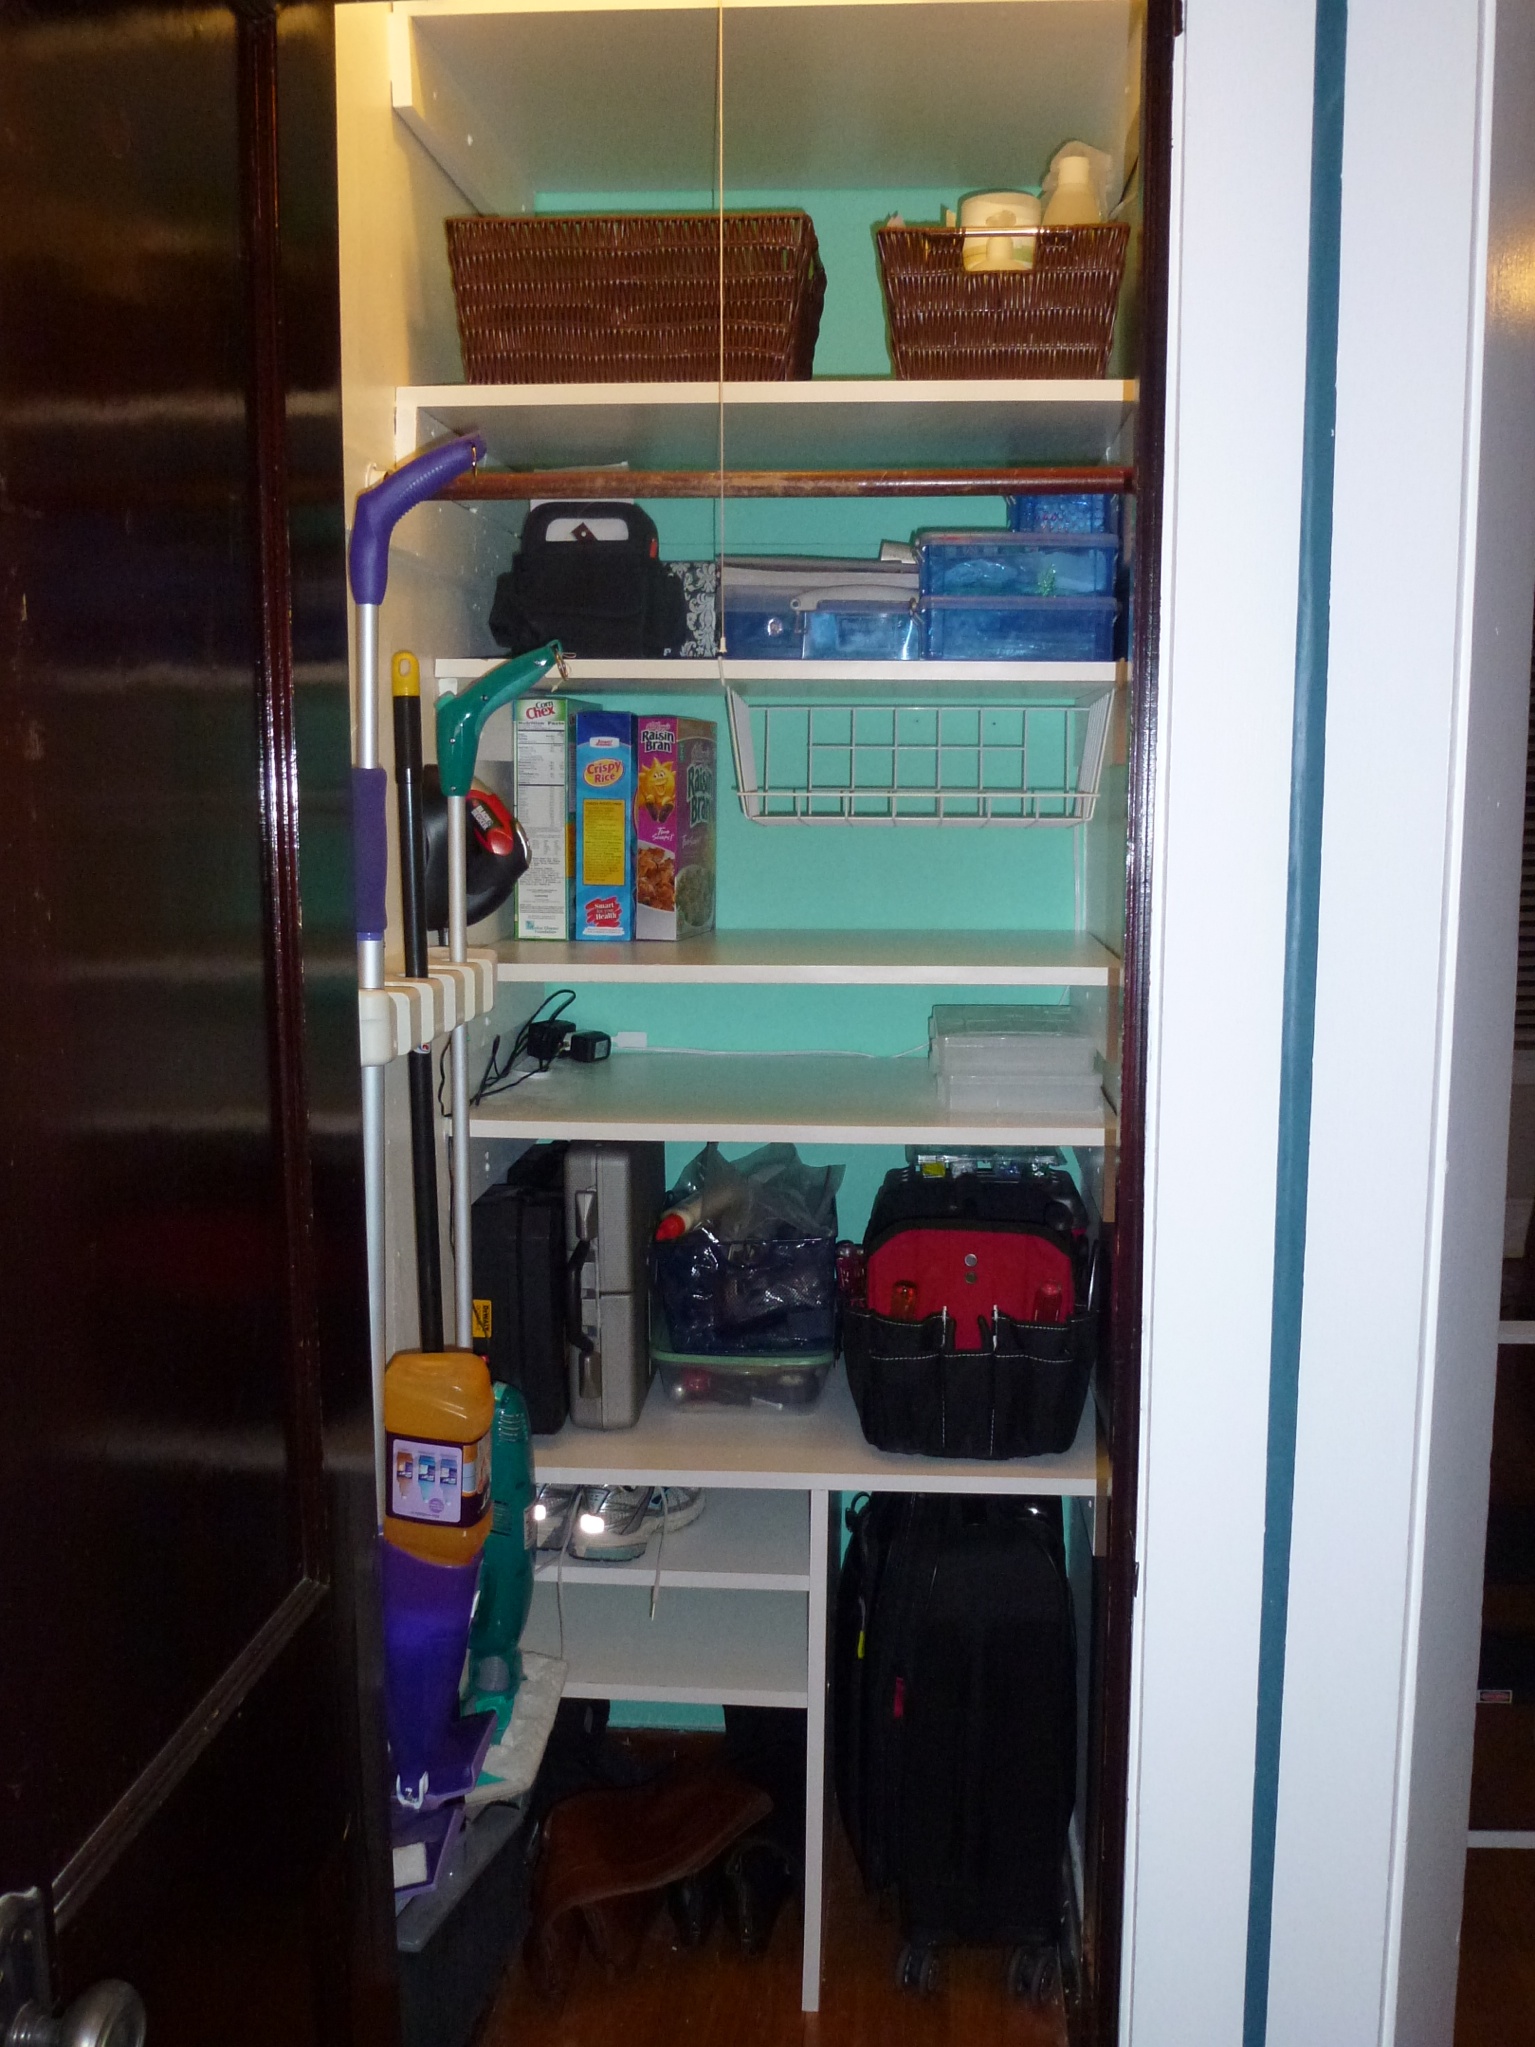
Then in went the broom holder and the coat rod, and we started to load stuff back in:

Hall Closet New

The suitcase fits perfectly, the little shelves next to it are for extra shoes, the bottom is for boots, then we have tools, food and cleaning supplies, more food, picnic stuff. All sorts of fun. It doesn’t look this empty anymore; we’ve moved in more boxes, and its filling up (although not packed). And the rod has coats on it, because we have nowhere else to put our coats.

I’m sure those of you with houses (and lots of closets) feel sorry for us right now, but we’re really proud of how well we’ve made the space we do have work for us. This closet now packs a huge storage punch, holds brooms and dustbusters (you can’t see it in pictures, but on the left side where the brooms are, he wall mounted the dustbuster above the door, where it charges too), has his suitcase easily accessible, holds all of our coats and plenty of extra stuff. I’m sure I’ll get over it eventually but right now I keep opening the closet and looking.

We made a few small-but-awesome tweaks to our bedroom closet too, which I’ll share once the house calms down enough to accomplish anything.

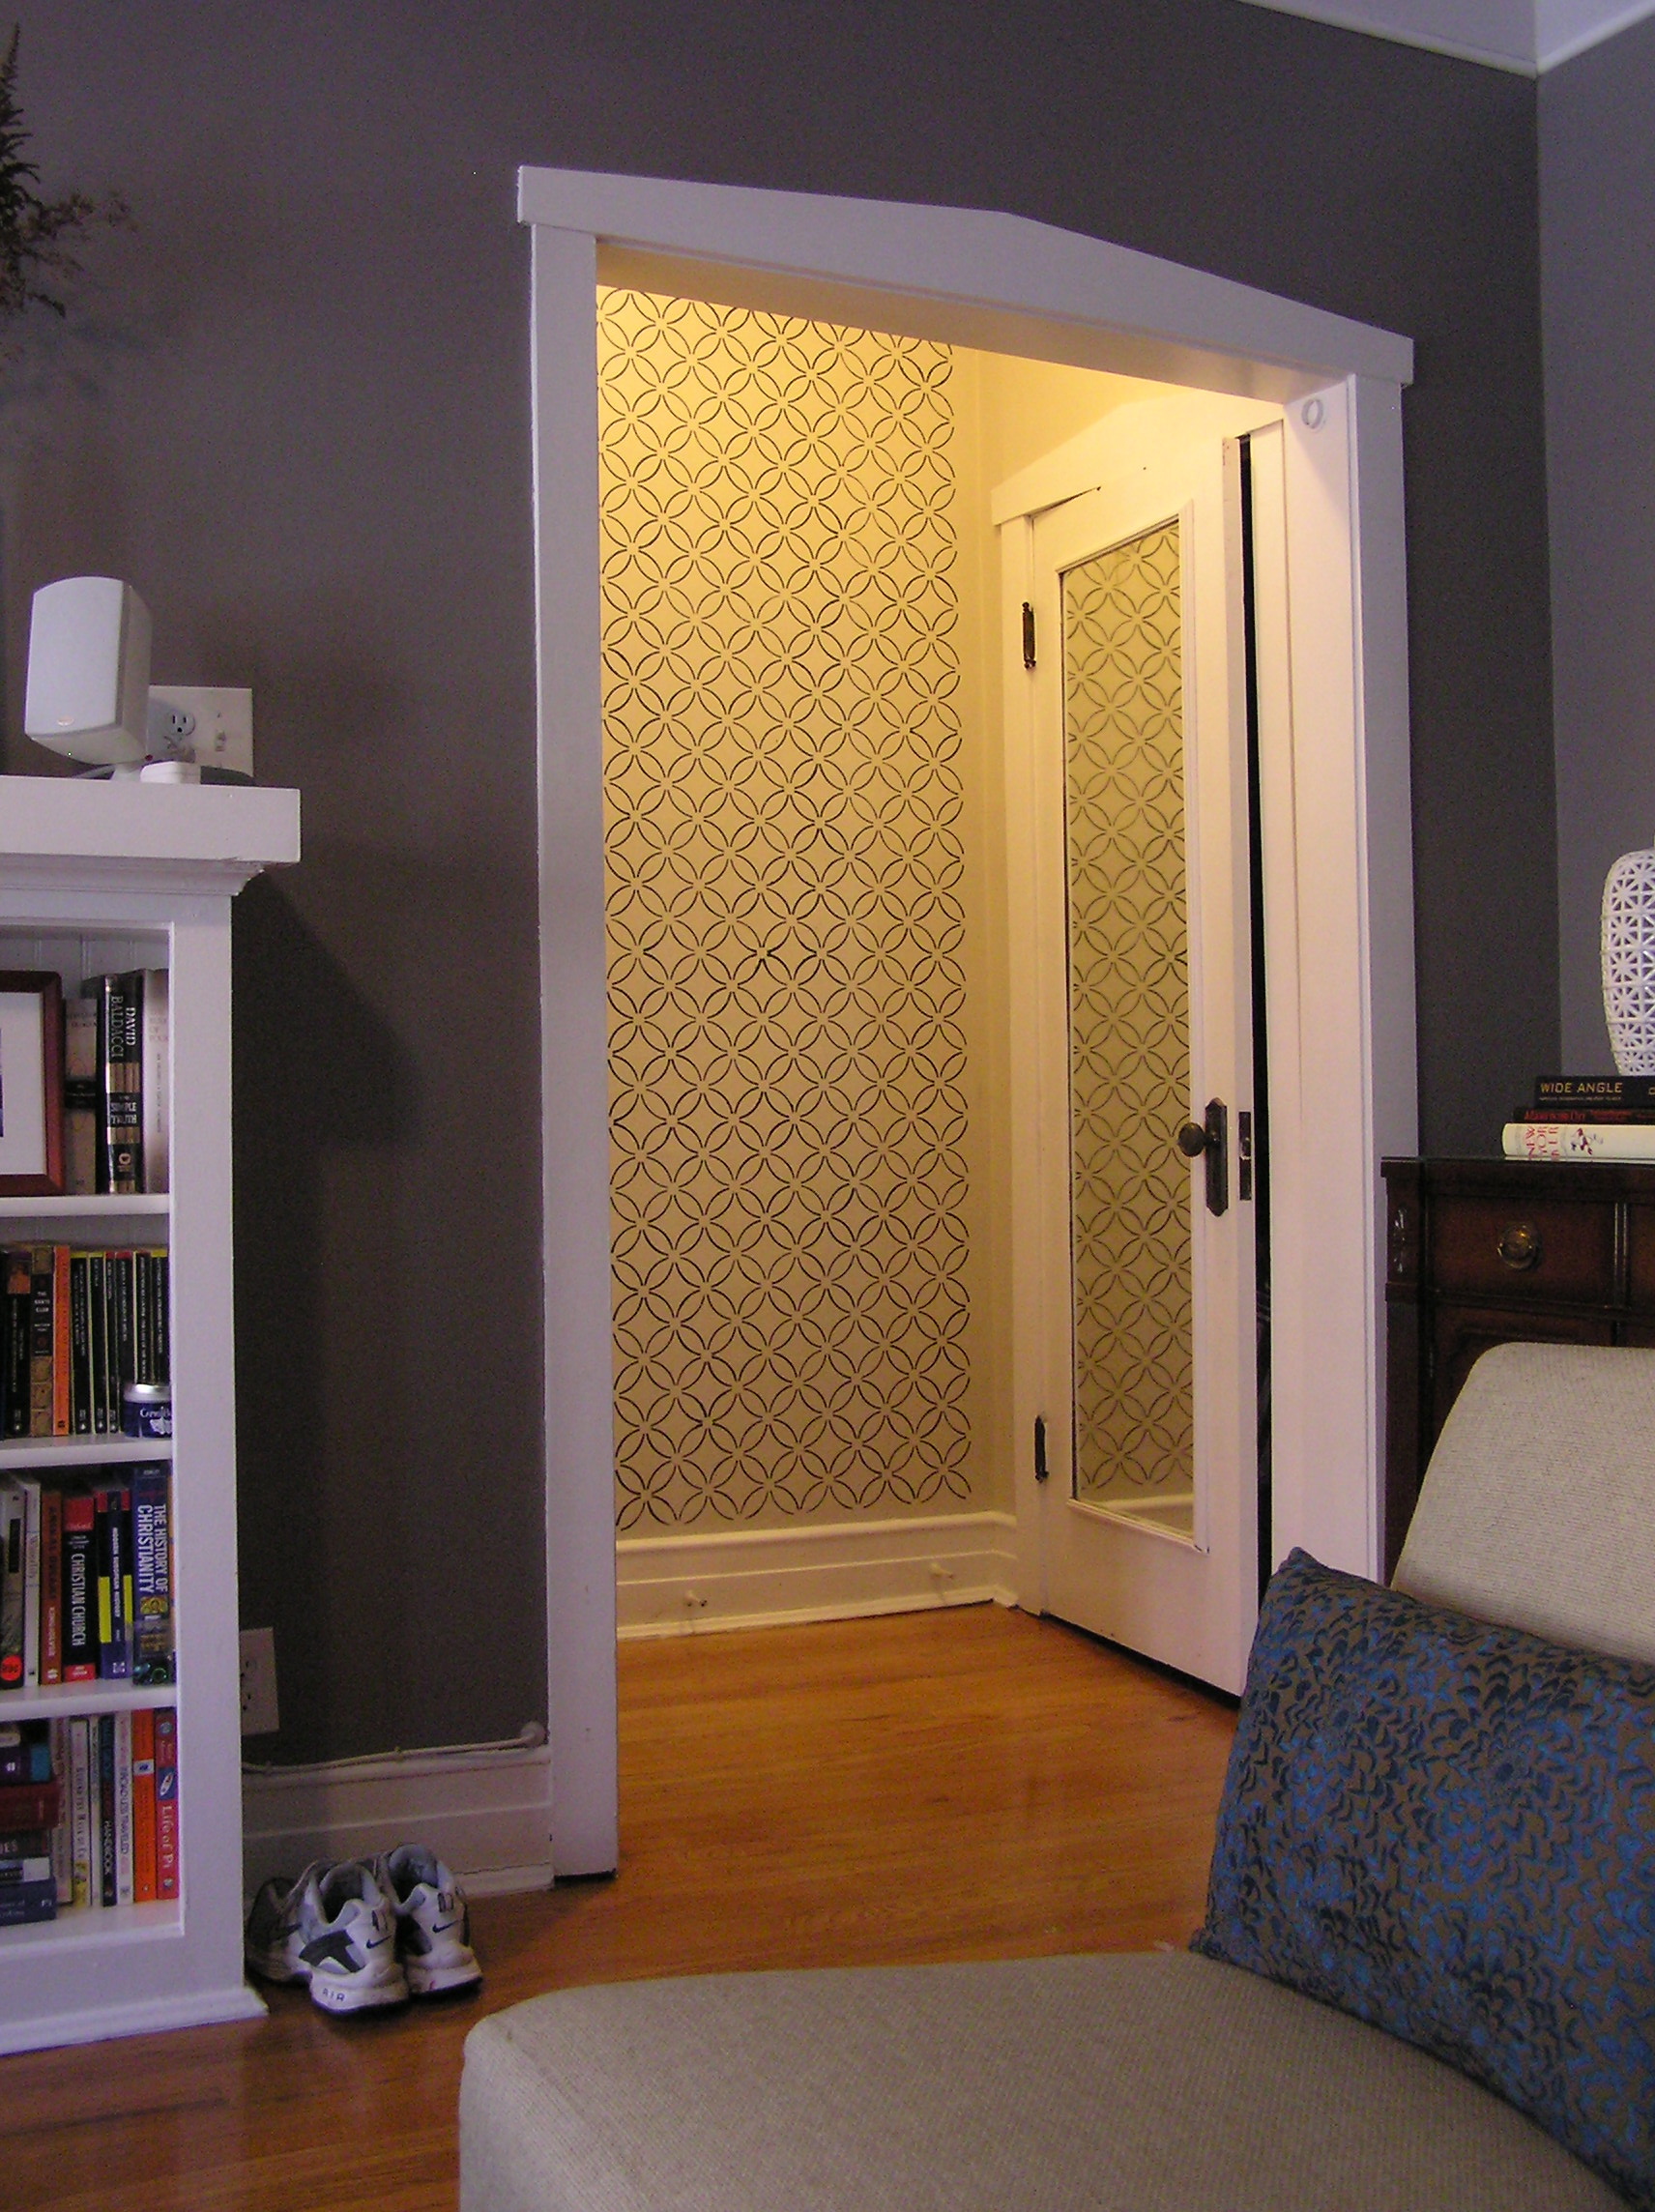
*I have a front hall closet, but it only looks real:

Stenciled Hallway from living room

It’s actually only about 9 inches deep. It has hooks inside. I’ll share it sometime, because I think I’ve packed a lot into it. But it isn’t even deep enough for hangers, let alone lots of stuff.

How many closets do you have? Do you love organizing closets as much as I do?

Pinterest Challenge: Herringbone Art

banner

It’s Pinterest Challenge time*! This great opportunity to stop pinning and start doing is hosted by Sherry and Katie and is always a ton of fun.

Apparently DIY art is my favorite thing, and I needed something big to fill the wall in my dining room…here’s what I came up with:

DR Birthday Art

There’s a very popular pin of a painting all over Pinterest….I thought it was ok, but the colors aren’t really my first choice. Herringbone Art

The first DIY spin on this I saw  was Amanda’s using art by her kids:

I just had to do one of my own. I’ve been looking for something to replace my large/boring/generic/beige hand-me-down art from my dad in the dining room and this seemed like the perfect choice. Plus, she did it with her kids—so cute.

Then I remembered I don’t have kids. First I thought about getting some of my students to make me art, but I didn’t get around to it. Then I realized it could be my activity at my birthday party! (You know how when you’re a kid you have an activity at your party? And then you grow up and you mostly just drink? I missed that memo. I don’t drink, but I have to have an activity.)

  1. As soon as people finish their ice cream, tell them, “Now you have to make my birthday present!”
  2. Give them watercolors that your mom brought and some paper. Show them the picture above. Tell them you are going to cut it up and that you’d like them to use colors that match your curtains (only three people will actually listen, but its still worth a try).
  3. Have them paint.

4.   Let paintings dry. Ideally for a month. You want to make sure they are really, really dry. (You may also just be disorganized.)

5.   Figure out what size you want your pieces to be. Especially if people drew actual pictures, smaller is probably better.

3 sizes I considered. A 1:3 ratio looked best to me.

6.   Once you decide on your pieces (I did 1×3), measure out on the backs where to cut. Set aside any that you will not want uniform pieces of—basically anything that was a thing (like a tree) and not abstract.

7.   SPECIAL CUTTING TIP: I measured out one inch increments on one side and three inch on the other. If you have extra on one side, which you likely will, make your marks there and DON’T cut all the way through. You’ll end up with strips attached across the top. Then you can line it up and cut once to get several pieces, which saves a ton of time.

Measure the dimensions along two edges. If you use a paper cutter, you won’t need to extend the lines. Cut MOST (but not all) of the way across, so you have a fringe.

When you slice across the mostly-cut strips, you’ll get your pieces. Much faster than cutting strips into individual pieces.

8. Cut, cut, cut.

9.  Start playing. Lesley did this while I was still cutting and measuring.

10. Get ready to do this for real. My mat left a space that was 19.25”x27.25”, so I measured out a 20”x28” box on a large piece of white paper. I also sorted the pieces a little bit, mostly by color intensity.

Ruler, pencil, scissors, strips. And, um, toes.

In retrospect, I wish I had set aside a piece or two of everyone’s to make sure they all made it in. Pretty sure I was successful, but not positive.

11. Decision time: Do I want to orient the herringbone vertically or horizontally? (Horizontally. It’s a big wall)

12. What angle looks right? (I’m using math in real life! First I measured everything and now I need to find an angle!!!) [Spoiler: its 45 degrees. Lame. Although sensible.]

13. Play.  Lesley’s playing above helped a lot here. It was also interesting to see how the art changed when I was looking at a photo instead of the real thing.

14. Once I had a layout I liked, I needed to stick it down. It will be behind glass, so I was hoping I could just double sided tape. I used American Crafts tape runners, which I very highly DON’T recommend. Very annoying.

15. Leave it on your floor while you go on vacation.

16. Restick some pieces because you used cheap adhesive (thanks AC), stick it behind glass, and get it on a wall! Everyone loves it and I love that so many people who are important to me are represented in all the pictures.

DR Birthday Art

I’ve seen other cool takes where you use one large piece of art and cut it in that pattern and then restick it, or where you use a pre-existing painting and tape out the herringbones. Just look for herringbone art on pinterest for some other equally-awesome takes.

Check out the other projects linked up by the hosts Emily, Katie, Sherry and Renee:

pinterest-pic

And my other Pinterest Challenge Projects:

Circle Art: Framed

Ring Around the Artwork

Storybook Final

Childhood Favorites Art

Finished Drawer

Map-Lined Drawer

What did you do? Do you share my desire for making tons of homemade art (there is tons more that weren’t Pinterest Challenges…I don’t know what’s wrong with me!)

Trading Spaces

Ok, not actually trading spaces…just adding another person.

Mike’s moving in. Furniture drama aside (we have WAY too much stuff), we are in mostly good shape. I’m sad that my mantel won’t look like this much longer:

Living Room Mantel

The mirror will be moving above the console, replaced by a (gulp) 58 inch TV. For a girl who doesn’t actually watch tv at all. But stuff we’re ok with. We can combine, and weed out and all that with technology (mostly his) and office supplies (mostly mine) and kitchen stuff (a mix). But not clothes. I do the whole sweatshirt-stealing thing sometimes, but for the most part we can’t share that stuff. And we have different interests, and other stuff that needs to share space.

And 2.5 closets. Total. (We’re working on that one, and I’ve got some great progress to share.)

Mike’s a consultant, which means he travels fairly frequently, and his suitcase needs to be accessible. He’s a pretty handy guy (lucky me!) and he’s got a good number of tools. Many of them can go in the basement, but not everything. Oh, and he’s in computers (well, networking) and so has a ton of cables and cords and the like. And I could be way more efficient with my craft supplies. Enter:

MSFile


Sigh. Be still my heart. And if that’s not enough, we paired it with this:

MSHutch

It’s awesome. We got the flat file cabinet the day before we got engaged (and he made me put most of it together by myself, telling me he had “errands”), and the hutch the following weekend. They’re amazing. So amazing I will obviously talk more about them later.

So, for now at least, forgive me for being scattered. I’m hoping to get it together this week, but if not, next week for sure. This Friday my students have their AP Exam (I teach an AP class) and then the following Friday is moving-in day (although we’ve already done a lot, its mostly just the movers dealing with actual furniture). But then? Down to two preps without much to do in AP, and for the next three weeks mostly out of the room while my resident (student teacher) has his final training wheels go at things. Although the camera just went to Hawaii on a 2 week vacation with my photographer, so quality is probably going to suffer here.

Any big changes for you? Do you know anyone who has my awesome cabinet? I’ve been visiting them in the store for a year now, and was so excited to justify it!

Earth Month: Ride a Bike

earthmonth

…or at least consider alternate transportation. While public transit can be great (and here in Chicago there are buses and trains galore, and population density is high enough that my grocery store is less than 3 blocks–totally walkable) , its not always an option.

I carpool to work almost every day (with my other half–MC. Two Mary’s both with C last names). It’s awesome. We’ve been carpooling over a year and it’s routine now. I’m not sure what I would do if I had to drive alone with any kind of regularity.

Here’s how we work it:

  • We’re flexible. Roughly speaking, we switch off weeks, but today should have been my day and she wanted to drive (street cleaning)
  • We always check in the night before. We had to kick someone out of carpool for one too many last-second “hey are you driving”, as well as some other issues.
  • Stick to a schedule. We leave at 6:30. Neither of us is ever more than 5 min late and we are basically always on time. We text when we get in the car to pick up the other one, and each know when to head outside. If one of us wants to get to school even earlier, we work that out the night before.
  • We like driving together more than almost anything else (I’m writing this still at work at 6:30 because MC coaches), but drive alone sometimes if you need to. Don’t be resentful because you keep having to stay 3 hours late because of the other person.
  • This one’s optional but…come up with carpool insides jokes and dance moves. Oh, and if you’re stuck in the car for two hours driving home in a snowstorm, its a great idea to call your boss on the bluetooth so you can sing to her voicemail. We think.

Our commute is 14 city miles, which means with literally no traffic (leaving for work at 5:30 am), the best case is a little over 25 minutes. Heading home on a Friday? Over an hour. Which leads to my favorite option…

Ride a bike.

Healthy, scenic, green….and totally fun.

I’m crazy. We should probably start there. I don’t like gyms. I can’t handle the waste of time I feel like working out is. But I’ll walk anywhere. 4 miles? No biggie. Crazier still? I bike to work. For you locals, I live about a mile from Wrigley Field and work about a mile from Midway Airport. The same 14 miles mentioned above.

It’s not close. My old commute was a very doable 3 miles, until I moved and it became four. But when I started this new job, I was sure I couldn’t ride. Too far. And I was heartbroken. Until I realized the only thing stopping me was…me. I started out small, biking one way and getting a ride the other but now I just ride both ways, and I love it. I have a checklist to make sure I don’t forget anything (although I still screw up, most recently leaving my house keys at work on Friday).

Do you ride a bike? Walk? Carpool?

Changes, Decisions & Life in General

In two weeks, my Advanced Placement class takes their Statistics exam.

The ACT was this week.

Oh, and on Sunday, this happened:

Ring

I actually have a few drafts, but now I need to edit them–I don’t have a Boyfriend anymore. In a week, things will calm down a lot, and then the week after that (AP exams), even more.

I haven’t been planning my wedding since I was five. I have no idea what I’m doing. But we are both really excited–here goes nothing!

Earth Month: Go Paperless

earthmonth

This past week was a big one for the Green Team I sponsor at school–our neighborhood finally got recycling (North side of Chicago gets services way before the South side does). At conferences last week, the Green Team had boxes of stuff that people could try sorting correctly for recycling and the parents really liked it. Turnout was low due to the crazy rainstorms but people seemed to enjoy it.

Today’s tip is super easy. Even better than recycling paper is reusing paper (I always write random lists on old envelopes or old assignments). But better still–not creating the paper at all. Are you still receiving paper bills? I’ve switched many of mine to paperless, but I had some holdouts.

Go online and sign up for ebills with email notification. Switching to electronic bills, statements and payments has huge impacts–payitgreen.org says that the average household could reduce greenhouse gas emissions by 171 pounds annually. If that means nothing to you, its like…

  • Not driving 169 miles
  • Not consuming 8.8 gallons of gasoline
  • Planting two trees and allowing them to grow for 10 years
  • Preserving 24 square feet of forest land

And it’s usually pretty easy* to do. Try to do three that are still showing up in paper form this week!

How many paper bills do you still receive?

*not always. ComEd, there is NO WAY this should be so difficult, take so many steps or require to set up a new type of account (I already have an electronic account).

Want to check out the other Earth Month tips?

Makeover Mistakes

As someone who just completed a bathroom renovation (and is considering new floors & counters in the kitchen), an article in Sunday’s Chicago Tribune caught my eye. Instead of the usual “best resale investment” list, they went the opposite way with the worst choices–“Renovations that won’t come close to paying for themselves”. The list was all about what how much of your investment you’ll get back on resale, and while there were several no-surprise, a couple raised my eyebrows.

THE WELL-DUH CAMP:

swimming-pool-300x200

  • Swimming pools: I wouldn’t want to deal with one either–unless everyone else in the neighborhood has one (and buyers are expecting it), don’t expect to make the money back. Boyfriend’s sister and her family just bought a house with a pool, and the purchase was definitely in spite of the pool, not because of it.

charlottes-garden-one1

  • Over-the-top or too personal: Koi pond with water feature? Bathroom bigger than the living room? Basement model-train workshop? Huge garden of native flowers with ornamental shrubs? Great for making you happy…probably not going to mean so much to the person who might buy your house. The one above is gorgeous, but for a non-gardener like myself, it isn’t a selling point.
  • Bright colors: I love my teal hallway, but I understand others might not. And your bright orange kids room? Or the cobalt blue bedroom? Do it for you, but don’t think someone else will automatically love it as much as you do. Other than paint, my personal rule is that anything I install in my home should be pretty neutral. A new owner can change out my bathroom paint without much fuss, but green tile? Stuck with it.

Teal Hall outside bedroom door

  • Amateur Hour: Only DIY if it doesn’t LOOK DIY. Especially if it would be pretty expensive to get someone with actual skill to do it. (Of course, if you can pull it off, go for it.)

But the list contained a few things that I didn’t expect…

THE WAIT….REALLY?! COLLECTION:

  • Granite countertops: I’m considering upgrading my laminate to granite (or maybe quartz) so this was a big surprise, although the article does go on to explain that “it’s a poor investment to top your counter with granite in a Formica neighborhood.” So that’s a little different; I think especially when space is limited (in, say, Chicago condos) homes distinguish themselves with their finishes. A bigger surprise was a real estate agents comment that granite is too trendy–in five years it will “mark a home as being outdated.”

12004843

  • Converted garages: I was surprised that adding extra living space to your house wasn’t considered a plus–but the article explained that many people look for a garage, and converted garages are often not-exactly living space, missing insulation or connection to the HVAC. They even talked about a house flipper who says his biggest profits come from buying homes with converted garages…and changing them back. The image above is from a real estate website article addressing this, and interestingly they all say the best case scenario is that they are a wash, but in most cases they reduce the value of the home.

finished-office-may-2011

  • Home office: My home-stager friend and I were just talking about this, so this one was a big surprise. He told me that you should stage a spare bedroom as an office, because many buyers are looking for that space. My neighbors just sold their condo, and staged the second bedroom as a baby’s room, but buyers with limited imagination may not be as likely to see something used for a different purpose. And on the flip side, if you need room for baby, you’ll figure out that its a better choice than the office. So what was the problem? Built-ins. The picture above is Amanda‘s old office, with tons of amazing cabinets and shelves that her husband built from scratch. It’s pretty awesome. The issue comes in if you want to use the room as a bedroom–built-ins really limit options. So, unless you have plenty of space (they had four other bedrooms, so this was a great choice) use a room as an office but leave it flexible for other purposes too.

Did any of these surprise you? Should I still get granite countertops?

Earth Month: Save Energy

earthmonth

One of the most fun perks from running the Green Team at school is the fun toys. I’ve been to lots of meetings and heard about new and innovative programs to help people save power. Boyfriend actually consults with power companies about keeping information secure in some of the new active power management programs. In our area, ComEd will install a smart meter, which gives you real time electrical pricing and will decrease usage during peak hours.

Smart Meters aren’t for apartments, but a device anyone can use to see their power output is the Kill-a-watt. You just plug it into the wall and then plug your appliance in to the device. It measures how much power you’ve used and tracks how long its been plugged in.

Killawatt

I’ve used it to measure vampire power usage (stuff thats off and plugged in but still draws some power) and how much energy appliances draw while in use, like my space heater. Just that awareness reminds me to unplug–knowledge is power and all that. My other fun toy is a smart strip–one overall outlet, two always-hot outlets and then three more that are controlled by the overall outlet. Pretty cool: If you have the TV in the overall outlet, then speakers and stuff in the others, they’ll turn on once the tv turns on. I’m still deciding where it should go (I  don’t actually watch tv), but it’s a great idea that I’m excited to try out.

Other good ideas to save energy:

  • Don’t leave chargers plugged in
  • Use CFLs (duh)
  • Turn down the temperature on your hot water heater

What’s your best tip to save energy?