One skein projects and misjudgments

I have this chronic problem where I see a skein of yarn I like, and I buy it. But I just buy one. And then I’m stuck wondering what the heck to do with it. I live in the snowy north, so winter gear is always a good option, but I’ve drastically misjudged how far my yarn would go on my last two projects.

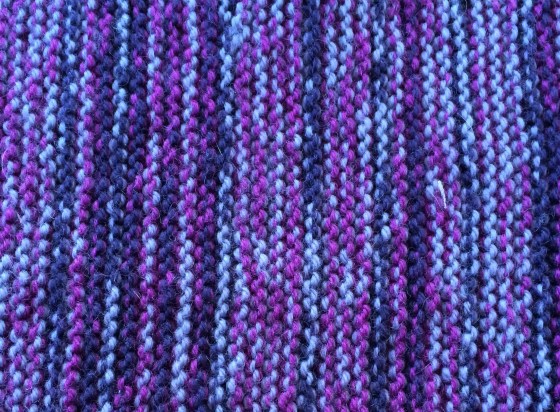
For the first one, I had leftover yarn from this giant stripey cowl I made for my old neighbor.

IMG_0018

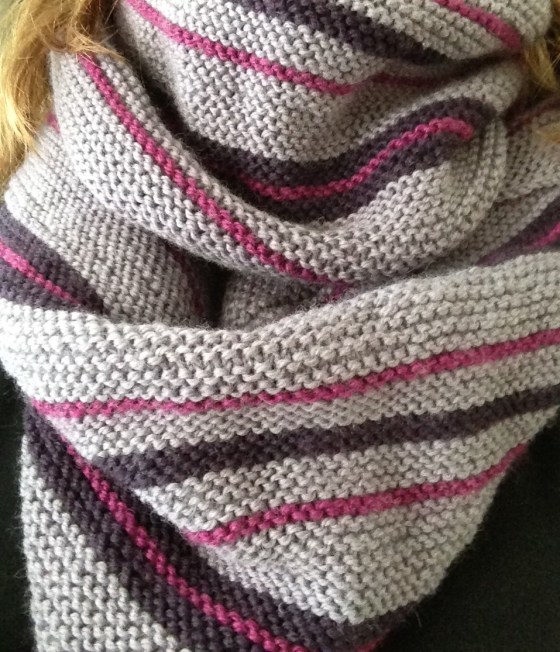
I loved the cosiness of the stockinette stitch for that piece, and set out to make an even thicker scarf from the leftovers (I had about a skein and a half of the lavender, and half a skein each plum and eggplant). I knit the entire piece with two strands together, randomly switching between which two colors were together every few rows. With the thickness of two strands, plus the naturally cushy nature of stockinette, I wound up with a fantastically thick, warm scarf. (Not sure what’s up with the colors in the next two photos — in real life the photo above is the closest to reality.)

flat scarf

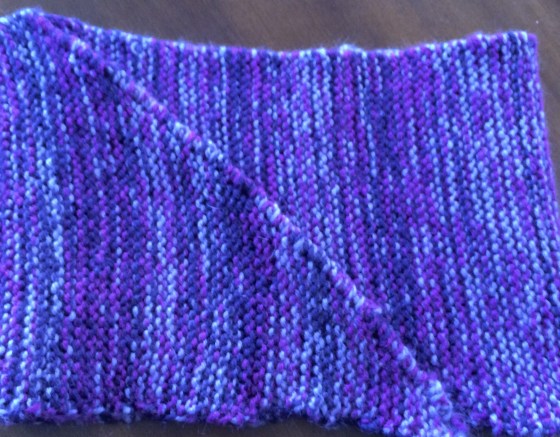
Except I ran out of yarn and it was way, way too short. I’d done very steeply angled ends, so I turned it into a small, sturdy cowl with an “intentional” diagonal seam as a feature.

purple cozy cowl

Not quite what I had initially envisioned, but it’s cute sticking up from a coat, and it’s definitely warm!

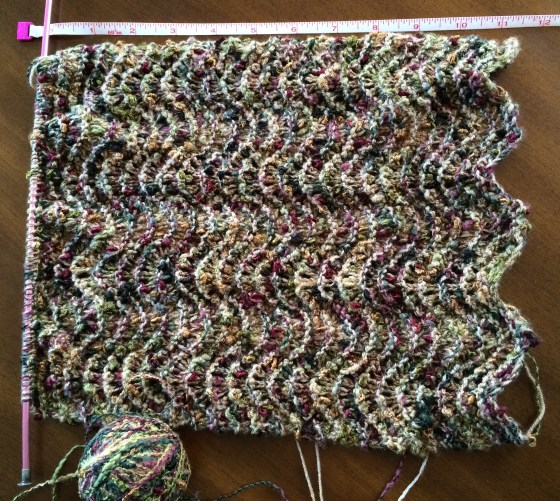
With my current project, I started with small skein of jeweled tone fingerling weight boucle yarn that I bought at a show years and years ago. It was really difficult to knit as a single strand, as the yarn would catch on itself, so I combined it with a second yarn in a neutral color.

wavy scarf

I love the combination, love the wavy pattern, but I’m more than half way through the skein and I’m not going to have the length to do a scarf. So I’m going to have to do is rip it all out (sad!) and either knit again with one less repeat across the pattern, or switch it up and knit in the round, making a cowl with the wavy running horizontally. I’m leaning toward the latter, since it seems a safer way to ensure I get the maximum size. I just need to figure out how the pattern would work in the round.

If you’re a knitter, how do you estimate what you can do with a skein? I have a large skein of a glorious green yarn that I’m scared to start with because I just don’t know how far it will stretch. (I know I could look for a one-skein pattern, but I haven’t found one I like yet!)

Starting again, starting simple

It’s been almost a year since I blogged. I find it hard to believe, but in many ways 2015 was a year that got away from me. Way too much time working, not enough time creating.

I want to make sure that in 2016, I take the time to be creative — and finish all those half done projects that have piled up over the years. After years of working with beads professionally, I have a huge stash, a nice stockpile of gemstones, seed beads, pearls and fibers.

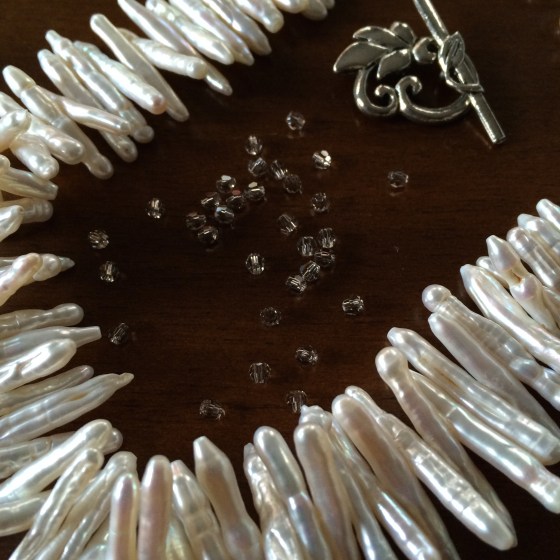
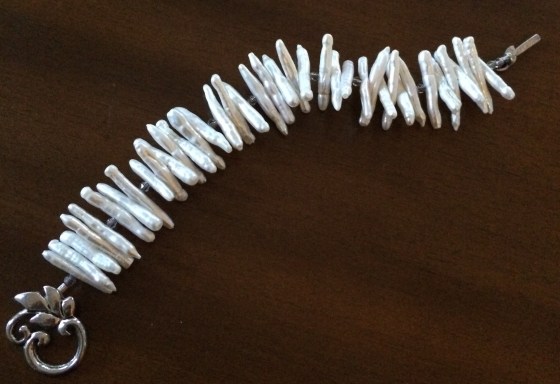
I’m starting out today with something really simple; I found a beautiful strand of stick pearls that I’ve never used, some 3mm light gray crystals, and a leftover clasp.

loose stick pearls

One thing that I love about stick pearls is that that make such a quick and easy cuff with big visual impact. You don’t even need to add other beads or spacers and they look good.

I simply strung irregular groups of stick pearls with crystals on .014 lb beading wire, and used crimps to attach a clasp to each end.

bracelet.jpg

Here’s to hoping 2016 has lots of beautiful small victories.


New Year, New Place, New Projects

What's handmade? That banquette bench and those pillows, that's what!

What’s handmade? That banquette bench and those pillows, that’s what!

Hey there! It’s been a while. How were your holidays? Is the new year shaping up the way you’d hoped so far?

I’m finally starting to feel settled in at the new place — it took forever. You’d think that since I was in the last place for 18 months I wouldn’t have forgotten how stressful moving is, but yep — totally forgot. Little things like misplacing the cam locks and shelf brackets for my bookshelves meant living with stacks of boxes for much longer than anticipated. I still have a box situation in some rooms (I mostly pretend the second bedroom doesn’t exist), but I’ve also managed to do a lot to make this place feel like home.

As I’ve been working on that though, I’ve had time to think about the blog in general, and I’ve decided to refocus some of my efforts here. Namely, to narrow down what I share. See, the thing is, I’m not a decorator or designer. A DIY-er for sure. A cook, definitely. But not a very good interior decorator by any stretch. Plus, I live in apartments and am more concerned with what works for me, for now, instead of what makes a great design. I should leave that area to the experts, because I think the blogosphere is already filled to the brim with amateur home decorators.

So I’m going to turn the focus back to where the blog started — homemade and handmade items and food. I might occasionally show a room or the garden if it’s relevant to a project (for instance, I built a really awesome three-piece banquette for the new kitchen!). But I hope you’ll stick around and enjoy some fun projects with me.

Moving, gardening, beading and more

The last month has been really busy! I did a little editing work for a certain beading magazine I used to work for (kumihimo! soutache! lots of fun techniques I had to master and test!).

My garden had reached that insane time of year when its covered with greenery and requires constant harvesting. I love it, but it’s really incredibly time consuming.

veggies

And, I’m moving! It was kind of a surprise. Just some changes and uncertainty around my building…and I decided I didn’t really want to be a property manager without any type of compensation. And my awesome neighbors decided to move. So I was done. I’m very excited about the new place, but I’m going to be busy packing, moving and unpacking, so the blog will be a little sporadic for the next few weeks.

Enjoy the end of summer!

Simple multistrand: When you don’t want to mess with a good thing

flat multistrand

I picked up a small hank of these simple and earthy mixed seed beads at one of our local bead shops. I loved the texture that the mix of sizes and colors offered, the blend of earth tones with pops of turquoise. But the hank sat around for months because I could figure out what to do. Stitch them? Make a thin simple strung necklace?

Eventually I realized that you don’t mess around with what’s already working: I loved the way these beads looked on the hank because the small strung bundle captured the best features of the mix — the variety of colors and sizes and the texture of them hanging freely together. The hank was just about the right size for a bracelet, so that’s what it became.

Multistrands aren’t quite as simple as they look: You’d think you just need to restring the beads, but you do need to make a few decisions first. What do you want the final length of the bracelet to be? Do you want it loose and dangly or neat and orderly? Should all the strands be exactly the same length, or do you want a bit of variety so they’ll layer and overlap? Should the clasps be unobtrusive or a centerpiece? Do you want the ends to gather or lay somewhat flat?

I went with a slight variation in length in a loose bracelet that was primarily flat with an unobtrusive clasp —basically, I wanted it to look like I’d just wrapped the hank around my wrist. Casual and earthy.

Casual multistrand bracelet

Materials:

  • 1 small hank mixed seed beads
  • 1 multi strand slide clasp (4 strand)
  • size 10 beading needle
  • strong but thin and flexible beading thread, such as Dandyline, silamide or Fireline

Instructions:

  1. Measure your wrist and add 1 1/2 in. (3.1 cm)—this is the length of your bracelet. Double this length and add 6 in. (10 cm) — this is the length of the thread for all your strands. If you are using sharp beads, triple the length of the thread so you can add another pass for security.
  2. Attach a stop bead to your thread and string a few beads. Go through a loop on your clasp and back through the strung beads. Continue stringing until you are 1/4 in. (.5 cm) short of your desired length, and pick up the corresponding loop on the other end of the clasp. Go through a few beads and check the length by clasping the bracelet. Adjust as needed by adding or removing beads.
  3. Continue back through the beads and the opposite clasp loop. If you are working with a shorter thread, tie of the ends using a few half-hitch knots and trim. If you are using the triple-length thread, go all the way back through the beads and the other clasp loop again (so there are two threads on each clasp loop), then secure both ends with half hitch knots and trim.
  4. Repeat steps 2 through 4 working across your clasp one loop at a time, then follow the same steps to add additional rows.

multistrand bracelet sharp fade

Guess who bought a juicer?

…Back in November.

That would be me.

You know I’ve thought about it before (In the CSA days and the garden overflow days) and I finally decided to give it a whirl…oddly at a time when I actually didn’t have an overflow of produce to juice.  So far, I love it.

I’ve tried short juice fasts and I’ve tried adding juice to my regular diet — I personally prefer the short fast approach. If I’m feeling out of sorts or like I’ve over indulged, I’ll just juice for a day or two (usually I also eat little bits of real food too, particularly nuts and seeds), and I feel a lot better. I usually tend to drink a lot more juice than eat food on those days (Juice actually is a lot of calories). I’m usually not hungry, and when I am I start eating again. It’s been great and I’ve felt healthier than I have for a long time. (Hopefully this isn’t TMI, but I’ve found juicing at a certain time of the month really cuts bloating and cramps for me to almost nothing, which alone makes it completely worthwhile for me.)

That said, it’s definitely not for everyone — if you are looking for information on juicers and juicing there are a million out there with a lot more information it than I can give you. Some people definitely experience negative side effects (I haven’t) and it’s not exactly cheap to buy all that produce.

But, given how much I’ve been enjoying it, I thought I’d share a few of my favorite recipes and discuss a complete failure of a recipe. So here we go!

Follow the directions for your juices and make sure you clean all your produce first.

DSC00508


Great green juice:

  • 1 cucumber
  • 2 cups packed spinach
  • 1 lime
  • 3 pears

Ginger Carrot:

  • 6 large carrots
  • 1 inch ginger root
  • 3 apples

Beet Berry:

  • 3 medium beets (peeling decreased bitterness)
  • 1 pint berries (mixed or one variety)
  • 1 small orange
  • handful of carrots

Now, this next one doesn’t look super appetizing (mixes the reds and greens, resulting in an unfortunate brown).

Red leaf juice:

  • 1 bunch chard, beet greens, or other red veined leafy green
  • 1 cup berries
  • 2 apples

Getting back to jewelry

Its been a long time since I posted about jewelry making. It’s not that I haven’t been making anything…I haven’t done much this year, but I’ve done a few things, and a lot of thinking.

Over the next few months, I want to take some time to talk about jewelry design. We’ll do some how-to and tips and general knowledge sharing too, but I think one thing that a lot of jewelry makers struggle with is transitioning from learning how to make jewelry to how to design jewelry.

Frankly, a lot of brilliant jewelry designs are based on serendipity—a designer just playing around with combinations and stitches arrangements until everything falls into place. And I think that a lot of jewelry makers, especially when they are first getting started, are so proud of finishing something that was their own idea that they stop there and don’t think about what next steps could be. That was one part of working for a jewelry making magazine that I really liked: We were always tasked with finding the best way to do something or explain it. The first try is rarely right, but once you know the principles and basics those pieces click into place much more quickly.

2014 Garden: Ta-da!

So, if you are wondering where I’ve been…well the answer is Chicago, Michigan, Colorado and Chicago again. Partially vacation, but also for a specific big event that happened for a certain blogger (hints: Not me, blogs on this blog, name sounds like the event). But I’ve also been in the backyard. A lot. Basically, every minute I haven’t been traveling.

And here’s how things are looking now:

Original garden box, with tomato and pepper seedlings, herbs, lettuce and violas. Tomato and pepper pots along the garage. And a happy dog in a her favorite sunny spot

Original garden box, with tomato and pepper seedlings, herbs, lettuce and violas. Tomato and pepper pots along the garage. And a happy dog in a her favorite sunny spot.


New garden beds, with mulch surrounding them, and a row of vining melons and squashes along the side.

New garden beds, with mulch surrounding them, and a row of vining melons and squashes along the side. You can see where we’re already having squirrel problems in the front.

And, as a bonus, I tackled the front of the house too, filling the numerous flower boxes and pulling out weeds. We had so many weeds and vines (including poison ivy and belladonna, which is poisonous) I had to call a service to come do a pick up. And beg my landlord to take the cost off my rent.

porch flowers

So, now that the vast amounts of physical labor are done (seriously: building the boxes, making all the trips to get dirt, mulch and plants in my little car, lining everything with paper and filling with dirt and mulch, planting, weeding, weeding and more weeding — It took for ever. Probably about 60 hours between my time and the upstairs tenant’s), I’ll hopefully be back to blogging with less emphasis on gardening, and more of what this blog was supposed to be about — Homemade food and crafts!

Garden Lesson 2: It’s like National Geographic out there

Last spring, in early June, we got new neighbors.

Our new neighbors

Our new neighbors

A bunny decided to have her babies in our herb garden, right under the parsley. It wasn’t really an ideal site for a bunny family: The herbs and lettuce hadn’t really grown in yet, so the nest seemed very exposed to us. Not to mention the fact that Bronwen-the-dog is out there all the time. And my neighbors’ cat, who is a known threat to wildlife (we’ll just refer to the proof as the Chipmunk Massacre of 2011 and leave it at that).

We called the Humane Society and they told us just to leave it, unless there was immediate danger. Young bunnies need their mom, she wouldn’t forget them and nature would take its course.

So we left them. And about four weeks later, they’d gone from being slimy little gray things to pretty cute fluffy babies.

Cute sleepy baby bunnies.

Cute sleepy baby bunnies.

I don’t think Bron ever realized they were there. Or if she did, she didn’t care. I kept a close eye on her those three weeks (which was a bit of a pain, actually), but she never touched them. At one point, we think the count went down from six bunnies to five, but it’s hard to count when they were always in a snuggly pile.  And, despite the fact that they were living in the garden, they didn’t eat anything, which was pretty nice. All-in-all, the upstairs neighbors and I were really enjoying watching them grow.

Then one night, at about 2 am, tragedy struck our happy little bunny family. I was woken up by a horrible repetitive keening noise and heard my upstairs neighbors (who were still up for some reason), run downstairs and into the backyard. And my neighbor (who was 8 months pregnant at the time) started shouting at the neighbor behind us to keep his cat out of our yard and then started crying. It turns out that the horrible noise that had woken me up was Momma Bunny screaming because that dang cat had raided the nest. (Now, I’m just going to note that I like cats in general, and I get that there’s a natural instinct at play, but I liked the bunnies and I hate that specific cat. I also hate that the cat is allowed by its owner to come into our yard and kill things. It’s really gross, and also, not safe for the cat.)

Now, my very pregnant neighbor was probably more upset by this than she normally would have been, due to hormones. She was extremely distraught. But it was really sad to come outside in my pjs and see that the nest was completely empty. We weren’t sure if they’d run for it, or if the cat had somehow carried them all away. We all had flashlights, and I scanned the grass and spotted one. We decided that this situation was an immediate threat, so we picked up the baby and put it in a shoe box. Then we spent the next two hours, in the middle of the night, out in the backyard with flashlights, looking for the other four bunnies. (Again, upset neighbor a huge factor here. I’m not sure I would have searched for survivors so long if she hadn’t been there.) Eventually, we found three.

Bunnie rescue box

Bunny rescue box

We also found a possum (which is a freaky thing to catch in your flashlight beam), saw a raccoon cross the alley and had a close (but not too close) encounter with a baby skunk. Apparently our yard is a wildlife hangout.

The neighbors took the bunnies to the Humane Society the next morning, where they were deemed really healthy and actually very big for their age and ready to be separated from their mom. They told them to put them back in the nest, and that their mom would either come back for them or they’d make their own way. The fact that they’d scattered when attacked showed they already knew their best defense mechanism.

When I came home from work that day, I could see them hanging out in the yard.

Home again

Home again

And that was the last time I saw them. I went out for the evening, and my upstairs neighbor looked out her window at dusk and saw that the momma had come back. She told me they were playing around, jumping in and out of the raised bed and chasing each other, and then they all ran off into the sunset.

As fun as it was to watch the babies grow, it was also a little bit stressful. I had to watch my dog every second she was in the yard (which is fenced, so she normally doesn’t need super attentive watching like that). I wondered whether all those herbs I’d just bought and planted would survive. And I worried that I’d come out and find a dead bunny on the walkway (which would be both sad and gross). So this year, I’m looking into ways I can prevent animals from calling the garden home. I’ve considered fences and possibly those scary owl things. Or maybe a bird mobile?

Now, if only I could figure out a way to keep that cat out of the yard.

Planning my 2014 Garden

This week is our Spring Garbage Pickup in my neighborhood (we have weekly pickup, of course, but this is the big week for yard waste and large items that don’t fit in the bins), so I’ve been busy cleaning out the alley (which was disgusting), raking up the leaves, acorns and twigs that littered the yard, and trying to eliminate the weeds that have already taken over last year’s garden patch.

My giant garden and all it's weeds

Last year’s garden, overrun with squash and weeds

This year's blank slate

This year’s blank slate

I’ve decided to add some raised beds this year to help keep the weeds at bay and keep my veggies from overrunning each other (last year the squash gave all the other veggies too much competition for sunlight). I’m also doing a bit of rearranging, now that I have a better understanding of the sunlight in each part of the yard.

The sunniest patch of the yard is actually the strip right alongside the garage and where the existing 4 x 8 foot raised bed sits. Last year, I filled this box with herbs and lettuce, but as lettuce can do with a little less sun, I’ve decided to promote the most sun-loving veggies to this part of the yard. My tomatoes did pretty well in a shadier part of the yard last year, but they were much slower than everyone else’s, so they are getting a little promotion. My cucumbers and peppers did pretty poorly, so we’re going to try out a sunnier spot for them too.

I’ve decided to try out a square-foot gardening approach this year, so here’s the plan for the first box:

Mint

Cucumber

Cucumber

Cucumber

Thyme

Basil

Tomato

(Cherry seedlings)

Tomato
(Heirloom seedlings)

Basil

Basil

Basil

Oregano

Hot pepper

Pepper seeds

Hot pepper

Chive

Then along the sunnier side of last year’s vegetable patch, I’m putting in three 4 x 6 ft boxes (the size was determined by the length of board that can fit in my tiny car).

Pole Beans

Arugula

Kale

Broccoli

Kale

Arugula

Parsley

Beets

Parsley


Peas

Spinach

Potato

Sweet potato

Parsnip

Chard

Lavender

Carrots

Sage


Cilantro

Brussels sprouts

Brussels sprouts

Dill

Fairy Eggplant

Eggplant

Onion

Red onion

Celery

Lettuce

Celery


Then, on the other side of veggie patch, I’m going to plan the vining vegetables and fruits — melon, zucchini, acorn squash, pumpkin and butternut. Last year the squash thrived on this side of the yard, while it wasn’t quite enough sun for the other vegetables. Plus, this way, the vines can go crazy without the risk of suffocating the eggplant or celery like last year.

I’m also planning to use some freestanding pots along the side of the garage, for additional tomato plants and possibly peppers. And rosemary — I regret not planting last year’s rosemary in a pot I could bring inside.

How do you decide what to plant where? Any plants that need maximum sun that I missed?

Mint

Cucumber

Cucumber

Cucumber

Thyme

Basil

Tomato

(Cherry seedlings)

Tomato
(Heirloom seedlings)

Basil

Basil

Basil

Oregano

Hot pepper

Pepper seeds

Hot pepper

Chive